
Inexpensive DIY Raised Garden Bed
It’s easier than you think to build your own DIY Raised Garden Bed. And you can do it for very little money too!
Do you love fresh fruits and veggies? I do too! This raised garden bed is a great way to grow what you love at a much lower cost than going to a farm market.
I have a local market that I go to and last summer I bought everything I needed for salsa and the cost was a lot for it all. It came to about $6 a jar for the salsa which is so much higher than buying some at the grocery store.
I need to be able to can my own salsa because of an onion intolerance I developed so I decided to plant my own. Now I can have all the veggies I need for a much lower cost.
DIY Raised Garden Bed
The steps are really easy to build a raised garden bed. I used the same technique for this project that I did for my front porch planters!
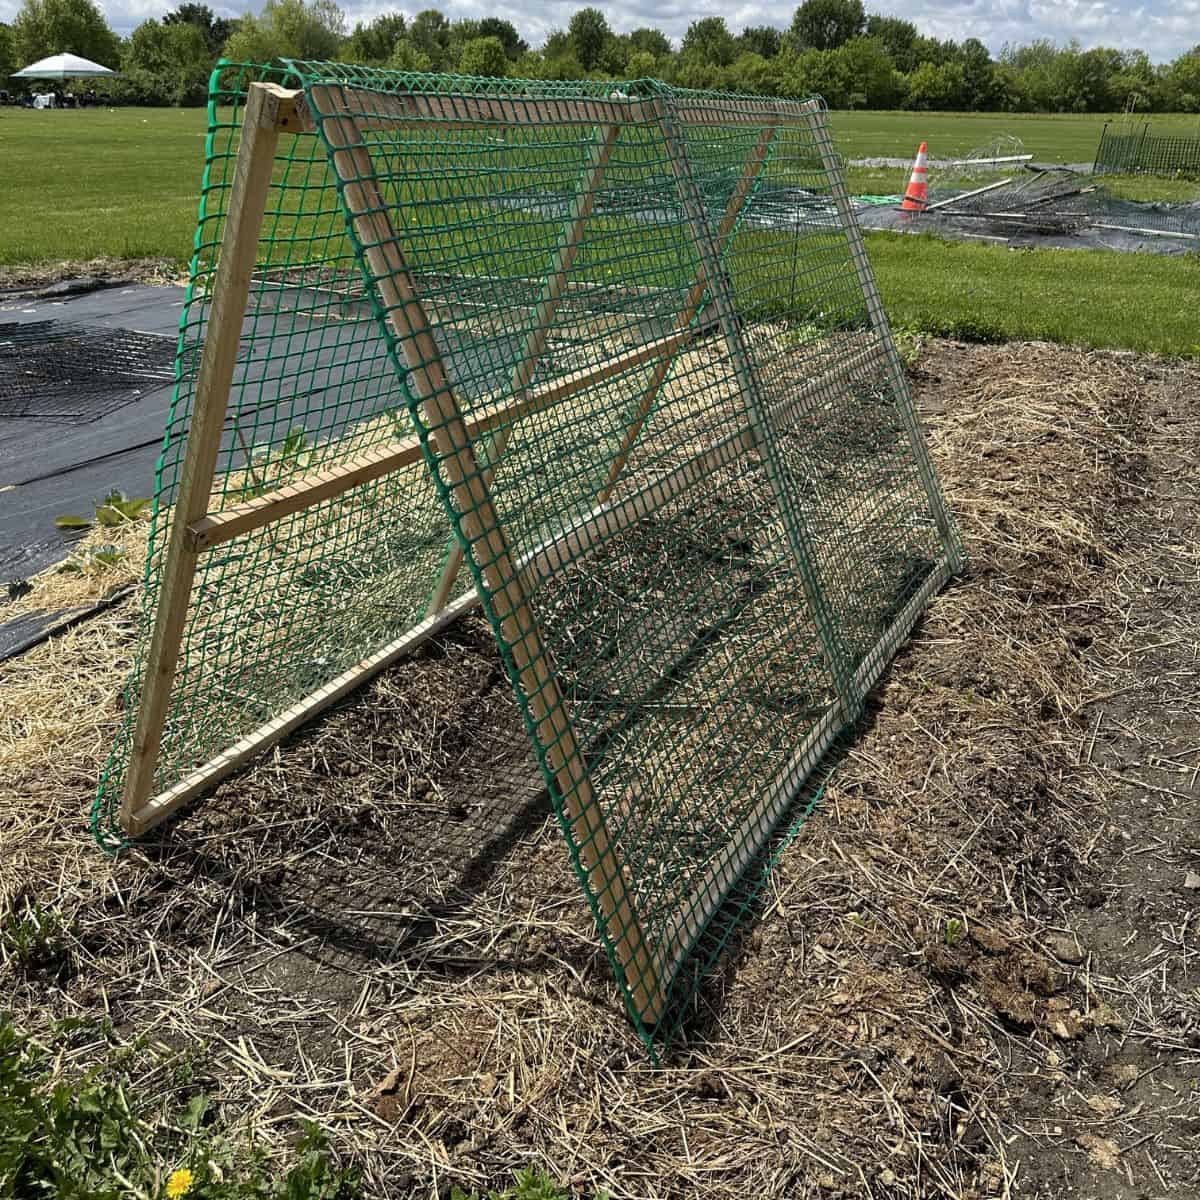
Step 1 – find and cut your wood
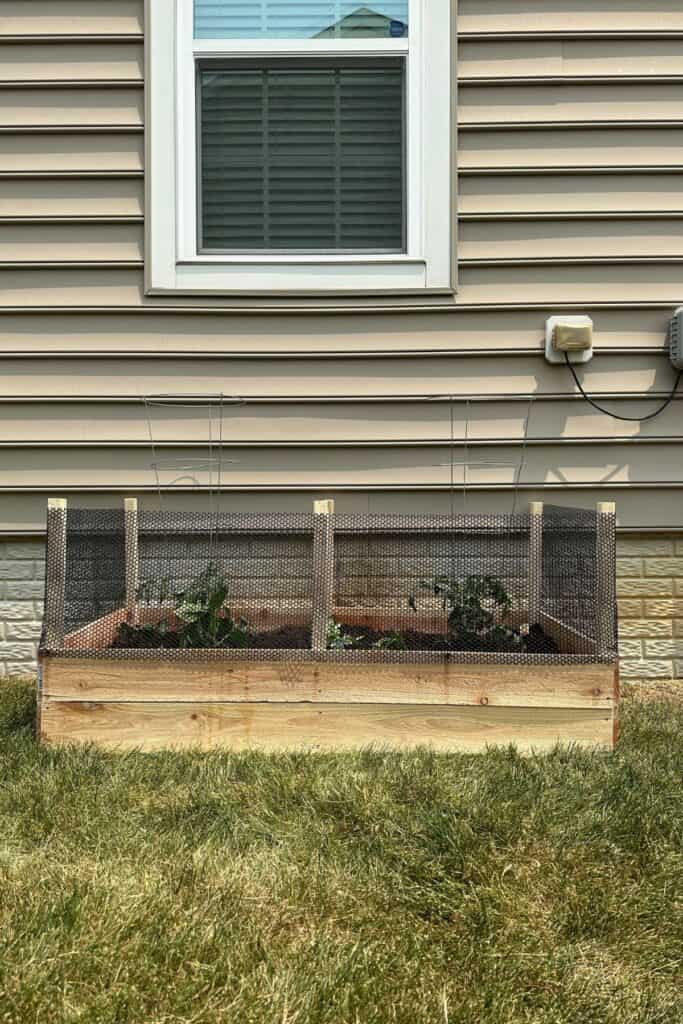
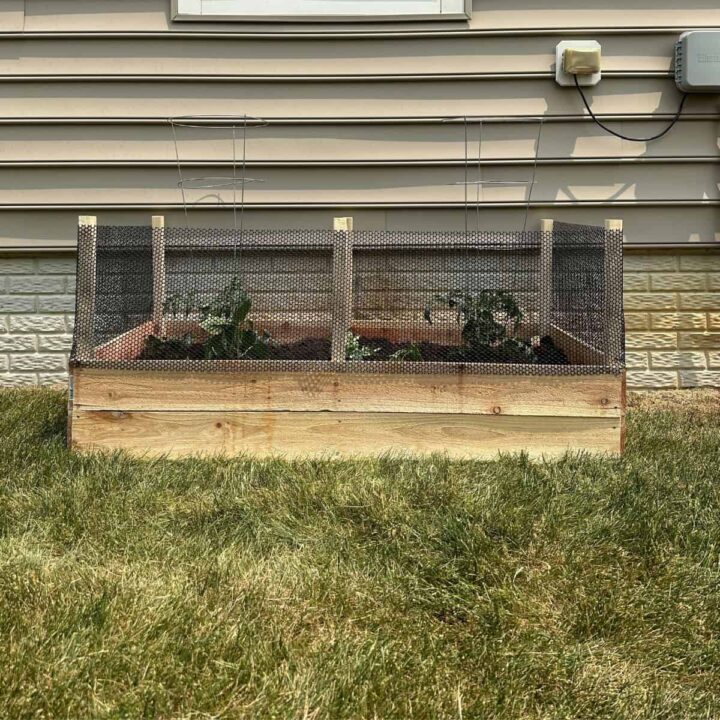
I used cedar fence posts and 2×2’s to build my raised garden. You do not want to use anything that has been pressure treated because they have chemicals in them and those chemicals will seep into your food. So stay away from pressure treated.
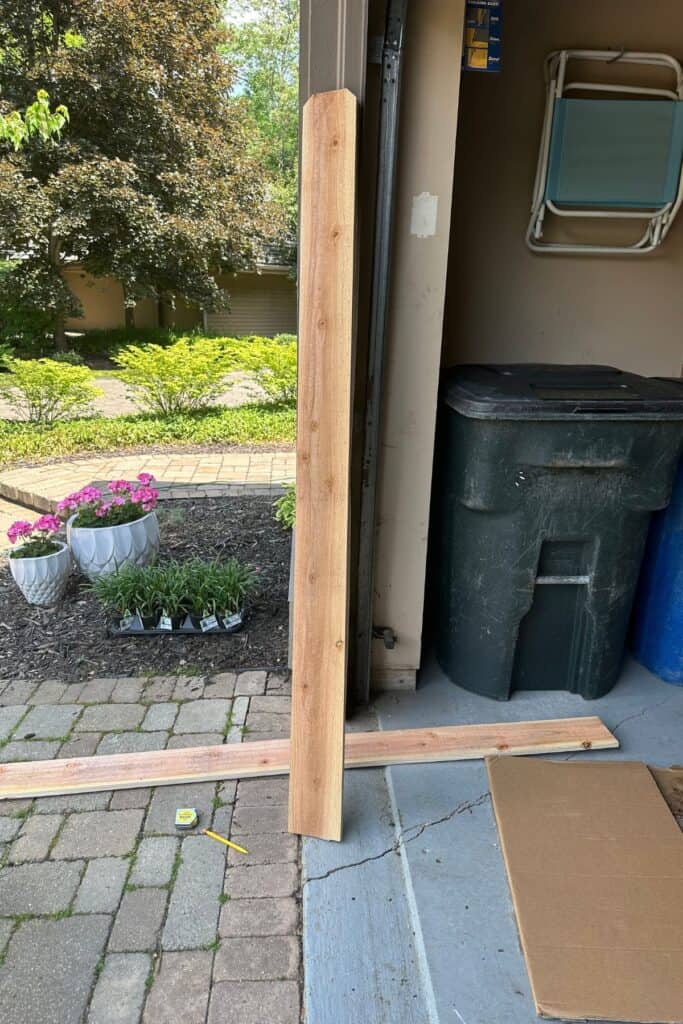
I cut the long pieces for the front and back to 5 feet and the side pieces to 2 1/2 feet.

My 2×2’s I cut two 2 foot pieces. They will stand taller than the cedar pieces but that is so I can attach some netting to keep animals from getting into the garden and eating all my veggies.

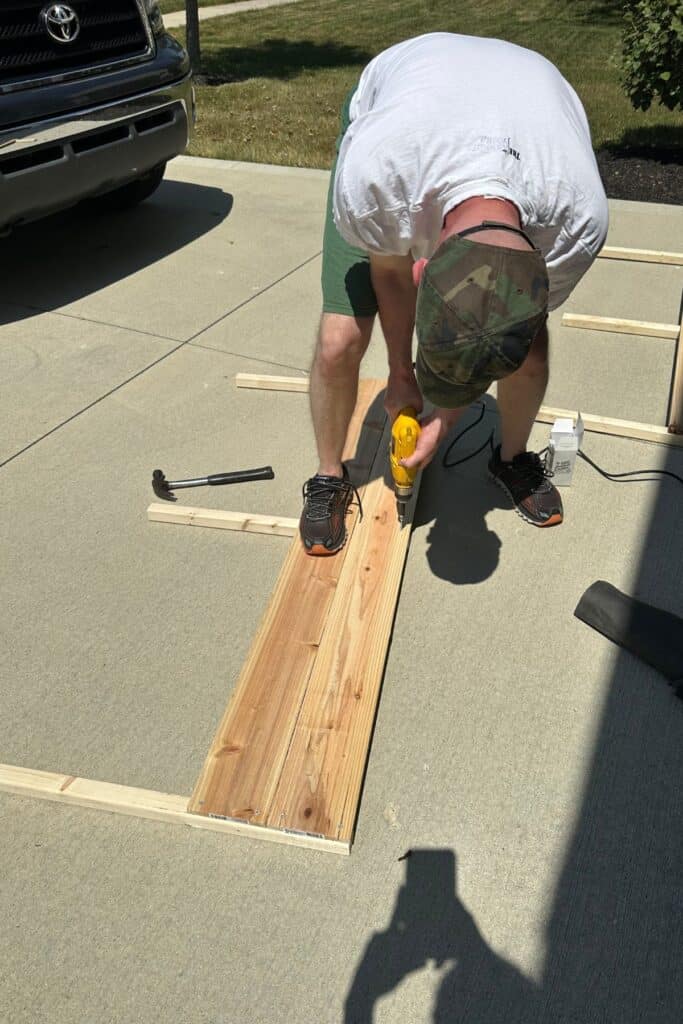
Step 2 – Screw everything together.
My husband screwed everything together with 2 1/2 in deck screws which are galvanized so they won’t rust being out in the elements.
Simply screw the fence posts to the 2×2’s. We did the long sides first then stood the sides up and he screwed the short sides. I don’t have pictures of this part because I had to hold everything in place so it did shift. You definitely need at least two sets of hands for this part.
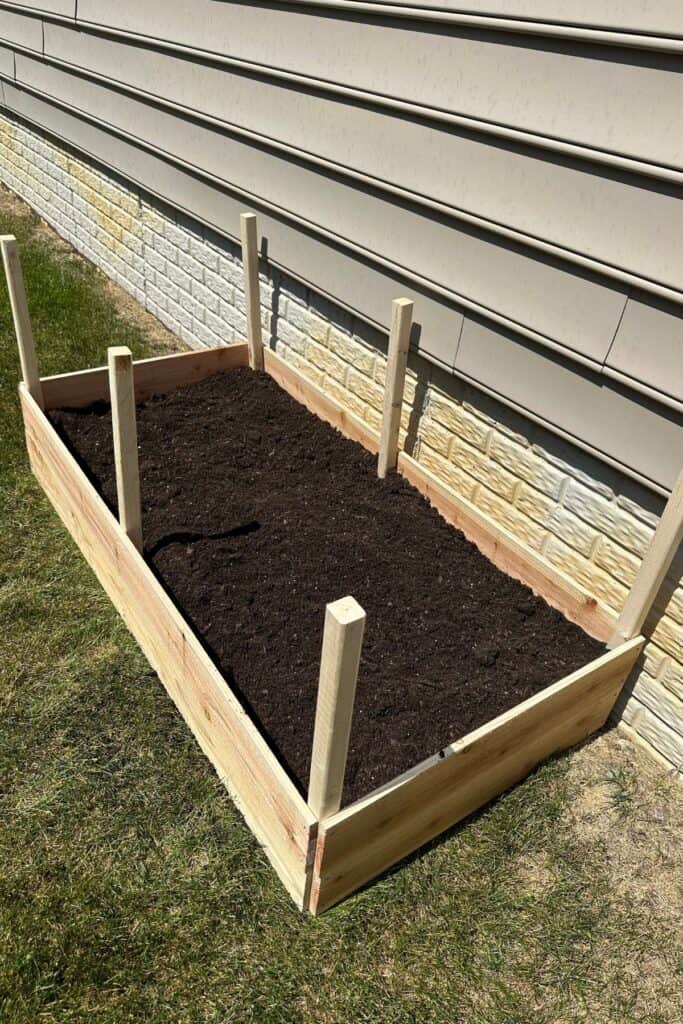
Step 3 – put your garden bed in place and fill with dirt
Choose your spot for your raised garden bed carefully so that the plants will get the right amount of sunlight. I had to place mine at my Mom’s house because my house has too much shade.
We put the bed on the side of the house where the sprinklers will hit the veggies.
Would you like to save this?
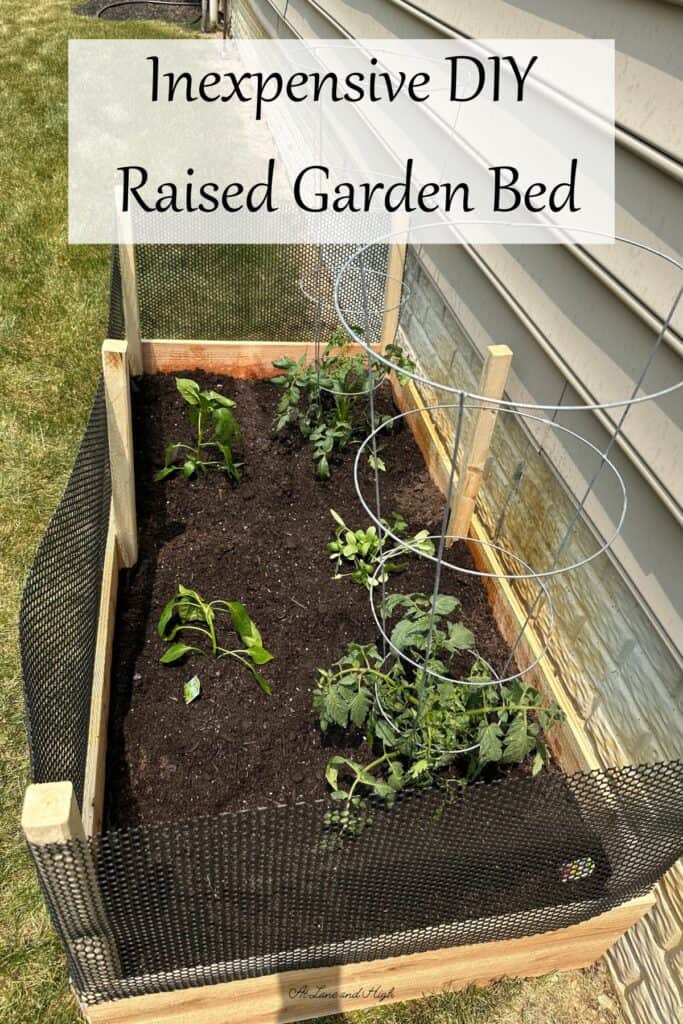
I also laid some landscape fabric at the bottom and stapled it to the cedar so the grass underneath won’t grow up through my dirt.

Fill the bed with dirt. I used an organic soil from Home Depot. For my 2.5 by 5 foot garden bed we put in about 6 bags.


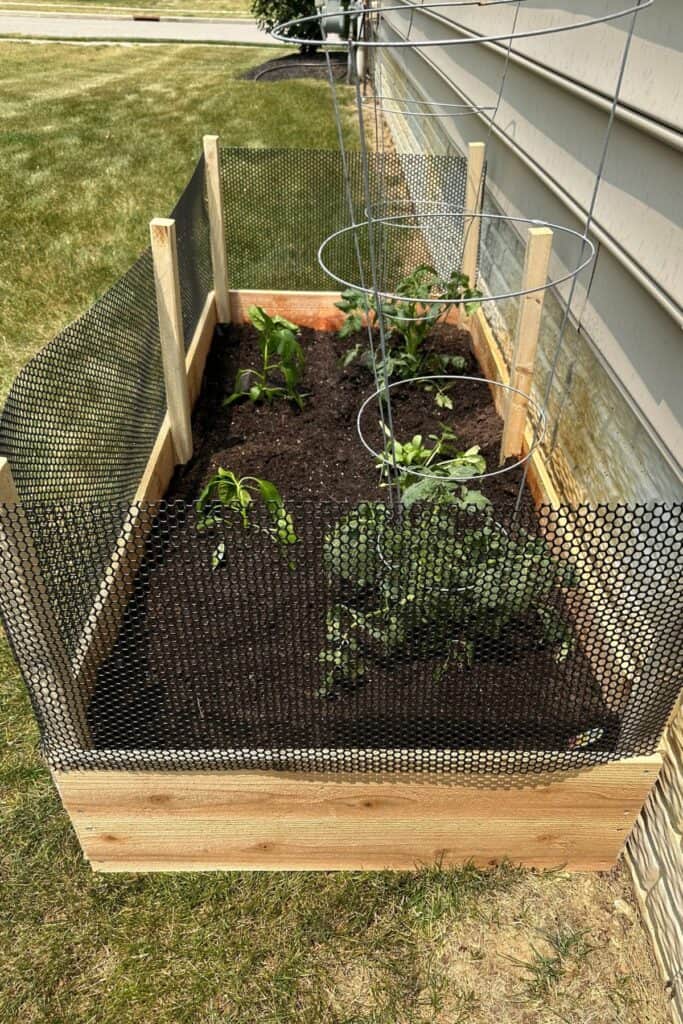
Step 4 – Add netting and plants
Now I picked out this netting from Amazon. It is a bit stiff but still pliable. I stapled it to the 2×2’s and the top part of the cedar boards.
Next, just add whatever plants you want in your garden! It’s that easy. Honestly, this whole project only took about 2 hours from start to finish. I am so excited to have fresh veggies all summer and be able to make salsa!
Other gardening posts you might like:
- The Best Deer Resistant Plants and Flowers
- Shade Plants and Flowers That Will Look Amazing in Your Garden
- Simple and Cheap Front Yard Landscaping Ideas

Inexpensive DIY Raised Garden Bed
Learn how to build a raised garden bed for very little money!
Materials
Instructions
- Cut 4 of your cedar fence boards down to 5 feet long. Cut 2 of the cedar boards into 2 1/2 foot long pieces. You should have 4 boards at 5 feet and 4 boards at 2 1/2 feet.
- Cut your 2x2's to 2 feet long pieces. You need 6 in total.
- Screw your long fence boards to 3 of the 2x2's. Once you have the long sides done stand it up and while someone holds the wood screw the short sides to the 2x2's.
- Now you have a box. Place your box where you want to have your raised garden bed.
- Staple landscape fabric to the interior sides of the wood to prevent grass and weeks from coming up through your dirt.
- Fill the inside with your choice of soil. I chose to go with an organic soil.
- Staple the netting around the outside of the 2x2's making sure to staple the bottom of the netting to the top of the cedar boards.
- Plant your chosen veggies!
Notes
The netting I used was the perfect length to go around the front and sides of my garden bed. Since it was up against the house I didn't need to put it in the back. If you are not against the house you might need two of these to cover the whole bed.

As a licensed Real Estate Agent and an avid home decorator, I strive to give my clients the very best I can when it comes to staging, selling, and decorating their homes. I have lots of experience with paint color choices and love to DIY my home so I can have everything just the way I want it. I share my ideas and projects with the world in the hopes that I can help others have their homes just the way they want as well.


If the netting is stapled in this fashion, how do you access the garden bed to weed, trim, and harvest? Are you unstapling and restapling each time you need to tend the garden?
Hi Dawn. Since the raised bed sits on the ground overall it’s only about 2 feet high so it’s really easy to reach over it and do whatever I need to do. Thanks