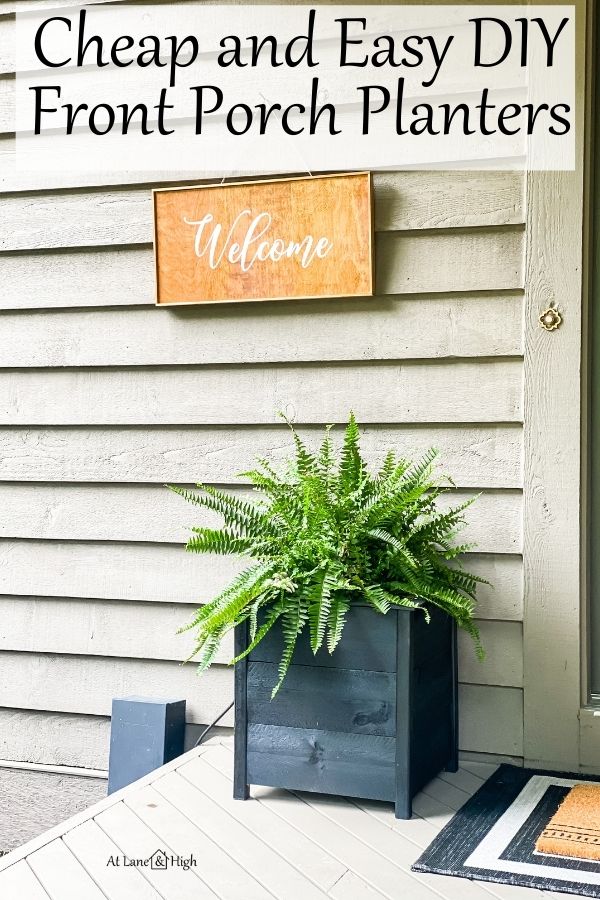
Cheap and Easy DIY Planters for your Front Porch
An easy way to spruce up your front porch is with planters. Today I am sharing how I built these DIY planters for my front porch. They were super easy to build and adds so much character to my space.
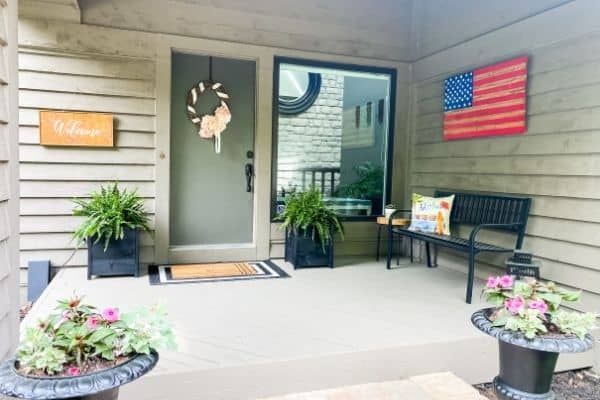
The cost of wood right now is insane because of the pandemic. So I have been getting creative with my builds. I was able to buy wood for this project and build these planters for less than $15! That’s right, super cheap and they were so easy to make.
*This post contains affiliate links. For more details see my full disclosure.
DIY Planters for your Front Porch
The way I was able to keep this build cheap was in choosing the right wood. By using fence boards that were pressure treated I was able to get the right wood for outdoors while not breaking the bank.
This is a great project that is totally customizable. I will give you all the info on mine and if you want yours to be taller or wider you can make the adjustments.
Materials
- 3 Pressure Treated Fence boards in 6-foot length. You can also choose cedar fence boards, they cost about a dollar more than the pressure-treated ones.
- 3 wood balusters in 42-inch length
- 1 1/2 inch Kreg jig screws
- 1 1/2 inch nails
- pressure treated lathe – optional
- spray paint – color of your choice
Tools
- Miter saw – or a hand saw
- Kreg jig – this is the one I have and I use it ALL the time! One of my favorite tools!
- nail gun – I bought this a couple years ago and I absolutely love it! I use it all the time.
How to build planters for your front porch.
I wanted to keep my planters below the front window on my porch and that came to less than 18 inches. I also wanted it to be slightly elevated off the porch.
The fence boards are 5 1/2 inches wide so if I use 3 of them that comes to 16 1/2 inches and if I elevate an inch and a half that brings it to the 18 inches I wanted.
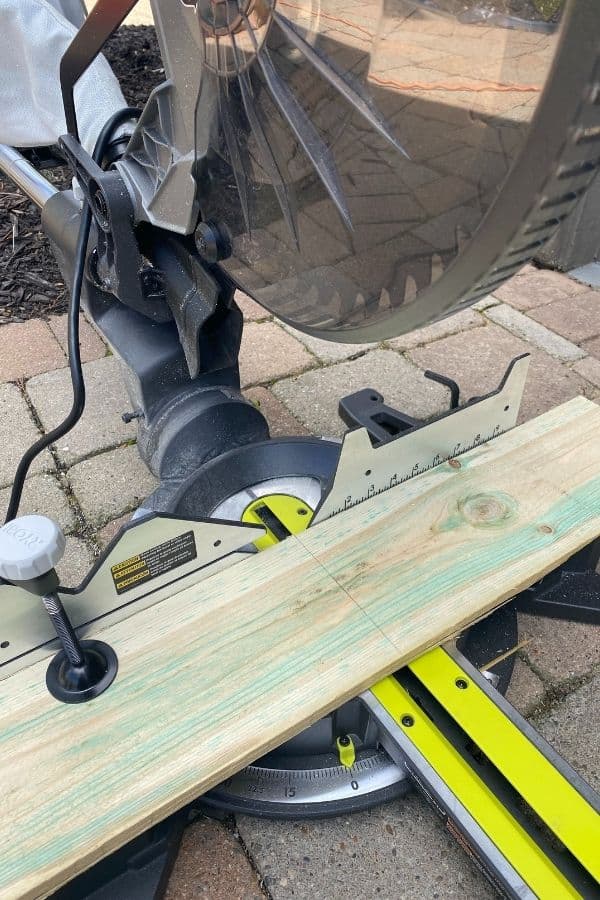
Since the planter is 16 1/2 inches tall I made them 16 1/2 inches wide. The balusters are 1 1/4 inch wide so with one on each end of the board I needed my boards to be 14 inches long.
I sat down and made all my cuts at once. Keep in mind when looking at the photos, I made two matching planters to flank my front door so I had twice the wood to cut.
The fence boards are cut to 14 inches and the balusters are cut to 18 inches.

Now it’s time to use the Kreg Jig to drill the pilot holes in the fence boards where you will be attaching them to the balusters.
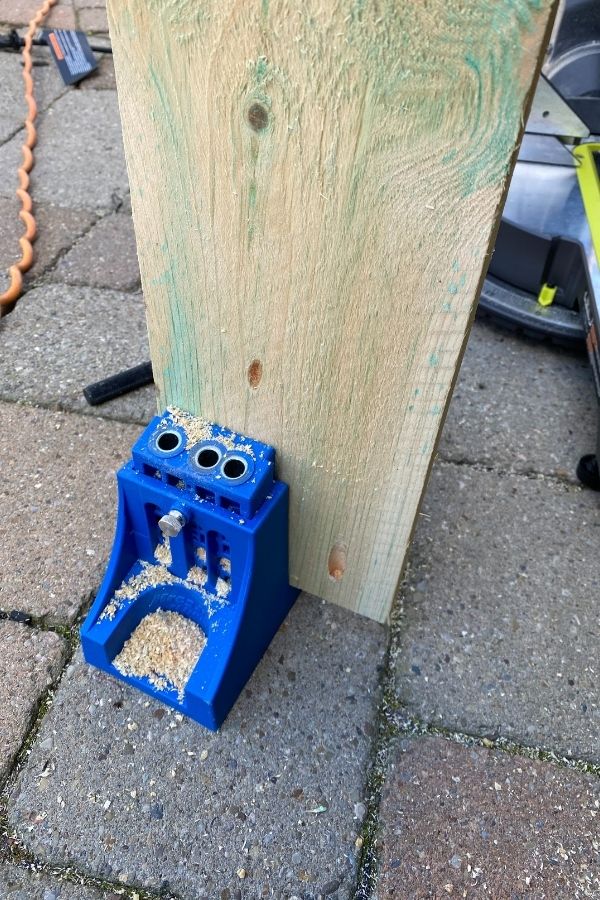
I started with the very top board and make it even with the end of the baluster. I screwed the boards into the center of the baluster.
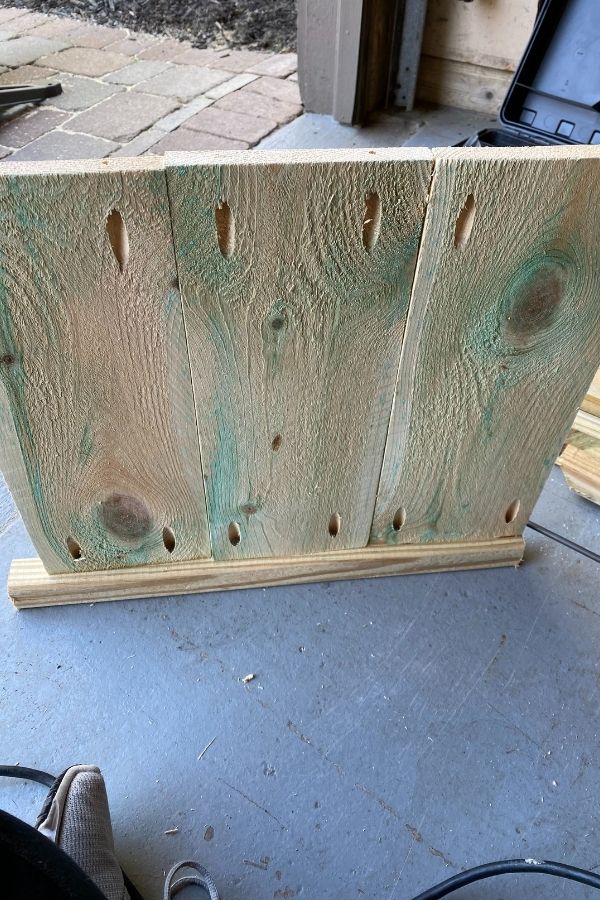
Do one end then flip it over and do the other side. Repeat for the opposite side and you will end up with what I have here in this photo.
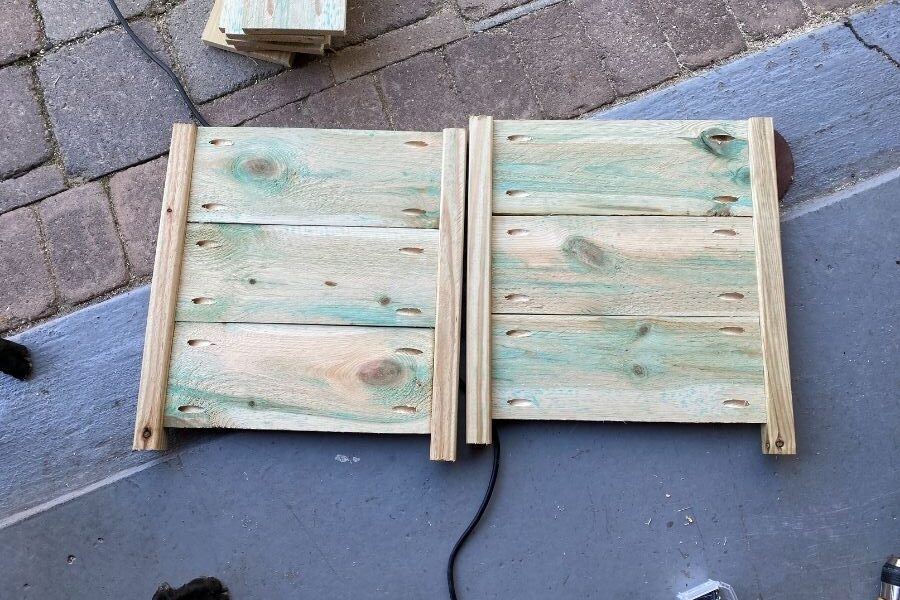
Once you have these two sides done you can begin attaching the other sides to the balusters. Keep going until all sides are done.
Would you like to save this?
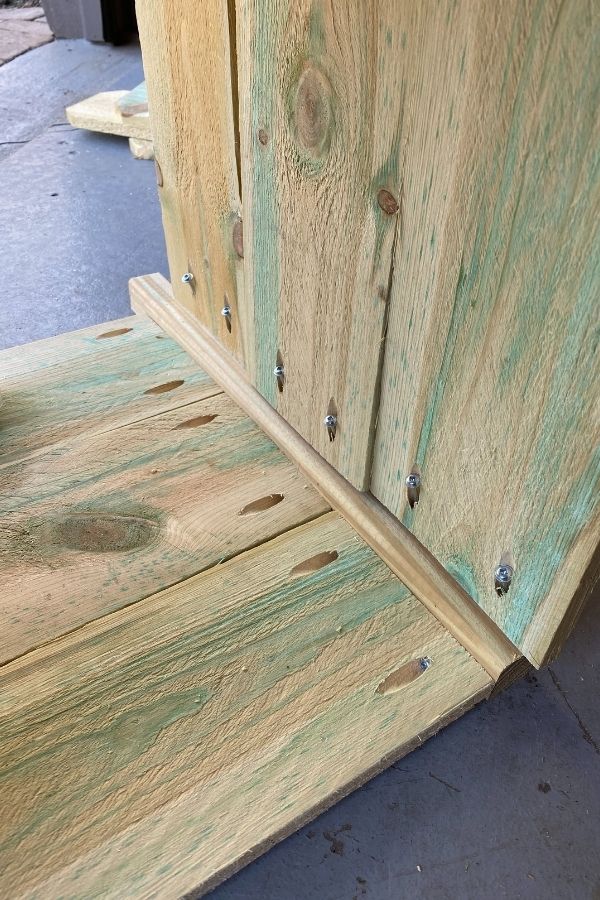
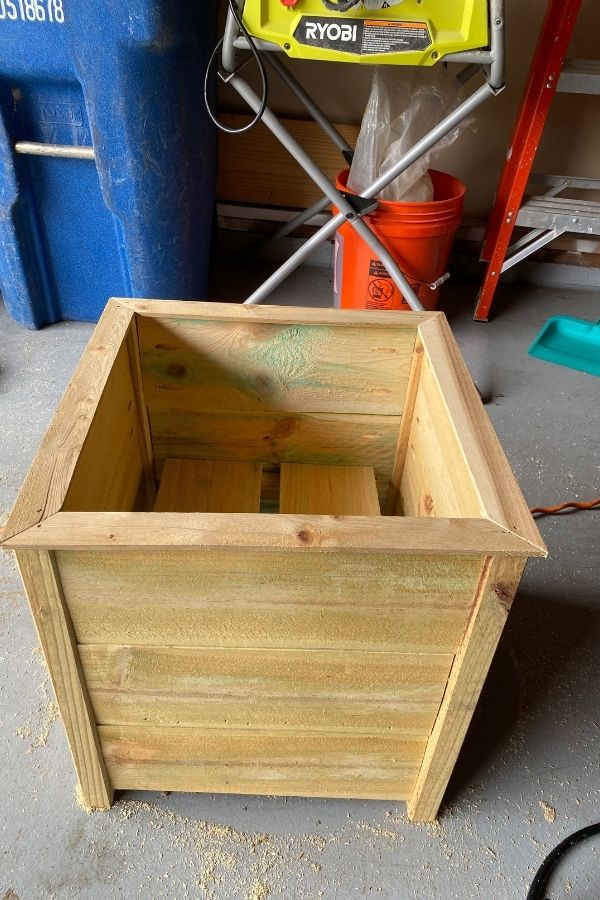
How to add the platform in the inside.
Using the third baluster cut it to fit inside the planter. Using the nail gun attach at the height of your choice on the inside.
With the rest of the leftover fence boards nail them to the balusters you just attached on the inside. You can put a pot on this or you can take landscape fabric and staple it to the inside and plant your flowers directly inside. This is totally up to you.

The finishing touch.
To add a little finishing details I used pressure treated lathe that you can purchase by the linear foot at the hardware store. I cut it with my miter saw and nailed to the top for a more finished look.
When I have plants in the planters you can’t really see it but since I live in the mid-west and we have long winters, I wanted the planters to have that finished look even when they were empty.
All that needs done now is painting! I used this black spray paint for mine. I actually gave my urns a coat of paint as well so it all blends in nicely.
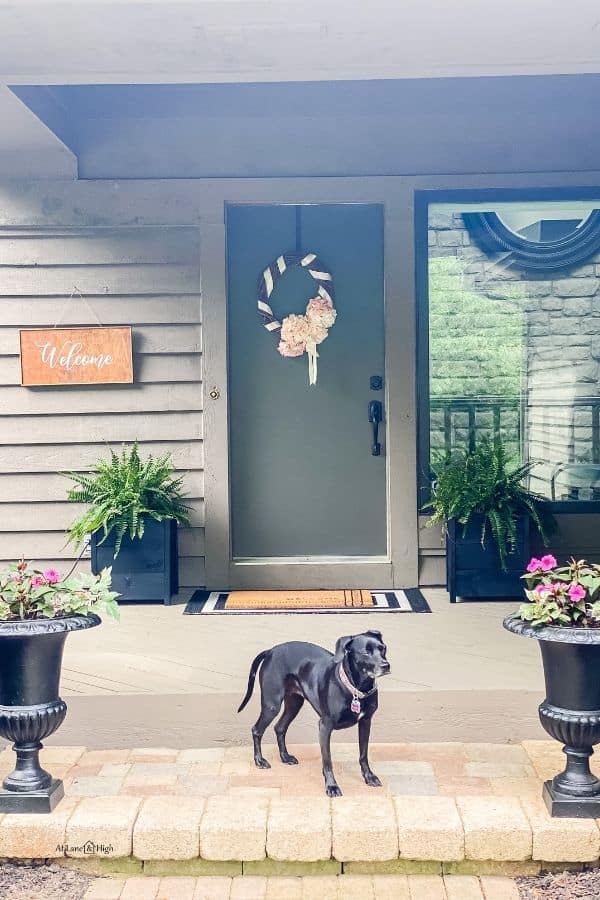
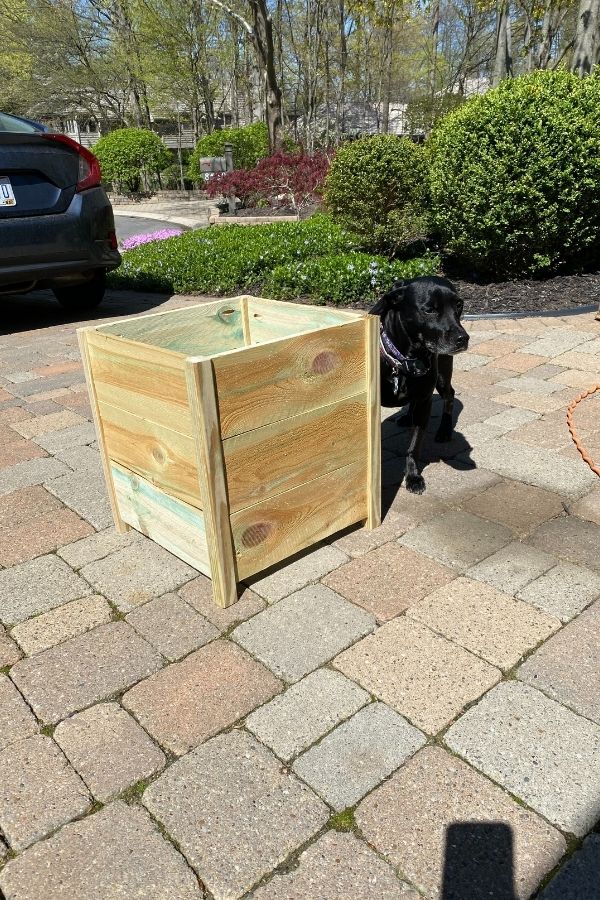
Clearly Lilly loves the front porch too!

How big should front porch planters be?
This is completely up to you. I have seen tall from porch planters as well as rectangular ones. These are great options for adding some privacy if you need to.
What plants are good for the front porch?
The answer to this question depends a lot on what kind of sunlight your porch gets. There are a ton of sun or shade plants/flowers that will work.
I have a covered front porch so I opted with two large ferns in mine.
If you want to go with annual flowers the best thing to do is go with a thriller, filler, and a spiller. What does that mean? The thriller is a taller plant, the filler is something that mounds and fills the space, the spiller should be something that will trail over the egde.
I am not a great gardener but I love using Creeping Jenny or Sweat Potato vines as my spillers. I also really like using vibrant colors in my plantings because the houses in our area are built to blend in with nature. So it can get pretty boring. The bright flowers really pops agains that natural backdrop.
What is the best material for planters?
For planters outdoors you really want to use either pressure-treated wood or cedar. Pressure-treated wood is slightly less expensive than Cedar but both are great choices for outside builds.
Cedar is a wood that doesn’t rot as quickly as other woods. It is used in home building for that very reason.
Pressure-treated wood is wood that has been soaked in a chemical solution which makes the wood stronger so it doesn’t rot as quickly. The only drawback to using pressure-treated wood is when you build with it you need to give it about a month to dry out before applying stain or paint.
Other outside build posts:
- DIY Outdoor Wall Art
- DIY Table Top
- A DIY Wooden American Flag
- 48 Cheap and Easy DIY Outdoor Furniture Ideas
- Amazing DIY Outdoor Accent Wall Ideas
- Modern Horizontal Fence Ideas for Your Yard
- Simple and Cheap Front Yard Landscaping Ideas

I hope you love these planters for my front porch as much as I do! It was such an easy build and makes a huge difference to my home’s curb appeal!
Don’t forget to grab your free plans so you too can create plants for your outdoor space!


As a licensed Real Estate Agent and an avid home decorator, I strive to give my clients the very best I can when it comes to staging, selling, and decorating their homes. I have lots of experience with paint color choices and love to DIY my home so I can have everything just the way I want it. I share my ideas and projects with the world in the hopes that I can help others have their homes just the way they want as well.