
DIY Outdoor Wall Art For Under $20
This week I created some DIY Outdoor Wall Art for my patio and I was able to do it for less than $20! You can’t beat the price tag on this outdoor wall decor.
If you have been following along then you know that this month is the $100 Room Challenge. It’s a challenge created by Erin at Lemons, Lavender, and Laundry. The main idea is to recreate a room in your home for under $100 and in less than one month. This September I am redoing my patio, a very underused space in my home.
If you want to check out the other weeks you can click on the week and be taken directly to that post.
Week 1 – Week 2 – Week 3 – Week 4 (this post) – Week 5 (the reveal)
*This post contains affiliate links. For more details see my full disclosure.
Outdoor Wall Art
The goal here is to create something pretty for this large wall space next to where my patio table sits. I scoured Pinterest and found some great inspiration. Of course, I decided to DIY it because it is the $100 Room Challenge!
I had heard that the cost of wood was rising, due to the craziness going on in the world right now. I hadn’t heard of any shortages as we have seen at the grocery store. (For the life of me I cannot find shower cleaner! UGH!) This week though when I went to Home Depot I couldn’t find all the specific pieces of wood I was going for.
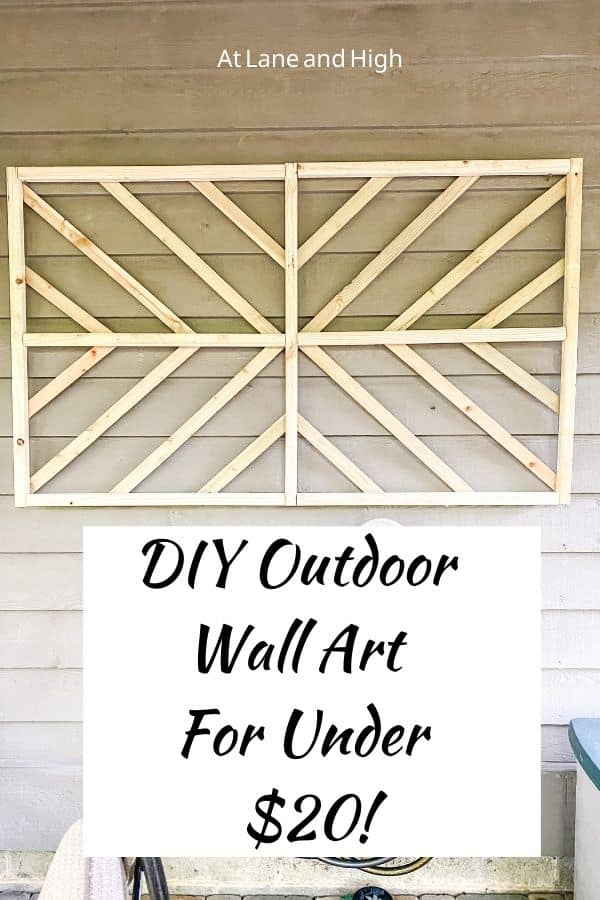
The whole thing is basically 3 feet by 5 feet. I originally planned on getting 1X2’s, but that wasn’t happening. Not a single one in the whole store of any type of wood. Not gonna lie, this threw me off a bit.
I started walking around the store wondering what I was going to do. I wandered down the pressure-treated aisle. That’s when I saw them!
I saw deck rail spindles, 42 inches long and 2X2 in size. If I cut each one down to 36 inches I can use them as the vertical posts and about 28 inches in between for horizontal pieces in between the verticals. This will be my support for the entire project.
Then they had long thin pieces of wood that were labeled fill-it wood on the shelf but on the wood itself it was labeled lathe. I don’t know exactly which name is correct but it did look just like the lathe that used to be under plaster walls. So I will call it that.
This lathe was thin, a couple of inches wide, and in 8-foot lengths. Some of the pieces were pretty curved so try to pick the straightest ones you can. This is the wood I used to create the starburst design.
Materials and tools needed:
- 9 – 42 inch pressure treated deck spindles
- 16 feet of pressure treated lathe
- Kreg Jig 4
- Kreg Jig screws
- Miter saw
- Drill
- Nail Gun and Compressor
- Nails
- 2 cans Black Spray Paint
Step 1 – Make the Supports
First I cut three spindles to 36 inches each. These will be my vertical supports.
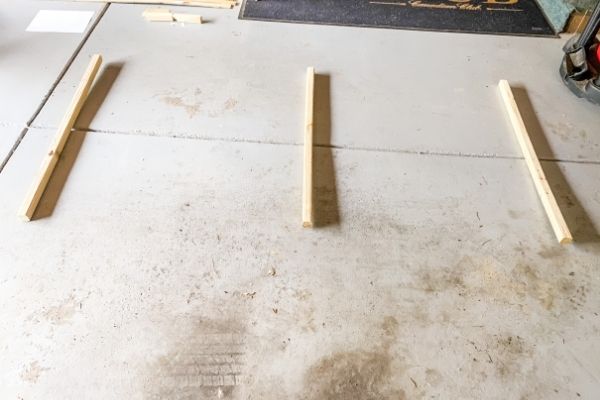
The horizontal spindles were cut to 28 1/4 inches. Add that to the three vertical posts and you get 5 feet in width.
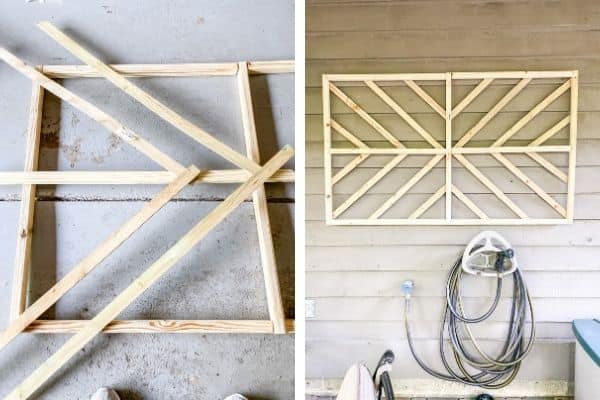
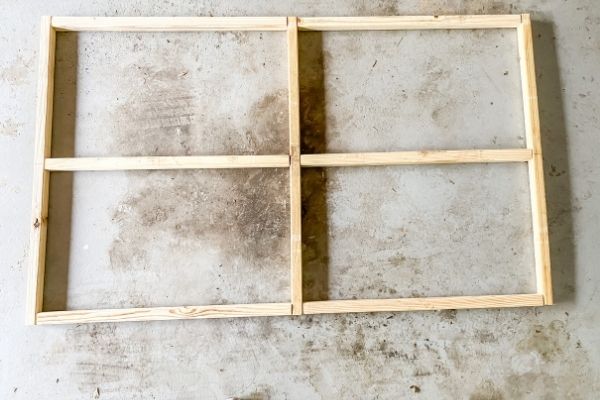
I laid it all out on my garage floor and I thought it looked a little busy. I removed a couple of the horizontal posts and I really liked that look better. Here are the two side by side.
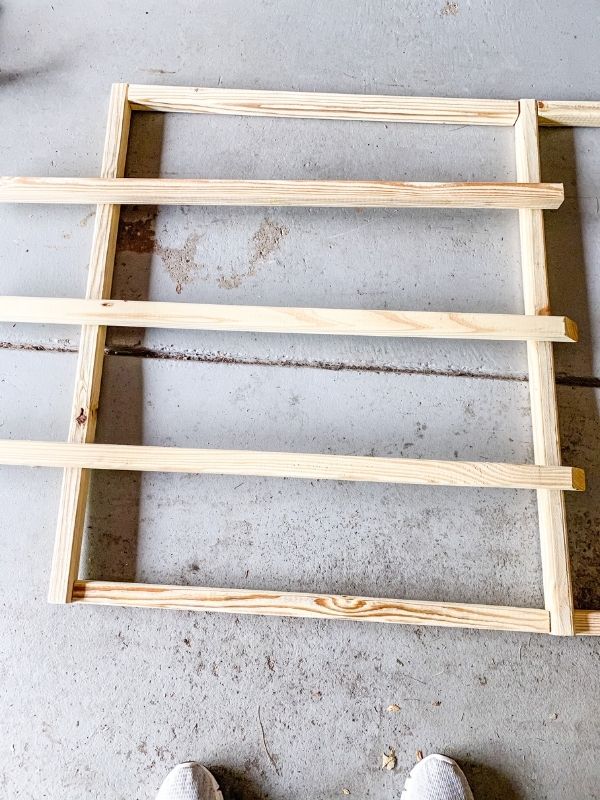
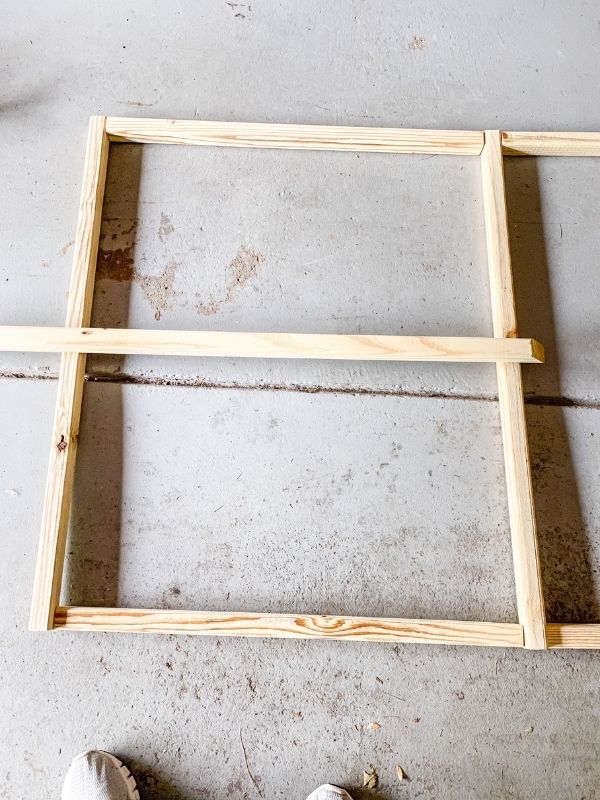
I screwed the pieces together, using my kreg jig for the center supports.
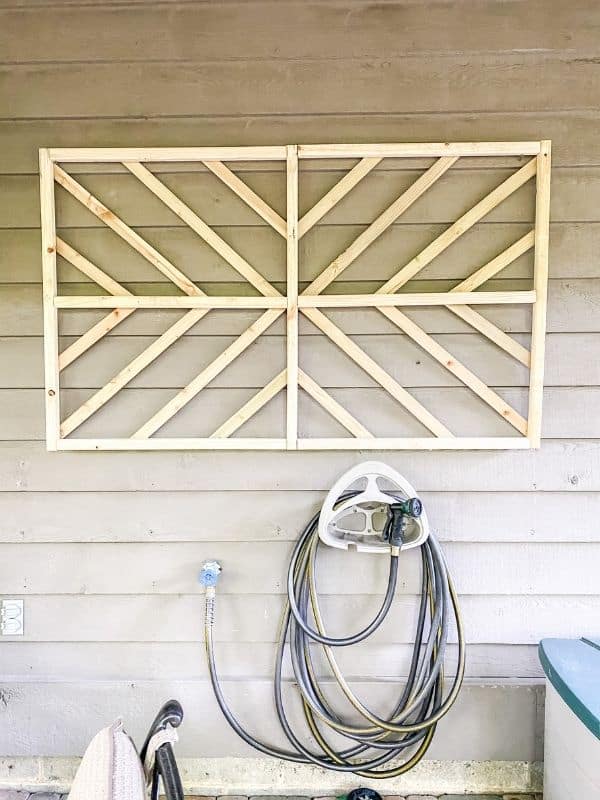
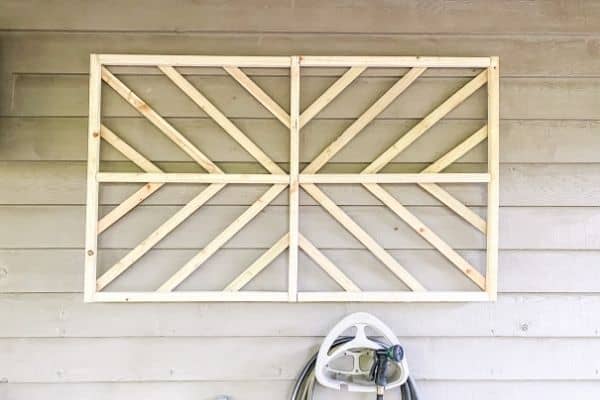
Step 2 – Creating the Starburst Design
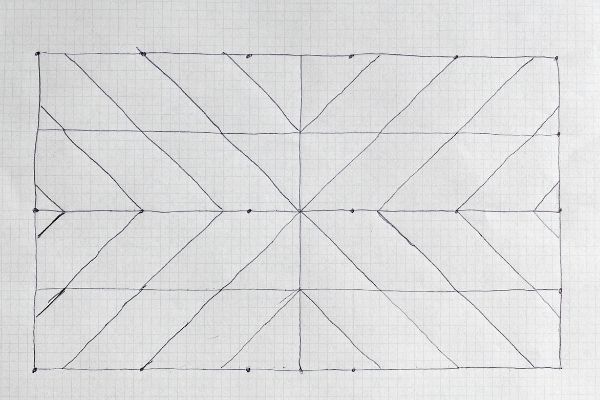
In my original drawing, I created the starburst design placing the wood 9 inches apart. I marked the support posts at 9 inches all the way around and placed the wood on a diagonal. I cut the one side at a 45-degree angle with my miter saw and laid it on the supports. Then marked where the other cut needed to be.
Would you like to save this?
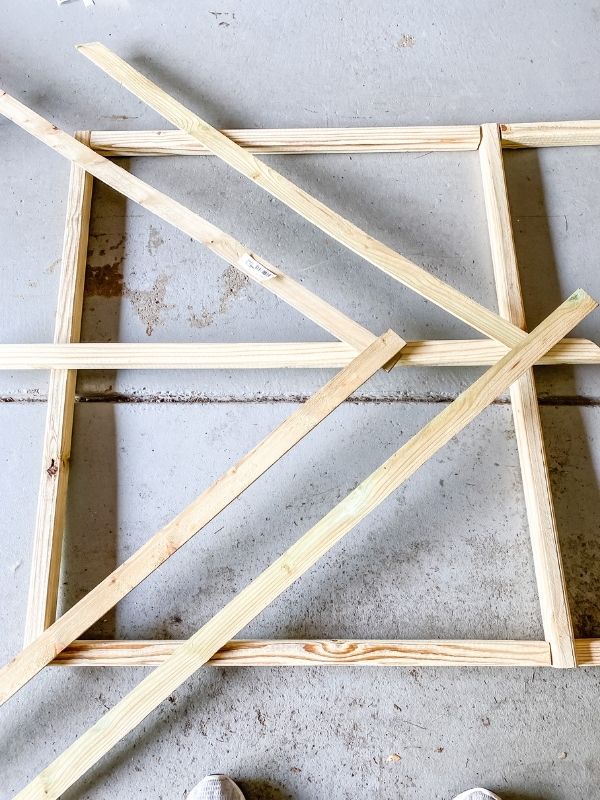
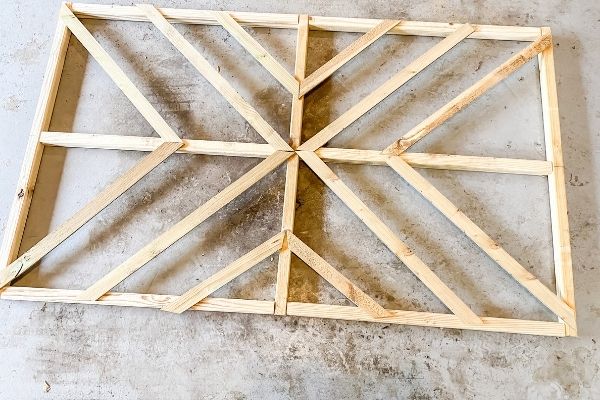
I did this all the way around laying out the design as I went. I didn’t nail anything in yet, I waited until it was all down and evenly spaced before I nailed it down.
Once I felt it looked good (and I checked the spacing between all the wood was equal) I used my compressor and nail gun to secure all the lathe to the wood spindle supports.
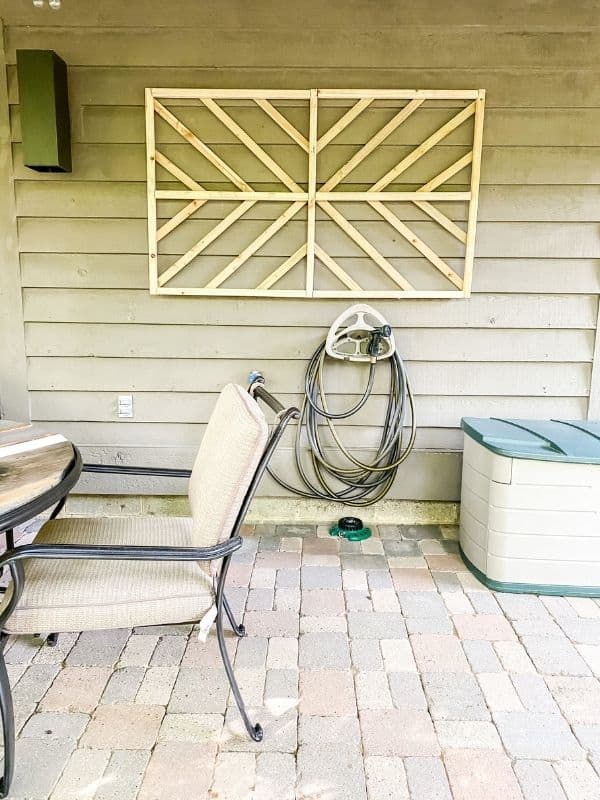
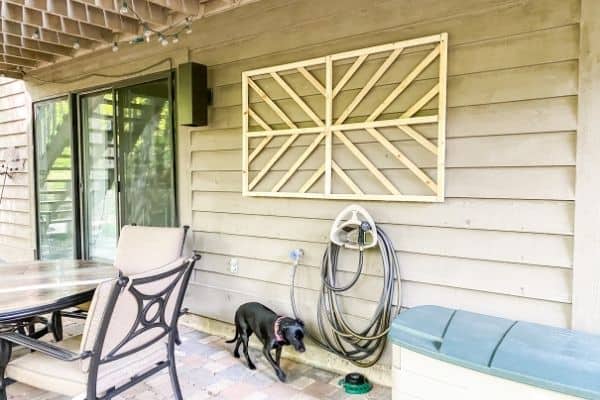
The Finished Artwork
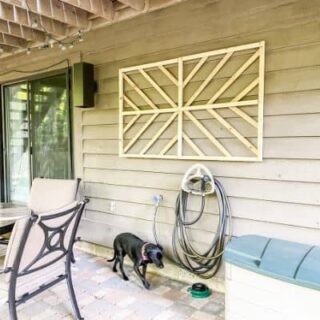
Here is the finished product hanging on the wall!
I plan to spray paint the whole thing black in one month with a leftover can of black paint that I used on another project. Why one month you ask? You see there is a rule of thumb for pressure-treated wood.
Because the wood is soaked in a chemical solution to prevent the wood from rotting quickly, you cannot paint or stain pressure-treated wood until it dries out. That takes about one month. If you paint or stain it too early it won’t stick.
Also, you shouldn’t use pressure-treated wood inside the home because of the chemicals, you shouldn’t breathe them in.
When we get to the one-month mark I will spray paint it and add the finished, finished picture then.
$100 Room Challenge Budget:
Here is where I was before this week, $66.98.
The purchase of the wood this week came in at a total of $17.74.
Add that together and I am officially at $84.72.
I have about $15 left to spend to finish off my space.
I am super excited about finishing this and also for when my daughter comes home from college to see everything. This will mainly be the space she hangs out outdoors and I want it to finally be somewhere she wants to hang out.
Other related DIY posts:
- How to Drill into Masonry: Stone/Brick/Concrete
- 48 Cheap and Easy DIY Outdoor Furniture Ideas
- How to Make a Table from a Tree Slice
- DIY Picture Frame Molding on the Walls
- How to Build Industrial Shelves
- How to DIY a Board and Batten Wall Inexpensively
- DIY Wooden American Flag You Can Hang All Year Long
- How to Create a Focal Wall With a Herringbone Stencil
- DIY Herringbone Headboard (and New Bedding)

Creating Outdoor Wall Art isn’t as hard as you might think. You can create it for very little money and make it sturdy to last a lifetime! I hope you will give it a try for your own home!
DIY Outdoor Wall Art
For some beautiful outdoor wall decor that will spice up your patio or deck try this DIY Outdoor Wall Art project!
Materials
- deck spindles
- pressure treated lathe
- Kreg Jig Screws
- Nails
- Black Spray Paint
Instructions
- Cut 3 of your deck spindles down to 36 inches.
- Cut the remaining 6 spindles to 28 1/4 inches.
- Using the Kreg Jig and the Kreg Jig screws connect the supports (spindles) together.
- Lay the lathe on top of your spindle supports and mark with a pencil where the cuts need to be made to achieve the starburst design.
- Cut on your pencil mark and continue until you have all your cuts made.
- Lay all the lathe on the supports and make sure you like the design and where everything is before you start nailing them together.
- Once you are satisfied with the placement nail the lathe to the supports.
- Spray paint the whole thing with black spray paint. Make sure you give the pressure-treated wood ample time to dry out first, generally a month.
- Hang on your wall.

As a licensed Real Estate Agent and an avid home decorator, I strive to give my clients the very best I can when it comes to staging, selling, and decorating their homes. I have lots of experience with paint color choices and love to DIY my home so I can have everything just the way I want it. I share my ideas and projects with the world in the hopes that I can help others have their homes just the way they want as well.


I have been looking for something to hang on the side of our house to go over our outdoor sofa in our pergola area and I think I am going to copy you and make this. I love it! Wish you could come help me with the miter cuts though!
Ah I wish too! LOL, it was pretty easy and if it’s on the back it doesn’t have to be perfect.
What a lovely wall decor for outside great job, looking forward to next week.
Thanks Maria! I am looking forward to finishing too!
Such a simple project with big impact! Great tips about the pressure treated wood. Looking forward to seeing your space complete
Thanks Jackie! I am looking forward to it too!
I love this design, definitely saving this one for down the road.
Thanks Brooke! I am so glad you like it.