
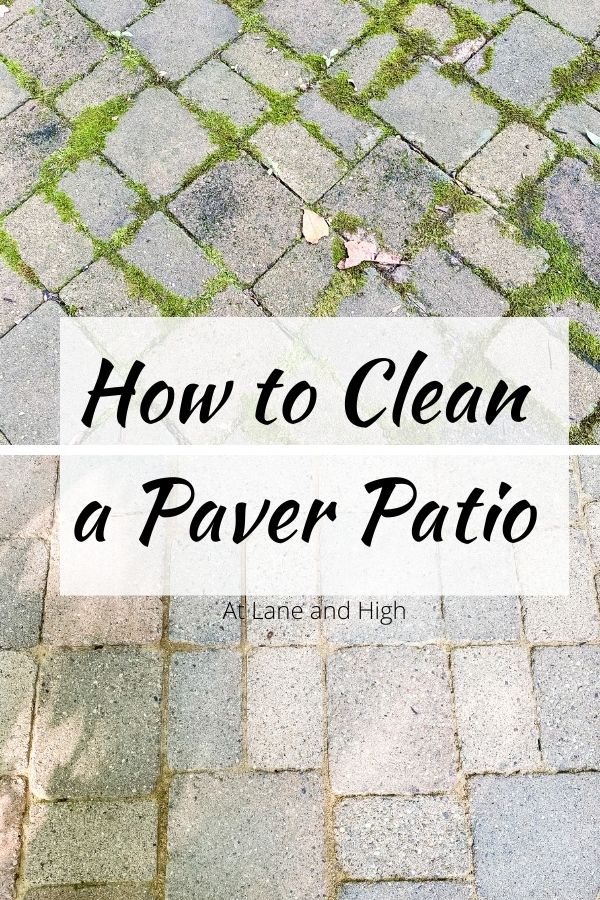
How to Clean a Paver Patio and Make it Look Like New
It’s week 2 of the $100 Room Challenge and this week it’s all about How to Clean a Paver Patio. You will not believe the changes in this patio!
If you are new here then you probably don’t know about the $100 Room Challenge. The goal is to redecorate a room in your home for under $100 and in one month’s time. This challenge was created by Erin at Lemons Lavender and Laundry.
I am redoing my patio, it’s the neglected outdoor space at my house. Here are the links to the other weeks if you want to check them out.
Week 1 – Week 2 (this week) – Week 3 – Week 4 – Week 5 (reveal)
*This post contains affiliate links. For more details see my full disclosure.
How to Clean a Paver Patio
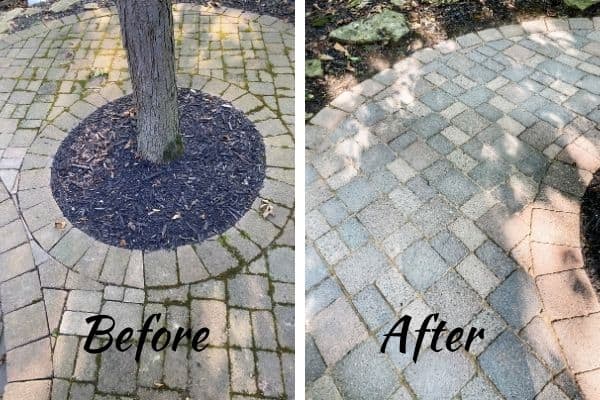
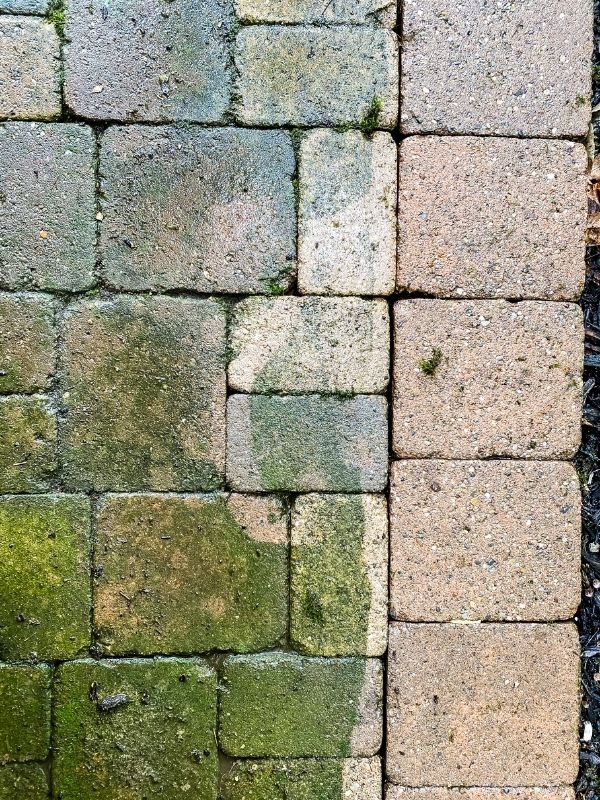
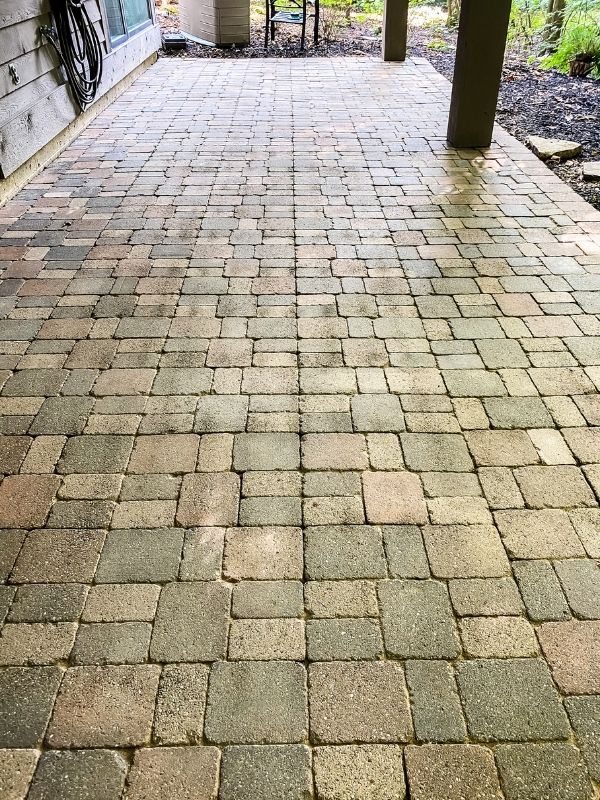
This week the plan was to clean, clean and clean this space. It’s so disgusting! Here are some before shots of the paver patio and all the lovely stuff I have growing on them.
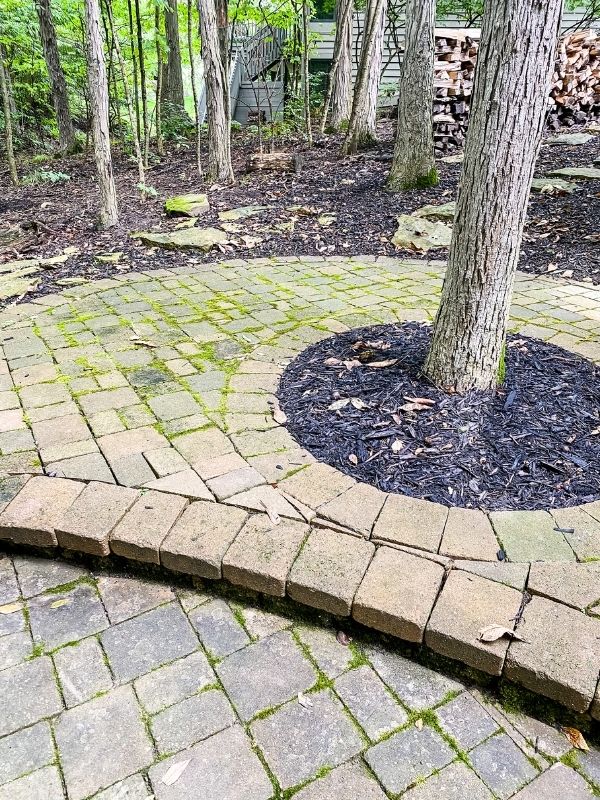
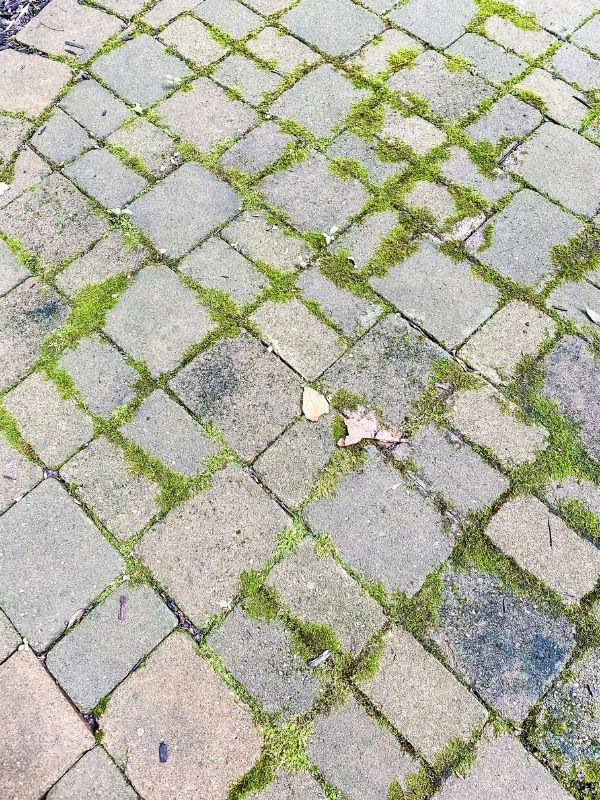
As you can see we have tons of moss and weeds growing in between the cracks. And just general dirt everywhere.
First, Power Wash the Patio
The first thing I did was break out my power washer! I bought mine at Menards. Here is a link to the one I have as well as a couple of others (here and here). You don’t need a professional strength power washer. Just a standard one for homeowners is good.
I started powerwashing one side and slowly worked my way to the other. It took me 5 hours to do the entire patio, which is insane! It took my 4 hours to do my entire driveway! That’s how dirty the pavers were.
There isn’t really a specific technique here to power wash. Just hold the nossle close to the pavers and spray them. You will get a feel for how close you need to be to get all the yucky stuff off. For me doing under the deck wasn’t too bad but the space outside of under the deck was awful!
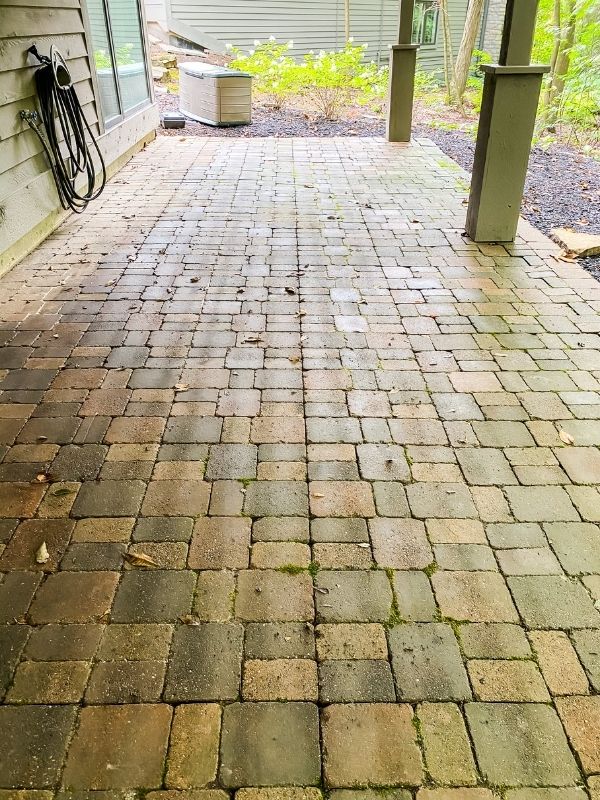
This photo shows some that I washed and some that I hadn’t. Pretty gross right!
Now once it’s done sit back and watch the beauty as it dries and bask in a job well done!
Safety tip! If you have neck or back problems you will not want to power wash for long periods. The head is the heaviest appendage and looking down for hours on end will make it very sore! So break it up in smaller segments or have someone else do it for you.
This safety tip is important. After 5 hours of looking down I lived on Alleve for 2 days just to get through. And I have no back or neck issues.
Second, Add Interlocking Sand
Once your pavers are dry you can add sand. I used Quickcrete on my driveway and was really pleased with the results. So I used them again.
There is a formula on the bag as to how many bags you will need based on the size of the area you are doing and the gaps in the pavers. I used 2 bags for this area since many gaps were really big! I also used 2 bags on my driveway and front walk. Bigger area but had smaller cracks.
Pour some sand in a pile like I did.
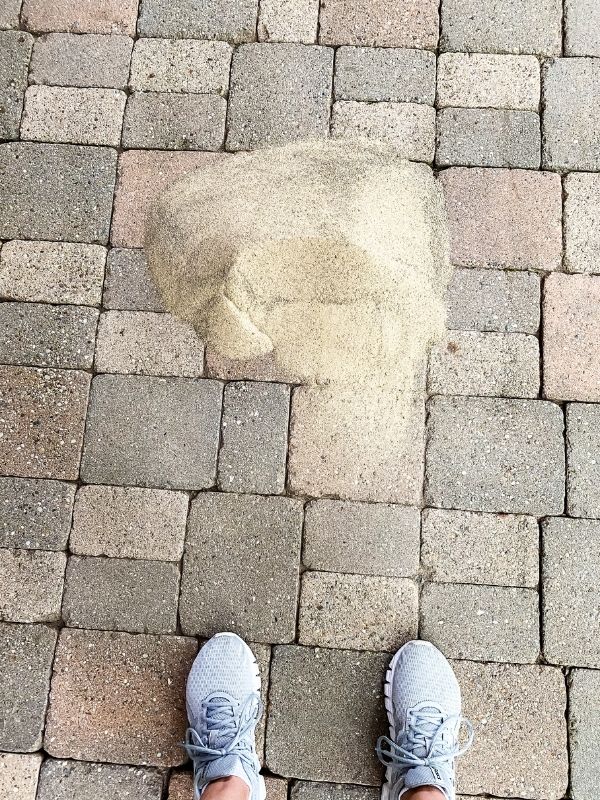
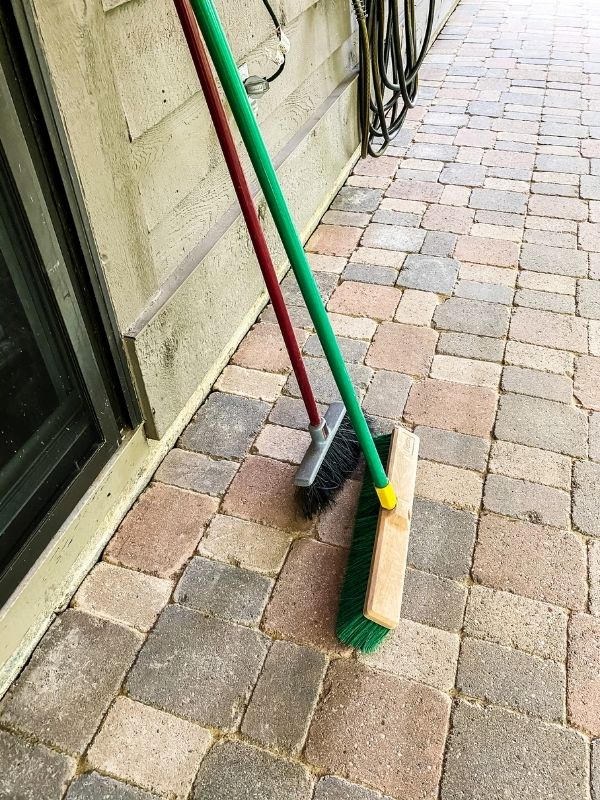
Then spread it slowly using a large push broom. Then go back and sweep up the excess sand.
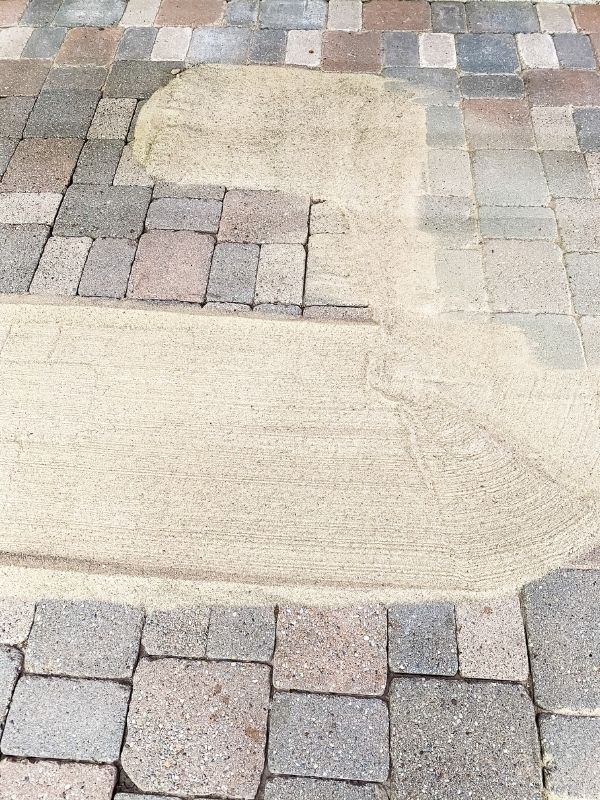
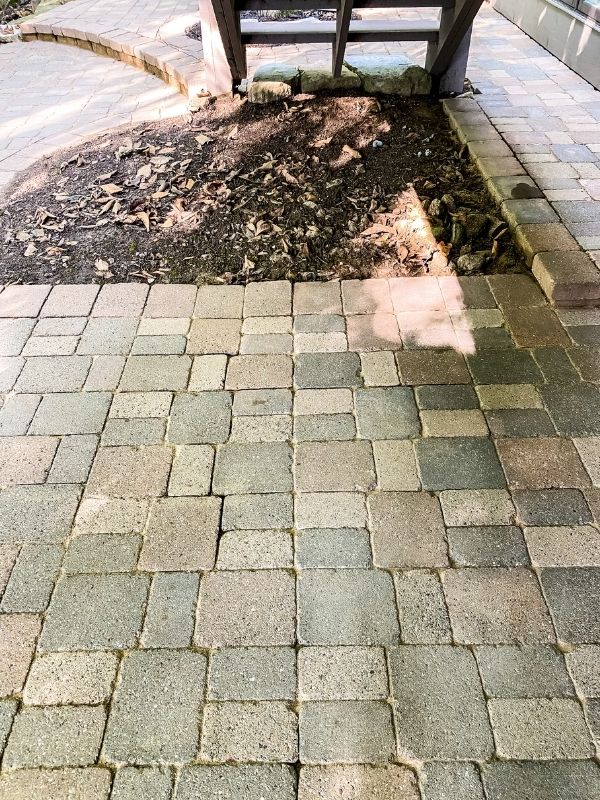
In this photo you can see the large area that I slowly pushed the sand across the pavers. In the top right section of the photo you can see where I swept up the excess. The pavers color will be more muted after you put sand down, don’t worry it will wash off and be just as bright as the originals.
Keep moving around your patio and fill in all the cracks then sweep it up. I used a large push broom for the big sections and the edges this smaller broom.
When you are all done spreading the sand and cleaning up any excess lightly spray with a hose and dampen all the sand down.
Let this completely dry for at least a day or two.
Then you have a beautiful paver patio that looks like new!
Would you like to save this?
Other repairs I also made:
Since I power washed the deck above I got yucky stuff all over the string lights and windows below. Then I power washed the patio and got more gunk on the windows. So the windows got a throrough cleaning.
I cannot recommend enough these microfiber cloths! They clean glass so well and don’t leave streaks, even when you have splattered them with the grossest of stuff from your patio;)
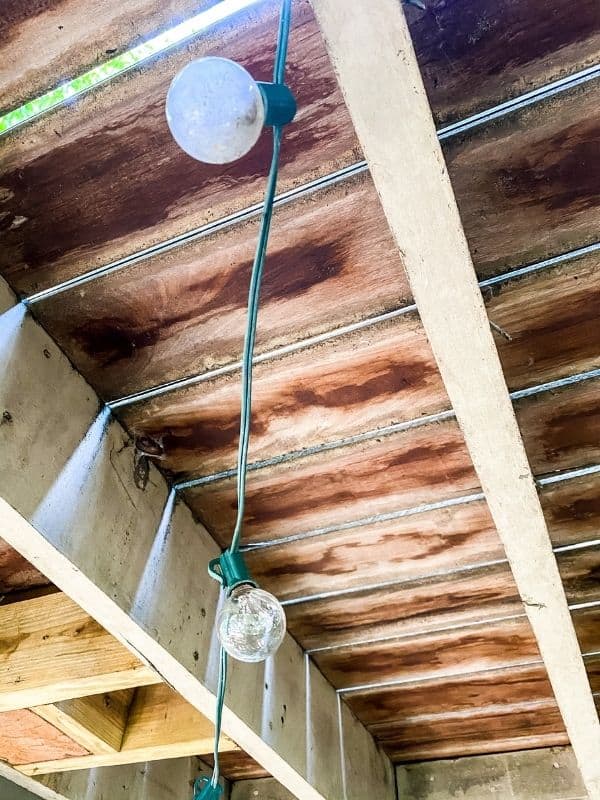
Here are the string lights, one clean and one not. What a difference!
How to Fix a Loose Paver Step
I actually discovered I had 7 loose steps, I thought there were only 3! But once I started pressing on them I realized there were more. So I grabbed some of this landscape adhesive and went to work.
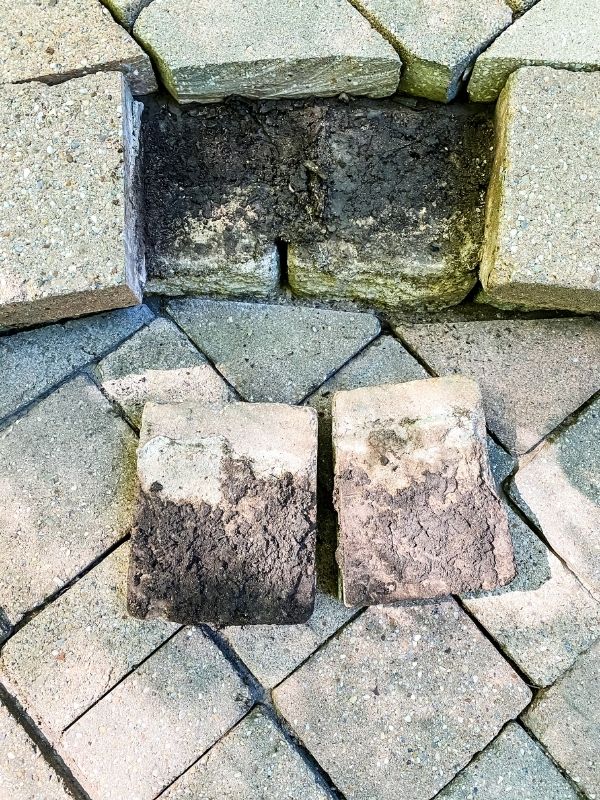
These pavers came off easily and when I flipped them over there was a lot of dirt that had gotten in there. That needed to be cleaned out.
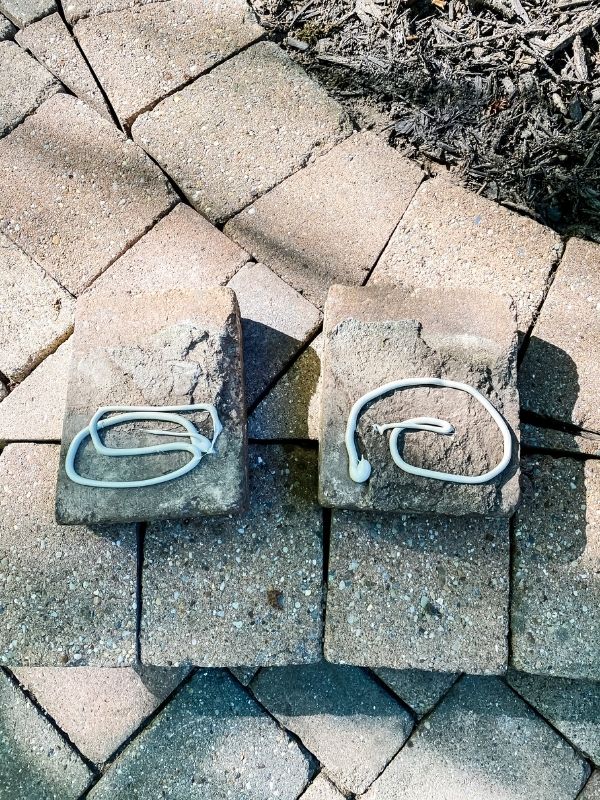
Once cleaned I generously spread the landscape adhesive all over the pavers and where they go on the patio.
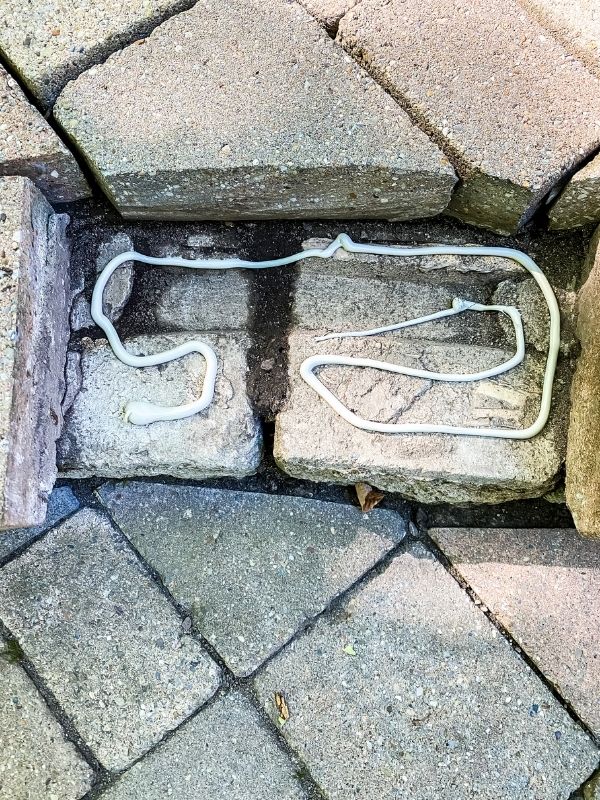
Put the pavers back in place and let everything dry for a good 24 hours. I did this step between power washing and laying the sand so the sand wouldn’t be disturbed when I removed the pavers.
How to clean a paver patio – the finished product!
And here it is! The final product and I am so excited for the space to be clean and rid of all the moss and weeds. Now I just have to keep it clean! LOL
More Patio Related Posts:
8 Ways to Create a Relaxing Porch or Patio That You Will Never Want to Leave
10 Cheap Patio Ideas for a Sensational Outside Space
How to Landscape with Large Rocks
How to Paint Flower Pots The Easy Way
$100 Room Challenge Budget:
So far here is what I spent:
Sand – $42.98
Landscape Adhesive – $4.75
Total spent so far – $47.73

I hope you learned something about how to clean a paver patio and make repairs. Keeping your outdoor spaces clean is really important and will increase the longevity of the patio. Making it last for many years to come!

As a licensed Real Estate Agent and an avid home decorator, I strive to give my clients the very best I can when it comes to staging, selling, and decorating their homes. I have lots of experience with paint color choices and love to DIY my home so I can have everything just the way I want it. I share my ideas and projects with the world in the hopes that I can help others have their homes just the way they want as well.


Wow Wendy that made a big difference I really need to clean our pavers soon, but I am loving the moss that has grown on mine as that natural look for the garden. So I am split between killing the moss and removing the dirt and mold, LOL go figure. However this has inspired me to go for the clean look.
I felt the same way Jen, but then it kept growing, and growing! I didn’t realize it but it was actually growing on top of the stones too. It became out of control so it had to go.
Great tips! We have a paver walkway that always has weeds growing in the cracks. Looks like I need to add some sand!
Yep, the sand helps tremendously!
What a difference! I have been wanting to get a pressure washer for awhile and I think this post gave me the push to finally buy one.
Oh my gosh, it’s honestly one of my favorite tools! It really changes everything.
Love it! So satisfying!! Great progress!
Looks great! A good cleaning always brings out the best view- nice job.