
How to Landscape with Large Rocks
Do you need a little something to add to your landscaping to take that curb appeal to the next level? Today I am sharing how to landscape with large rocks which will take your home from nice to WOW.
One side of my driveway has always been, we’ll get to it. It had two large Ash trees that were infected with the Emerald Ash Borer. Four bushes that were so overgrown that even on a ladder I couldn’t reach the top to trim. Let’s not even talk about the plants and ugly ground cover that is riddled with poison ivy.
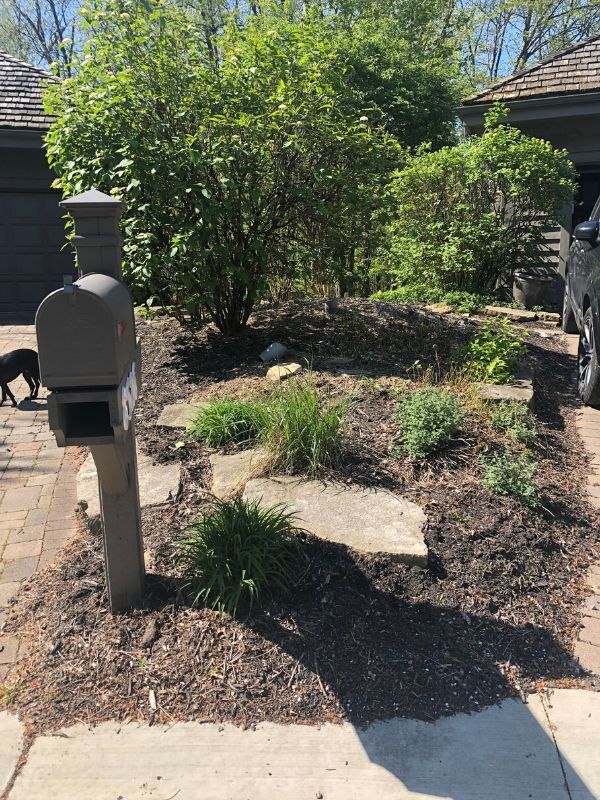
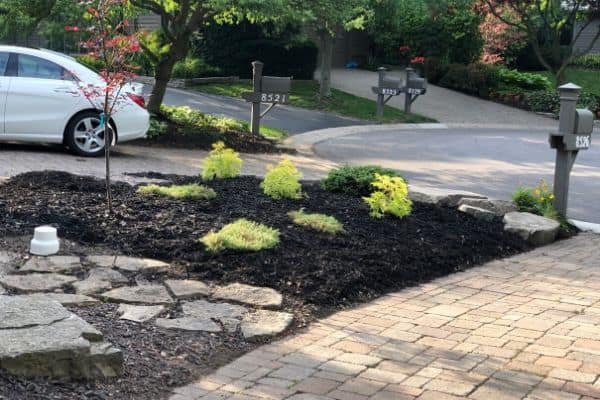
This photo is after the trees were removed. I had them grind the stumps and now the height of this bed is crazy high! As you can see mulch slides down into the driveways and onto the curb of the road.
The stones I love though. All throughout our little neighborhood the properties are decorated with large stones. Some are stack or layered. Landscapers continue to throw mulch down and many of the stones are slowly being covered up. It frustrates me so much!
*This post contains affiliate links. For more details see my full disclosure.
The plan to Landscape with Large Rocks
The first thing we have to do is remove these overgrown bushes and all the plants/weeds/deplorable poison ivy.
My husband worked on one bush a weekend while we were mulching the rest of the yard and within a few weeks all the bushes were out, root ball and all.
Next, we had to remove the top 8-ish inches of dirt. Luckily we have a large wooded area in the backyard so he just took the wheelbarrow and dumped the dirt back there.
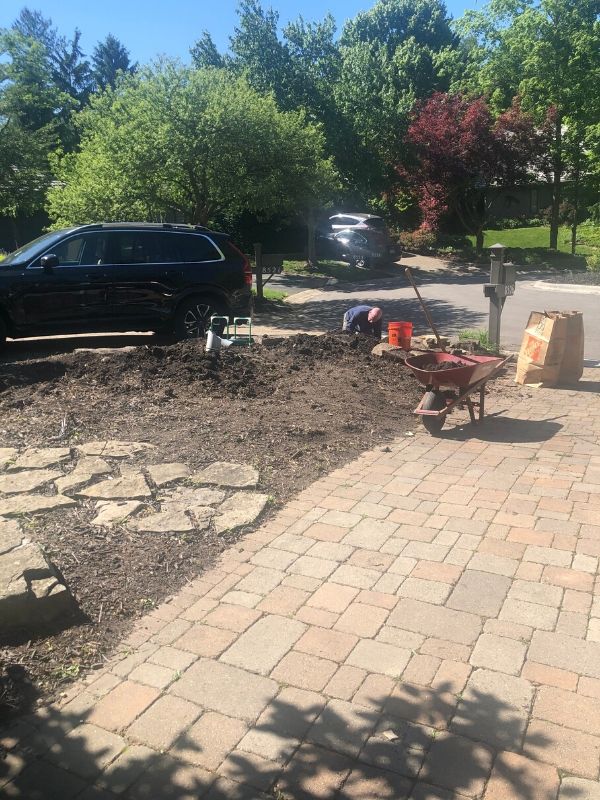
While we were doing this digging and hauling dirt (so not fun!) we discovered several rocks in our yard that had sunk underground. One of them was HUGE! I was like, ummmmm DAVE!!!
Where to get big rocks for landscaping
The quick answer is, most local landscaping companies or places that sell patio building materials. In my case they are burried in my own yard!
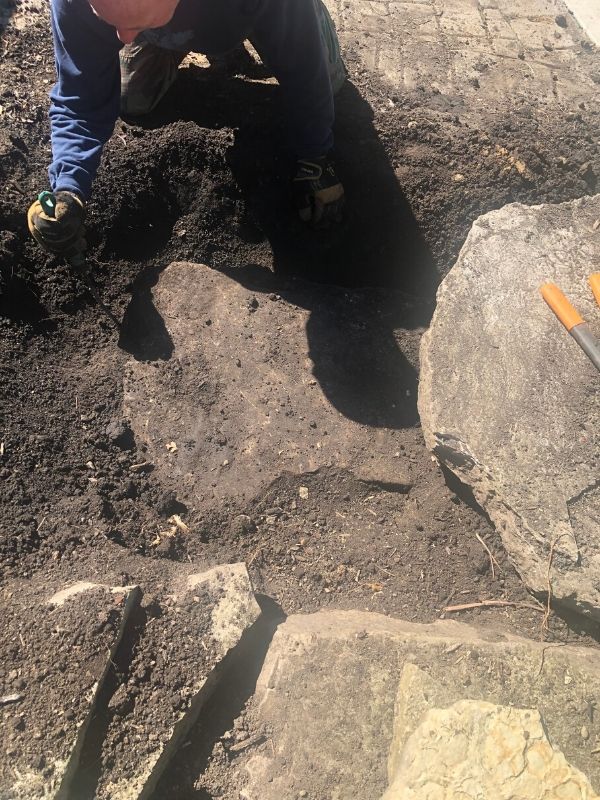
We had to buy a pry bar to get it up. My neighbor thinks the stone was probably about 400-500 lbs!
In order to raise this stone up we had to move the one that was slightly on top of it. Then we dug out the dirt all around the large stone as well as any that remained on top of it.
Using our new pry bar my husband pounded it under the stone and leveraged it up leaning on another stone. Using the dirt for leverage didn’t work, the pry bar just sunk down into it.
When he had the stone up I shoveled dirt under it. Then we repeated this process on the other side of the stone.
We went back and fourth 4 or 5 times until we had the stone at a height we liked.
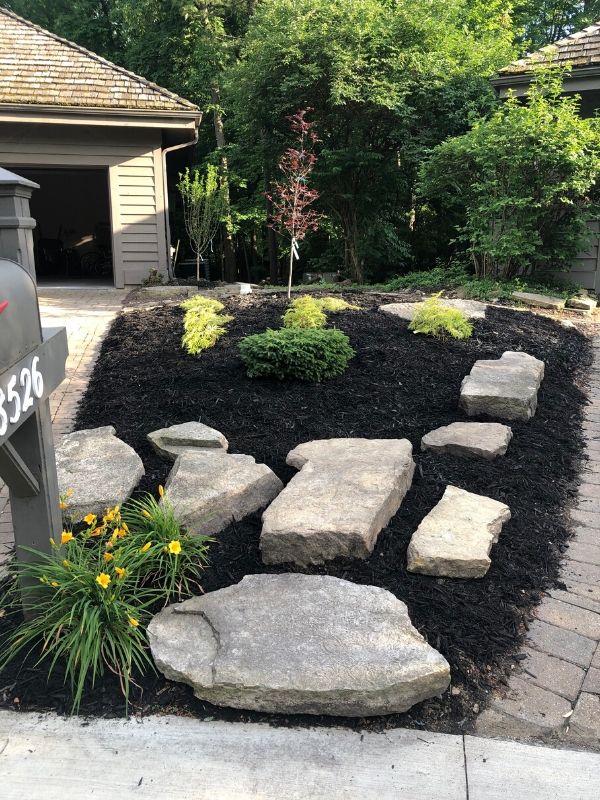
Arranging the Rocks with the Plants
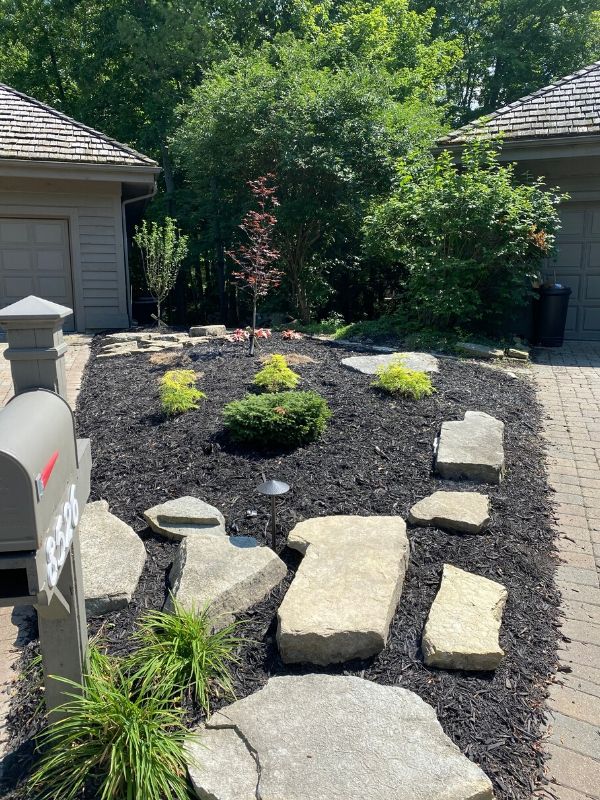
This part is personal preference. With the size of stones we had and the way they were situated in my yard I decided to leave the big ones where they were and filled in the gaps with smaller ones.
I say smaller ones but it took two people to move most of them! LOL
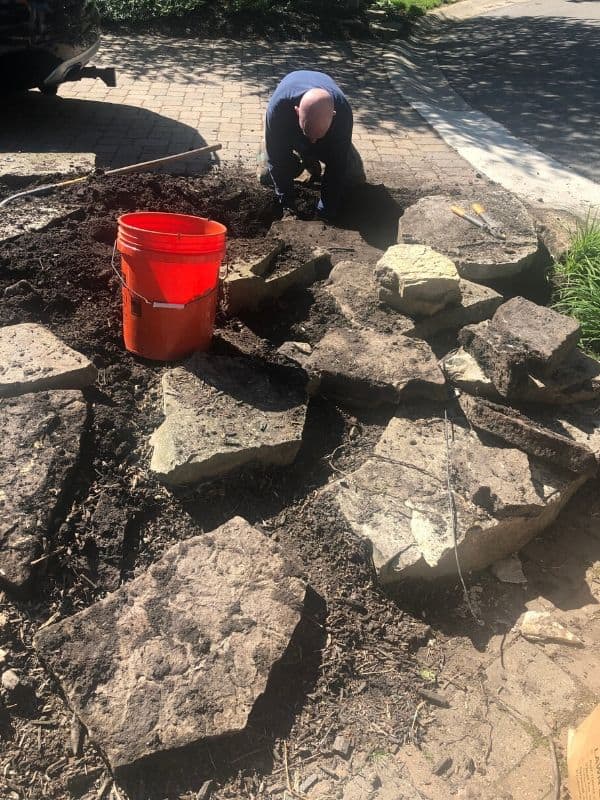
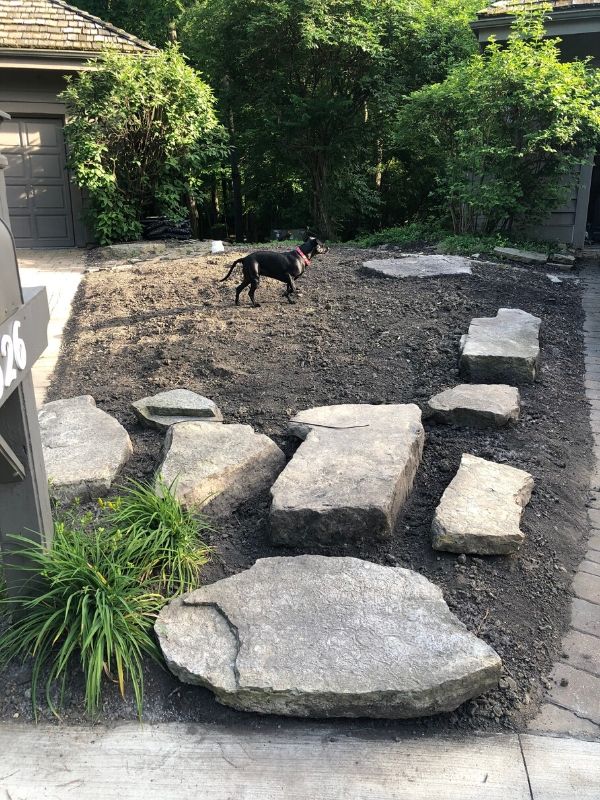

Some other options are to stack the rocks one on top of another or to layer them. If you have a big pitch to the landscape you can lay one on top of another but about halfway back and continue on. They sort of look like steps then. I really like that look.
Now add the pretty stuff! Plants!!
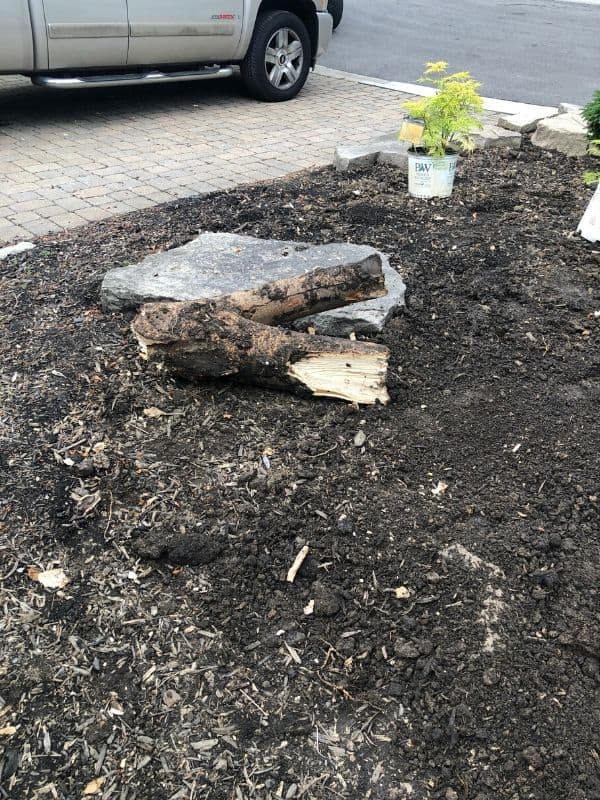
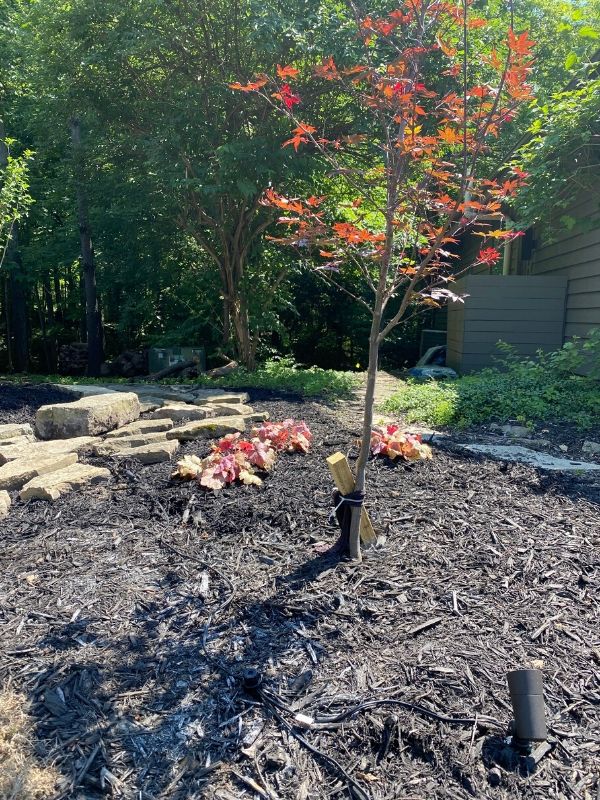
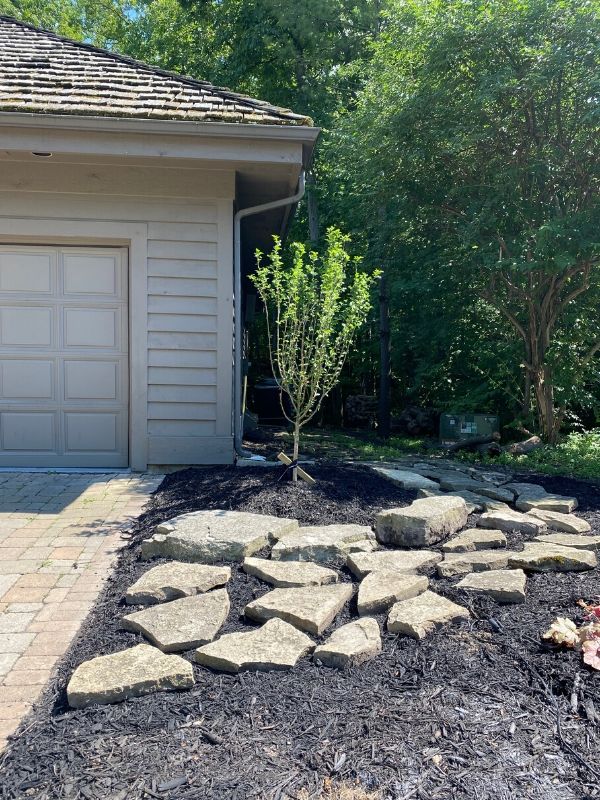
The first thing we decided to put in was a new tree. I found the perfect place to put it! Once we started digging we discovered that really was the perfect place…it was right where one of the old Ash trees had been. (Insert the face slapping emoji here!)
So I moved back a bit and started digging. Of course we hit massive roots. My poor husband thought all the hard work was done. HA! He used his ax and cut out this massive root.
Would you like to save this?
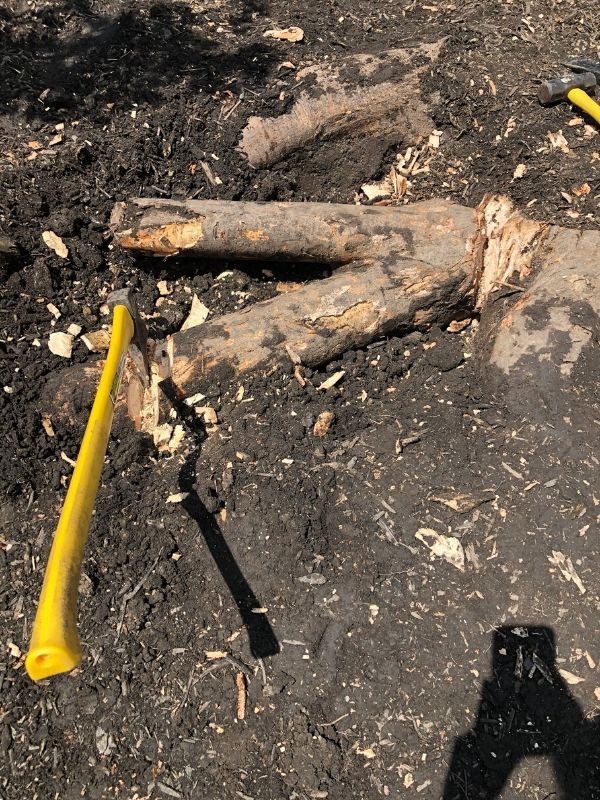
It took about 2 hours to get that thing out of the way. He said I was trying to make him buff by picking these places to plant things! LOL.
Now we planted our new tree. From there we laid out everything else and got started digging. Luckily we had much better luck for the rest of the plants than we did for the tree.
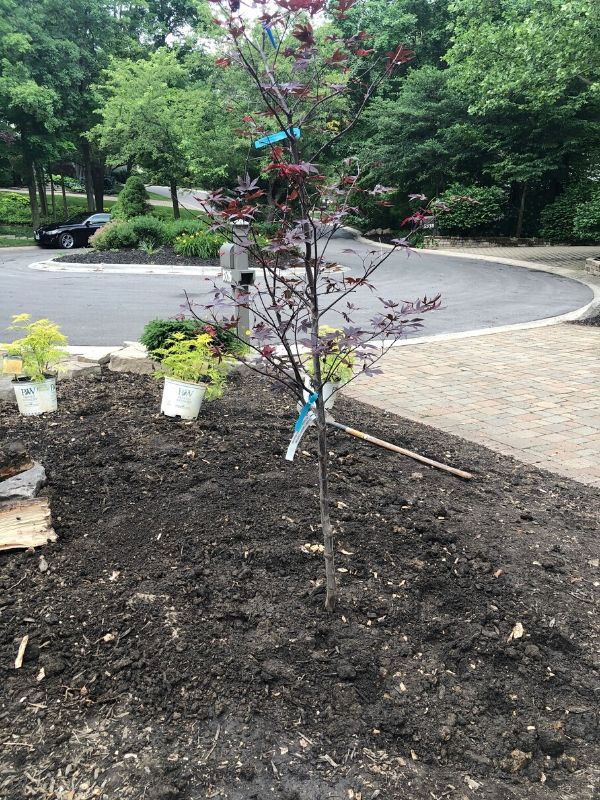
Here is a list of what we planted:
- Japanese Maple Blood good variety
- Lemony Lace Elderberry
- Birds Nest evergreen
- also transplanted some creeping flox from another area of the yard
Let’s talk Landscape Lighting
Here is what we pulled out of the yard before we started all our digging.
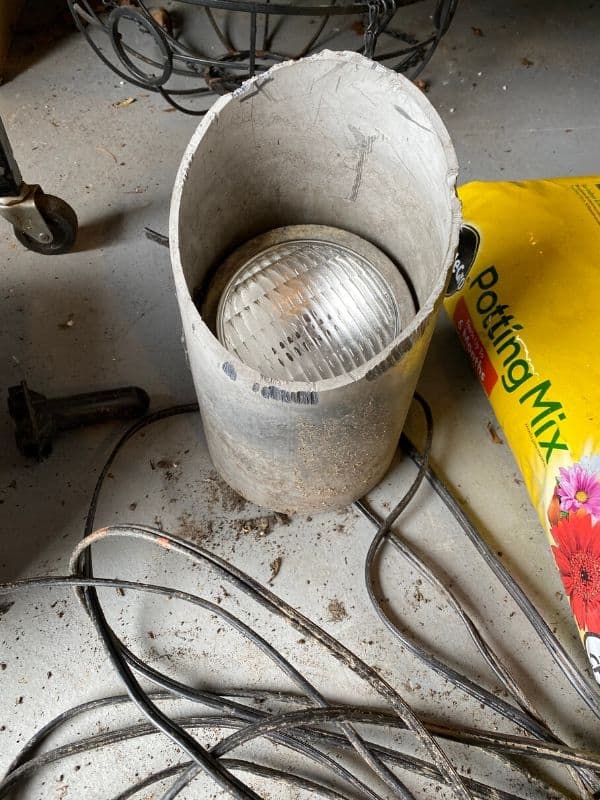
Pretty ugly right?! UGH! It looks like someone chewed on the edge of it!
Neither one of us wanted to put this back in. Plus the wires looks pretty janky with a couple of breaks that were not properly treated for the weather conditions of being outside.
We discussed having our landscape people out to work on it and replace the fixtures, but I was very concerned about how much that would cost. My husband was really bummed.
So I did what any good DIY’er does and started to learn about landscape lights. Made a trip to Lowe’s and I figured out how to install them. For $60 on light fixtures and another $20 on waterproof connectors we have a gorgeous new lighting package that is sound (waterproof) and beautiful!
My husband is happy now!
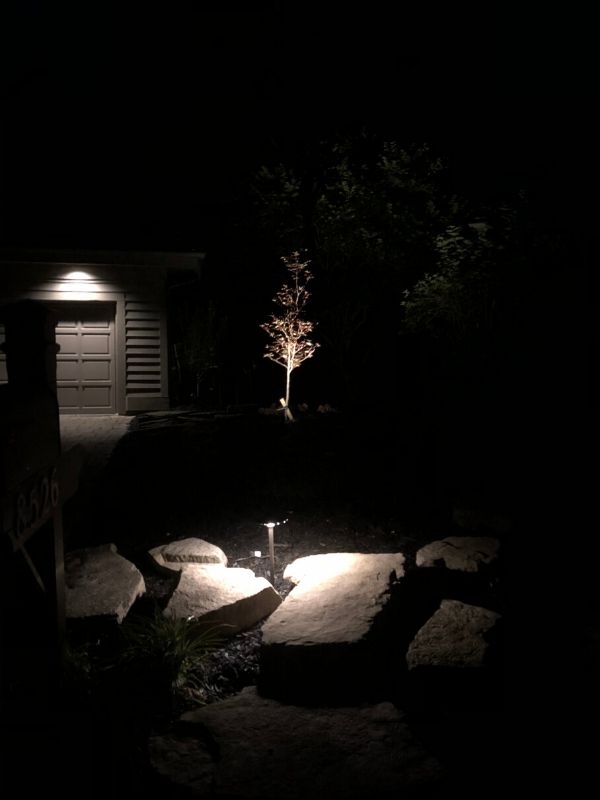
The yard landscaped with large rocks and new lighting
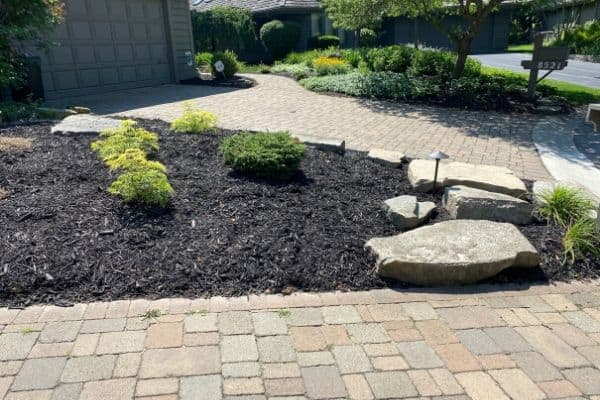
I am in love with how this turned out. Most of it was hard manual labor, took almost 2 months of weekends. As far as cost goes, we spent $80 on landscape lighting, $360 on new plants and trees, and about $100 on mulch. So for under $550, we have a completely new area that we were able to landscape with large rocks! I guarantee it would have been in the thousands if we had paid for this to be done.
*Related Landscaping Posts:
- How to Paint Flower Pots the Easy Way
- Shade Plants and Flowers that will look Amazing in your Garden this Year
- 8 Amazing DIY Outdoor Accent Wall Ideas
- Make Your Backyard Awesome with these Easy DIY Backyard Projects
- 8 Ways to Create a Relaxing Porch and Patio That You Will Never Want to Leave
- 10 Cheap Patio Ideas for a Sensational Outside Space

As a licensed Real Estate Agent and an avid home decorator, I strive to give my clients the very best I can when it comes to staging, selling, and decorating their homes. I have lots of experience with paint color choices and love to DIY my home so I can have everything just the way I want it. I share my ideas and projects with the world in the hopes that I can help others have their homes just the way they want as well.


Wooo, a lot of work there Wendy! It looks good!
Thank you so much Natalie!