
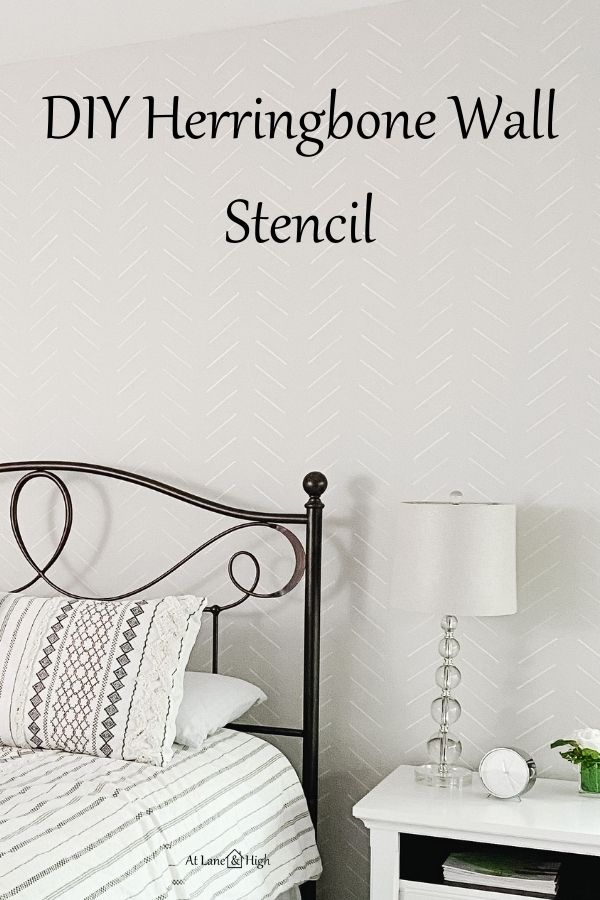
How to Create a Focal Wall With a Herringbone Stencil
This herringbone stencil was the easiest project I have done in years! Today I will share all the steps I did to create this entire accent wall in under 2 hours.
Herringbone is a classic pattern that has been around forever it seems. It has recently become super popular in modern farmhouse design by using the pattern in unique and creative ways.
I wanted a subtle pattern on this wall, something to add interest without stealing the show. So I decided to create a subtle herringbone detail that I simply love.
*This post contains affiliate links. For more details see my full disclosure.
Herringbone Wall Stencil
Materials:
Here are all the things you need for this project:
- Stencil – Etsy is a great place to buy stencils! I just love this one and the seller I bought it from was amazing to work with.
- White latex sharpie paint pen (you can use black if you want it to show up more)
- Blue tape
- level
- tape measure
Have you ever shopped from Etsy? I love shopping there for many reasons. First of all, you are supporting small businesses and I am all for that. Also, the customer service is superb!
I ordered my stencil and it came in the mail in about 2 days. It was packaged perfectly. Shop owners on Etsy really care about their product and your happiness with it.
Steps:
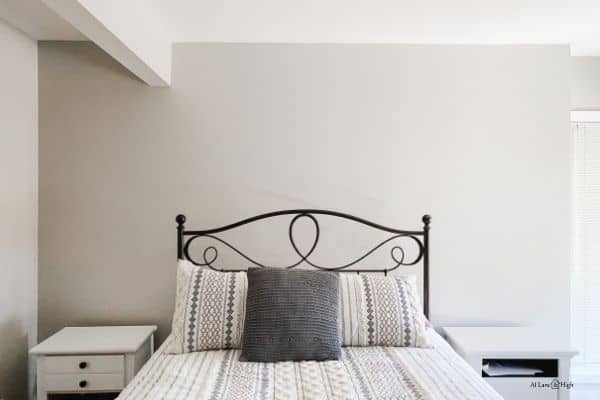
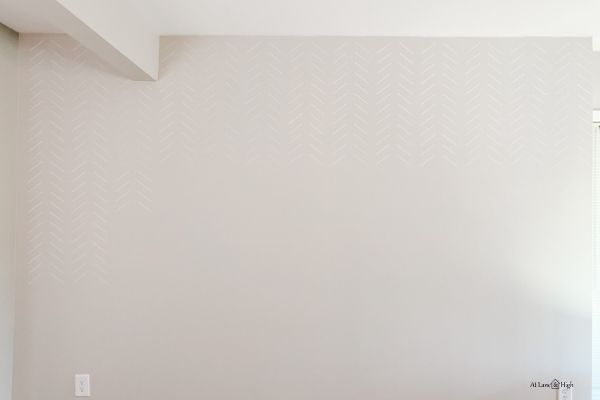
Here is the before photo, before I added any stencil.
Find the center of your wall using your tape measure and make a small mark on the wall.
Center your stencil on that mark and use the blue tape to secure the stencil to the wall.
I used about 3 pens for this wall. It’s not a big wall so if you are doing more space you might need more pens.
Follow the directions on your paint pen to get the paint flowing and once it is use the paint pen inside the stencil to create the herringbone pattern.
Would you like to save this?
Remove the stencil and replace it just below what you already did. You can see at the top of my stencil is half a line which gives you a guide to know your spacing.
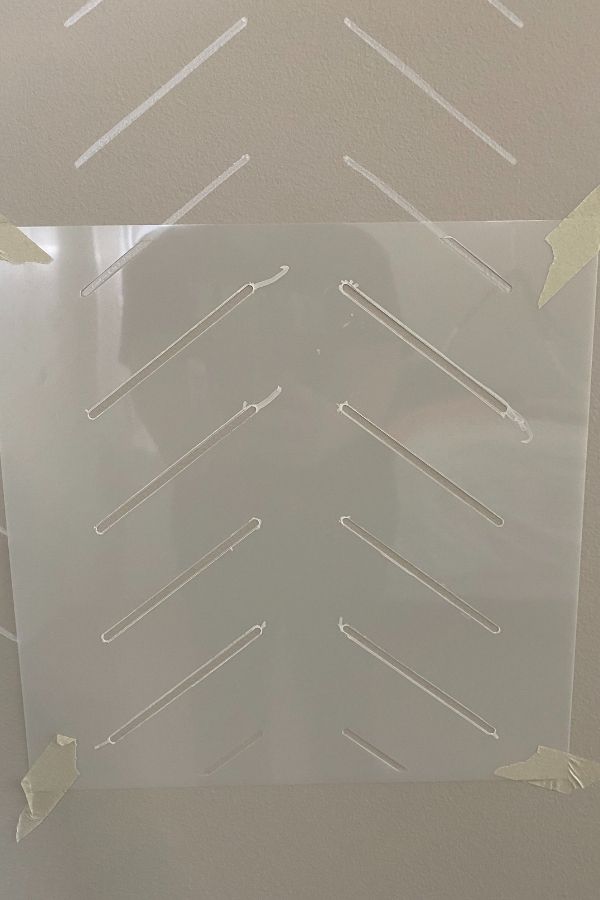
Use your level and continue to check that you stay straight! You don’t want your pattern to go at an angle down the wall.
Continue to the left and right as well. Turn on some music, it makes the time go by faster;)
Make sure that the paint is dry before moving on to the next stencil. The sharpie does dry pretty fast. If it’s not dry some paint might get on the underside of the stencil then transfer to the wall when you move it to the next spot. You don’t want that!
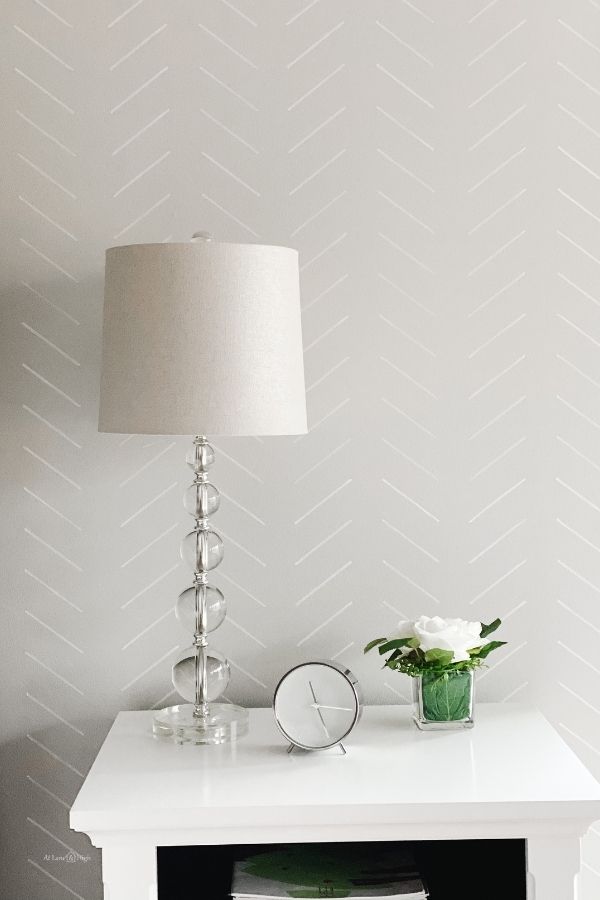
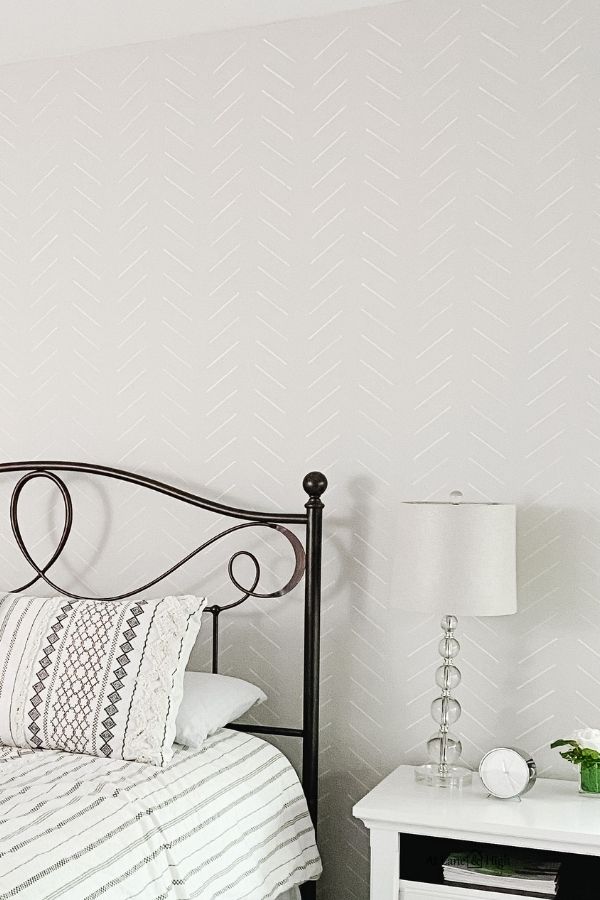
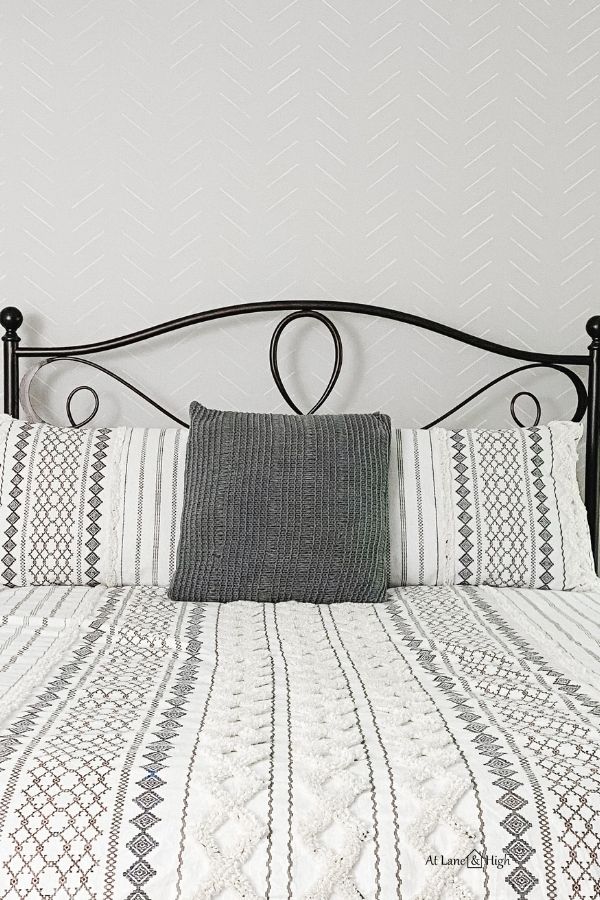
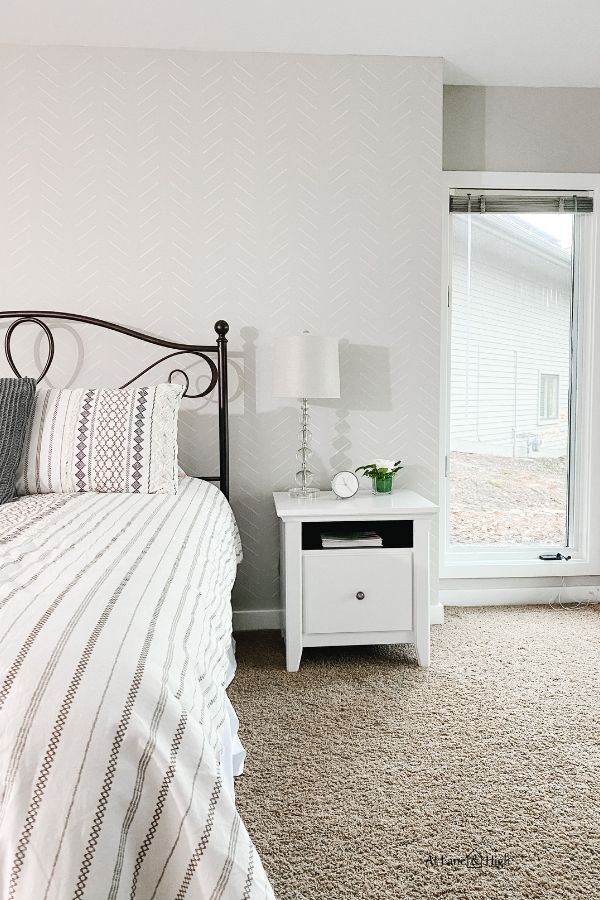
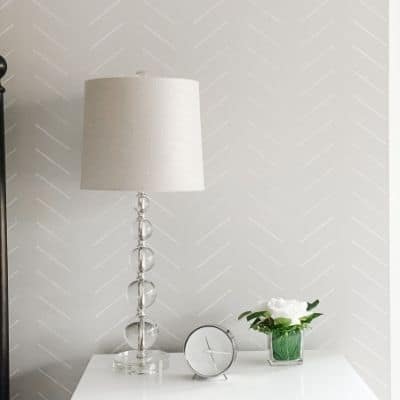
The Herringbone Stenciled Wall
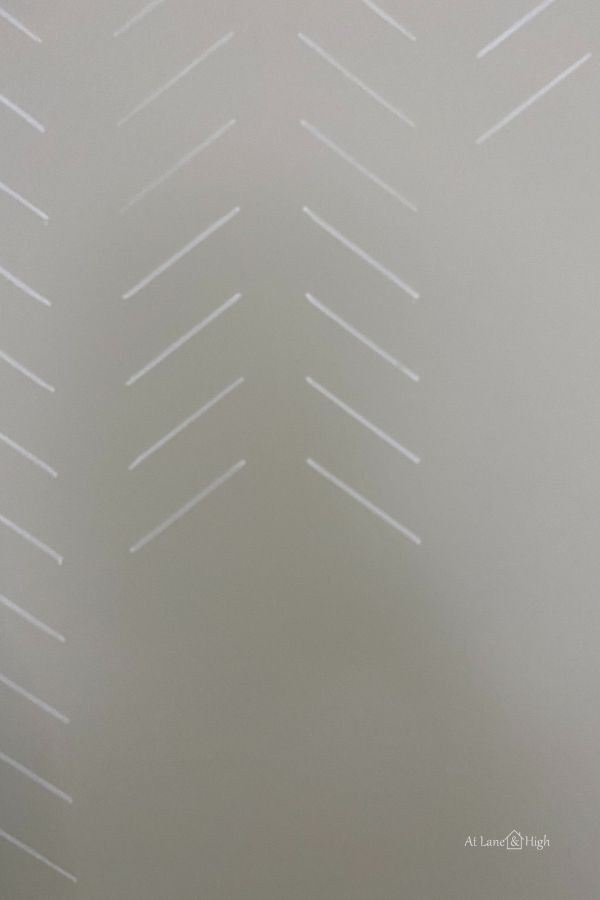
And here is the final product! I simply love the understated elegance of this focal wall. But if you are looking for something more striking definitely go for that black color.
The paint color on the wall is Sherwin Williams Agreeable Gray and I used a white sharpie paint pen (water-based).
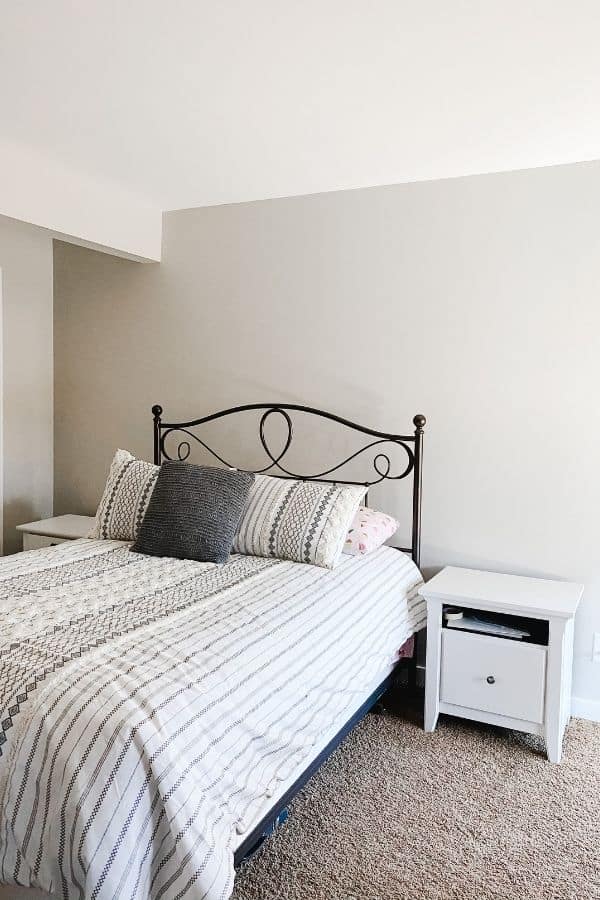
Other posts from this guest bedroom:
- DIY Blanket Ladder
- How to Build a Bench From Scratch
- Guest Bedroom Reveal: How to Decorate a Bedroom on a Budget

How to Create a Focal Wall With a Herringbone Stencil
Add interest to your room by creating a focal wall with a herringbone stencil. Today I show you how to do that.
Instructions
- Find the center of the wall and mark it.
- Center your stencil on the wall on that mark and secure it using painter's tape.
- Using your paint pen color in the lines on the stencil.
- Remove the stencil and move on to the next spot, lining up where you finished the last one.
- Make sure you check for level each time to make sure you don't go crooked.
Notes
This project doesn't take long but it's monotonous. Put on some tunes to make the time go faster.

As a licensed Real Estate Agent and an avid home decorator, I strive to give my clients the very best I can when it comes to staging, selling, and decorating their homes. I have lots of experience with paint color choices and love to DIY my home so I can have everything just the way I want it. I share my ideas and projects with the world in the hopes that I can help others have their homes just the way they want as well.


Hey there! I just checked out your guide on creating a focal wall with a herringbone stencil—so inspiring! I love how you broke down the process step-by-step; it makes it feel completely doable, even for someone like me who’s not super handy. The tips on choosing colors really caught my eye too! Have you ever tried this technique in different rooms? I’m curious how versatile the stencil can be. Also, any thoughts on where to find affordable stencils online? Beyond Google search, there are so many options these days!
Hi Larieka, I found my stencil on Etsy but there are companies out there that just sell stencils. I have seen lots of people use this same stencil with a black marker so it’s more bold. Thanks for stopping by!