DIY Blanket Ladder {Step by Step Tutorial}
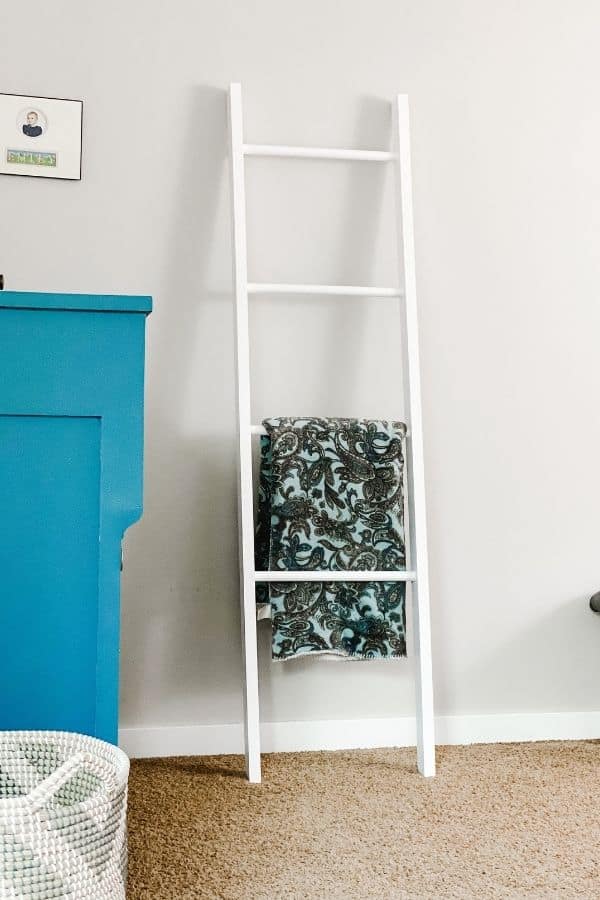
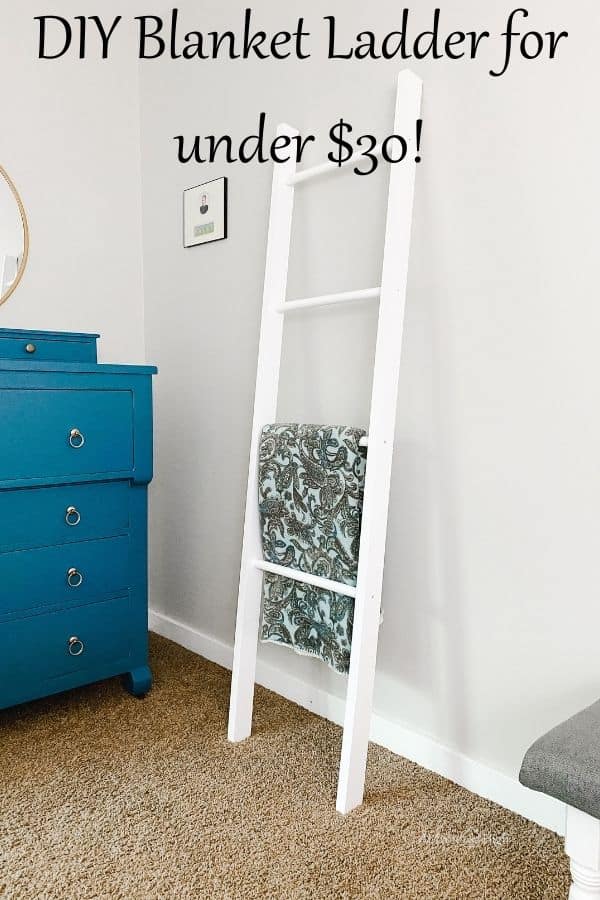
DIY blanket ladders are so popular right now. They are perfect for displaying your favorite throw blankets, for keeping them close at hand, and can be used in any room. Today I am going to show you how I built this blanket ladder for under $30!
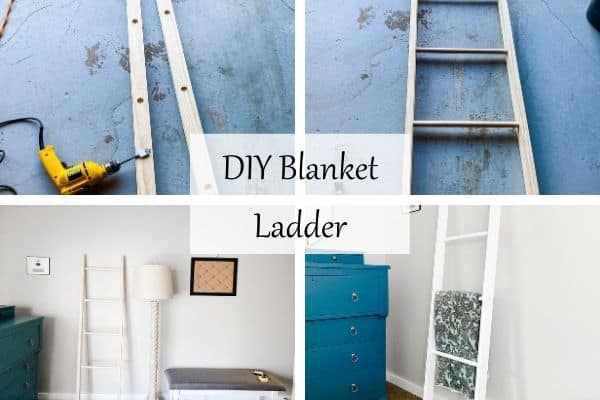
You can’t purchase one for that little. I used good wood and built it strong to hold anything you can throw at it. (Get it, throw at it-it’s for throws, I know terrible joke!)
*This post contains affiliate links. For more details see my full disclosure.
DIY Blanket Ladder
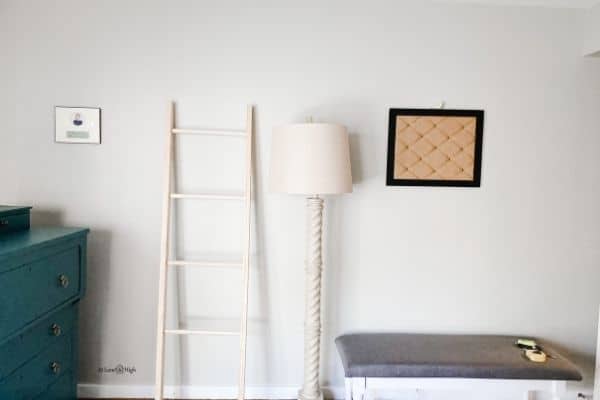
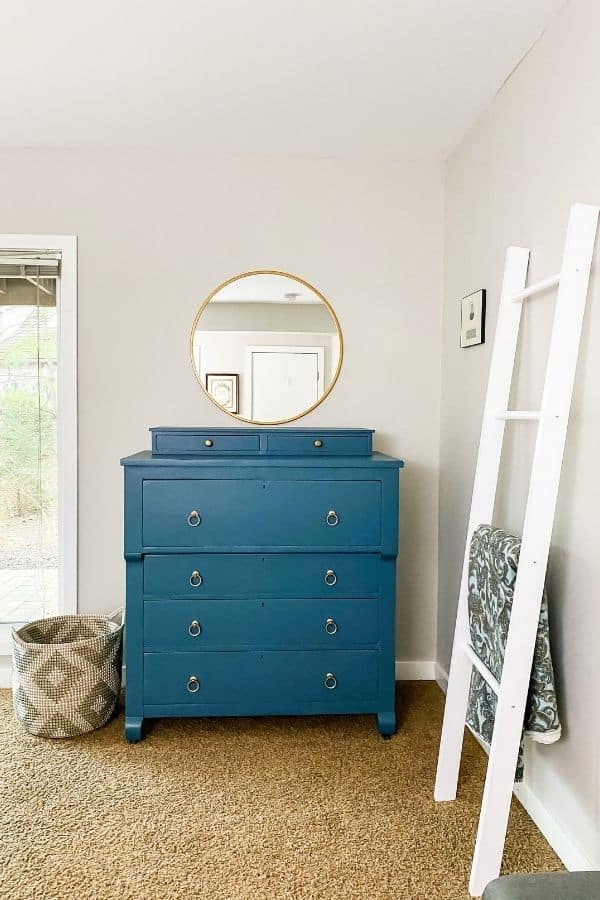
I built this blanket ladder and the bench for my guest bedroom in under 2 hours. It was so easy.
Materials
- 2-1×3 lumber
- 2-4 foot 1-inch dowels
- primer – This one is my favorite and I use it on all my DIY projects.
- paint – I use this paint for all my furniture projects, for painting baseboards, and for all my wall treatments. It holds up so much better than regular latex paint.
- wood glue
Tools
- Miter saw or miter box – I use my miter saw so much and recently bought a sliding compound miter saw. It’s been a game-changer!
- drill – I am partial to this electric drill. Cordless is such a pain with the batteries, they always seem to be dead when I need them.
- screws
- paintbrush – This is my favorite. I recommend always using a high-quality paintbrush and this is the best brand I have found.
- drop cloth – You can never have enough of these!
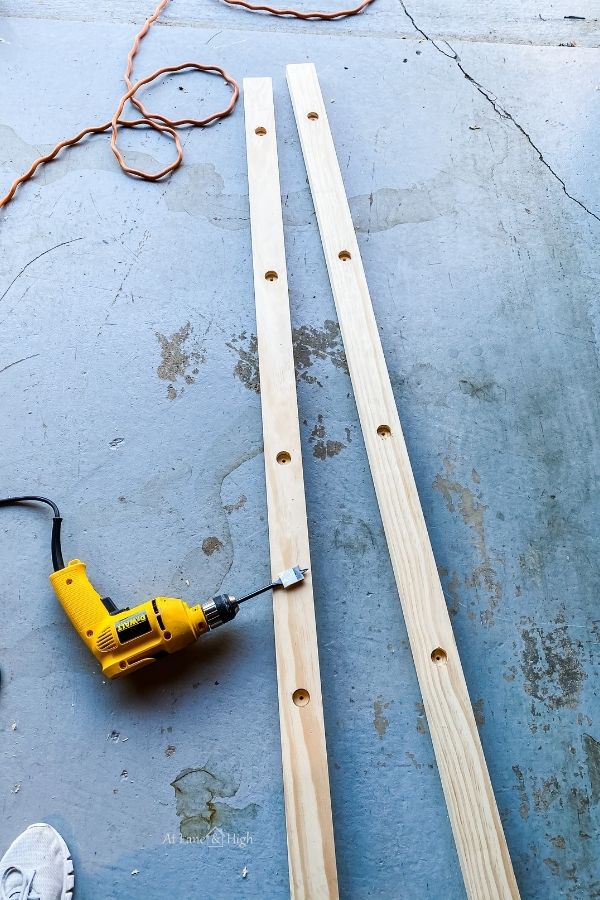
Step 1 – Cut your wood
First thing you need to do is determine how tall you want your ladder. I chose 6 feet. With my miter saw I cut 2 feet off the end of the 1×3’s.
On one end of the 1×3’s, I cut the wood at a 15-degree angle so when leaning the bottom feet would sit flat on the floor. You can change this to more or less depending on how far from the wall you want the bottom of the blanket ladder to sit.
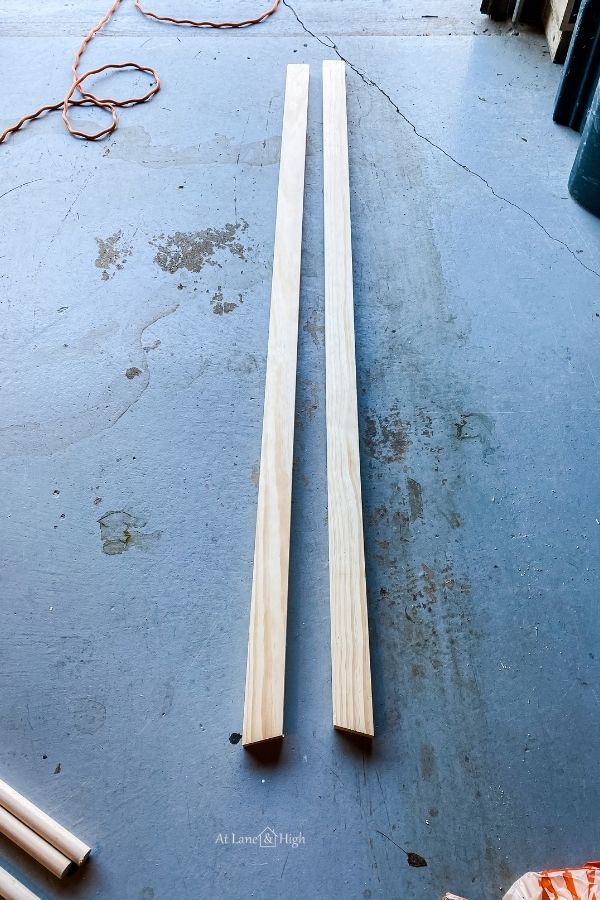
I wanted my rungs to be 18 inches wide so I cut the dowels to that and ended up with 4 rungs.
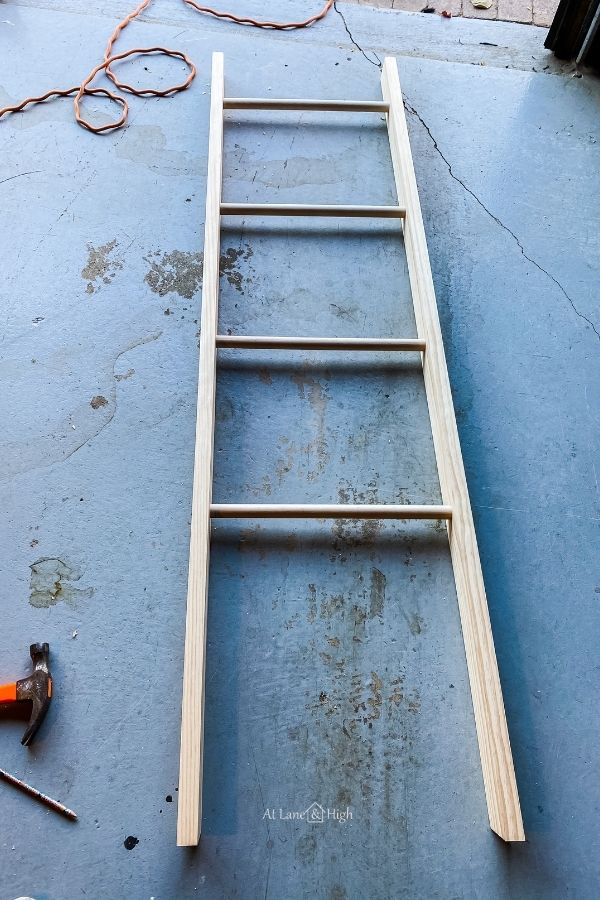
Step 2 – Asssemble the ladder
With the blanket ladder, you want to leave a decent amount of space under the last rung so there is room to hang a blanket.
I left 18 inches at the bottom, made all the rungs 12 inches apart and that left 6 inches between the top rung and the top of the ladder. You can adjust this to whatever you want for your space.
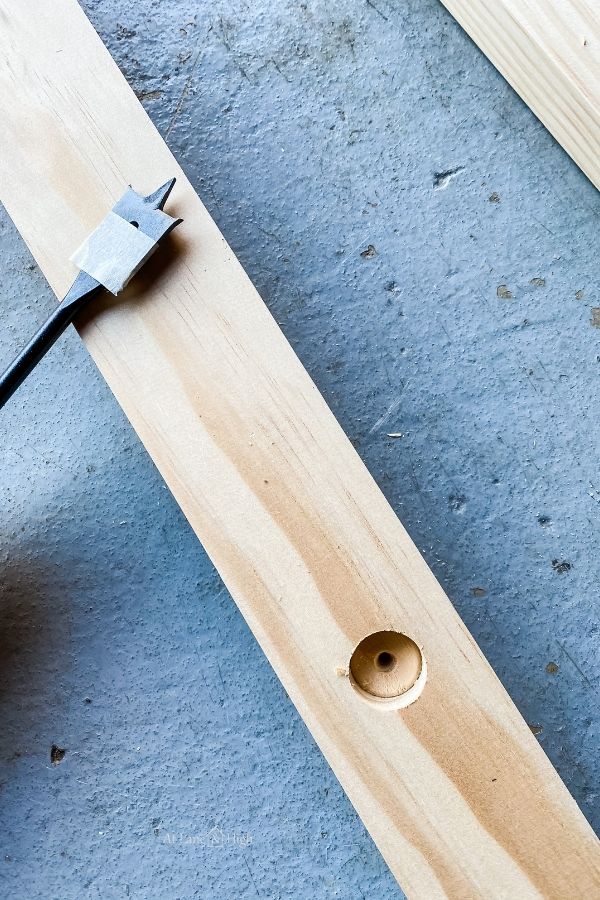
I made a pencil mark 12 inches apart on the 1X3’s where I wanted the rungs to go.
Then I took a 1-inch drill bit and drilled down 1/2 inch on each 1×3 where I wanted the rungs.
I did have to enlist my husband for this part because I needed someone to hold the ladder and another to screw the rungs to the side supports.
In order to know how far to drill down I marked the drill bit with a piece of tape, half-inch up so when I hit that mark I stopped drilling.
Would you like to save this?
Now put some wood glue inside that hole for added security. Just a dab will work. Wood glue is known to be just as strong, if not stronger, than screws and nails. So adding wood glue in this step is a very good idea.
Insert the dowels in each hole, put it on its side, and drill a screw into the outside of the supports into the dowel. I used a 1 1/2 inch screw. I couldn’t take a picture of this part because we needed all hands on deck.
Once you put a screw in each end of all the dowels you are done!
Step 3 – Prime and Paint
I decided to paint the blanket ladder white. So I primed the piece first to seal in any knots or color then put 3 coats of white paint.
I used an alcalyd paint for this project. This is the same thing I used on my DIY Built-Ins.
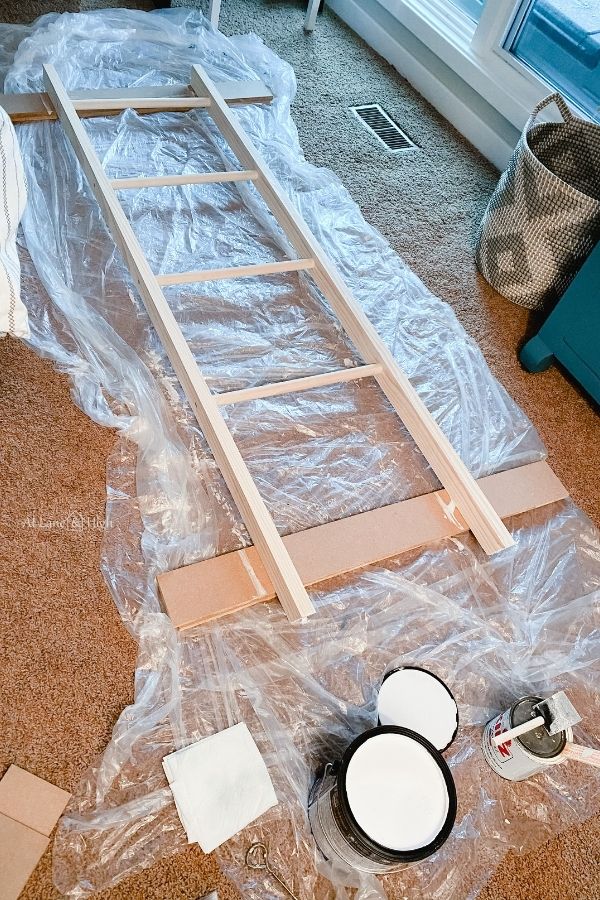
Let the blanket ladder sit for a few days to dry and cure, you don’t want any paint to get on any of your throw blankets.
Once it’s dry it’s time to put it to good use!
The DIY Blanket Ladder is Finished!

How to Make the Blanket Ladder for less money.
I made this blanket ladder for under $30. There are some ways to make it for less.
First of all I used 1X3’s. You could use 1X2’s instead. They are slightly cheaper.
I used dowels for my DIY blanket ladder. You can get 1X2’s in 8-foot length, cut 2 feet off to make the ladder 6 feet tall then use the 2 feet you cut off for the rungs. Cut them in half and your ladder will have 12 inch wide rungs.
That would cut the price of this in half. I really wanted the rungs to be round so I went with dowels, but if you wanted to cut the cost a bit you could go this other route.
Good luck and happy building!

I hope you are inspired to make your own DIY Blanket Ladder. It’s so easy and fun to create!
DIY Blanket Ladder {Step by Step Tutorial}
Learn how to build this DIY blanket ladder to have a stylish way to hang and display your blankets.
Materials
- 2 - 1x3 board
- 2 - 1 inch dowels in 4 feet length
- Primer
- Paint
- wood glue
- wood screws
- paintbrush
- drop cloth
Instructions
- Determine how tall you want your ladder and cut any extra off your 1X3 boards. Mine are 6 feet.
- Cut the bottom of the 1X3's at a 15-degree angle on your miter saw so it leans up against the wall easily.
- Decide how wide you want your rungs and cut the dowels accordingly. Mine was 18 inches.
- Mark on the inside of your 1X3's where you want your dowels. My bottom dowel was 18 inches from the bottom. The rest were 12 inches off the bottom dowel going up. I had 4 rungs and there were 6 inches left on the top of the 1X3s.
- Using a 1-inch drill bit drill a hole a half-inch down on all your marks.
- Put wood glue in the hole and add your dowels.
- Using your drill and wood screws drill into the dowels from the outside of the 1X3's to secure your rungs.
- Now it's time to prime your ladder.
- After the primer is dry paint the whole thing.
- Do as many coats as you need to get a nice smooth finish. Mine took 3 coats. Allow for dry time in between coats.
- Allow the ladder to cure for at least a few days before you add any blankets to ensure there is no paint transfer onto your blankets.

As a licensed Real Estate Agent and an avid home decorator, I strive to give my clients the very best I can when it comes to staging, selling, and decorating their homes. I have lots of experience with paint color choices and love to DIY my home so I can have everything just the way I want it. I share my ideas and projects with the world in the hopes that I can help others have their homes just the way they want as well.