
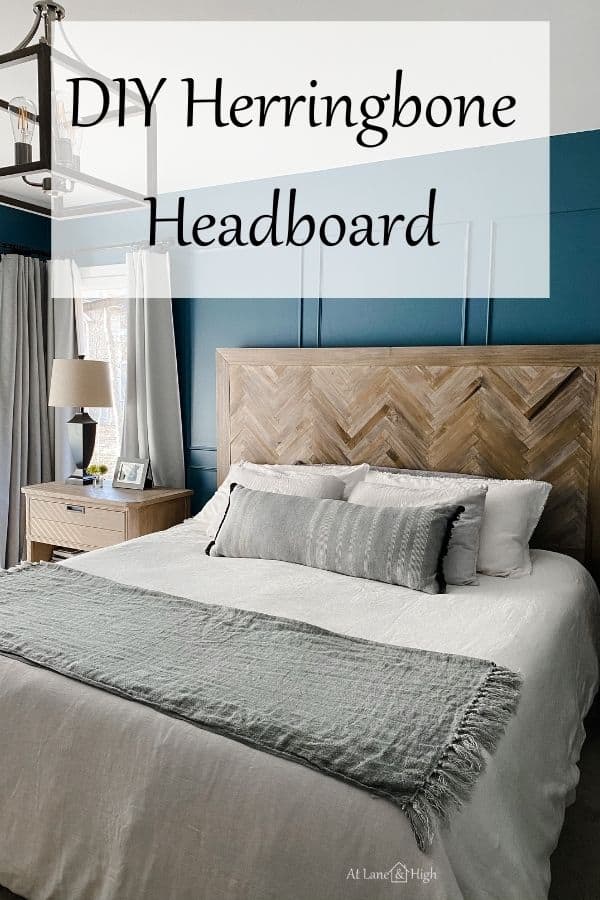
DIY Herringbone Headboard (and New Bedding)
This DIY Herringbone Headboard might honestly be my finest creation I have made yet. I love the products I used, the finish that was revealed, and the pattern of the herringbone.
Herringbone is one of my favorite patterns, if not my number 1 favorite. It’s such a timeless, classic pattern that will always be in style and popular.
My husband and I have been married for almost 25 years (this July will be 25!). In all that time we have never had a headboard on our bed. Yep, that’s right. Never!
We always put our time into making the common areas of the home, the spaces guests see, into amazing rooms. Also, we have decorated, and redecorated, our kid’s rooms over the years.
We never gave our personal space the time of day and this master bedroom had become a complete dumping ground! I hated it!
Over the last month, I have been working tirelessly to create a space that both my husband and I can walk into the room and say “Dang this room is gorgeous”.
I still have a few decor items to finish but I couldn’t wait to share the DIY herringbone headboard with you!
*This post contains affiliate links. For more details see my full disclosure.
DIY Herringbone Headboard
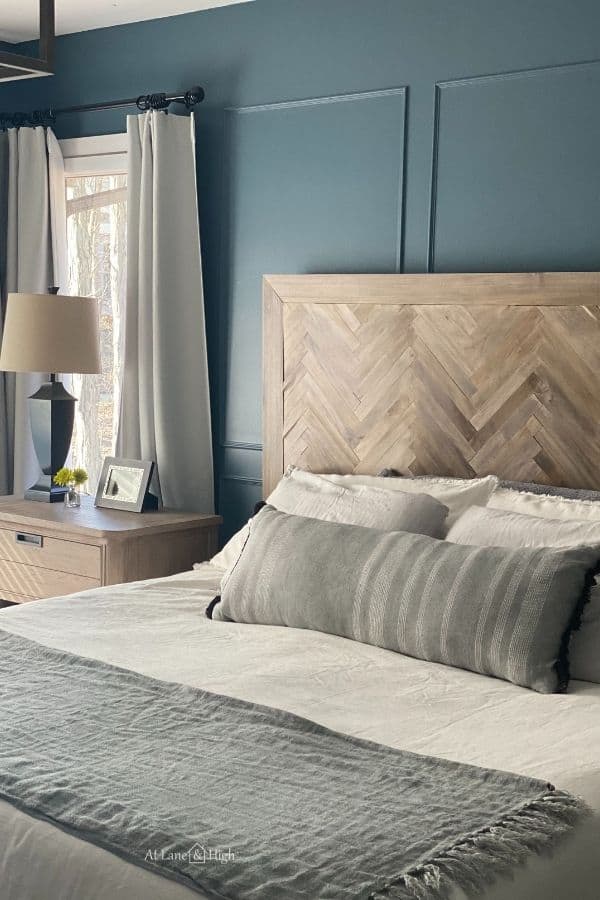
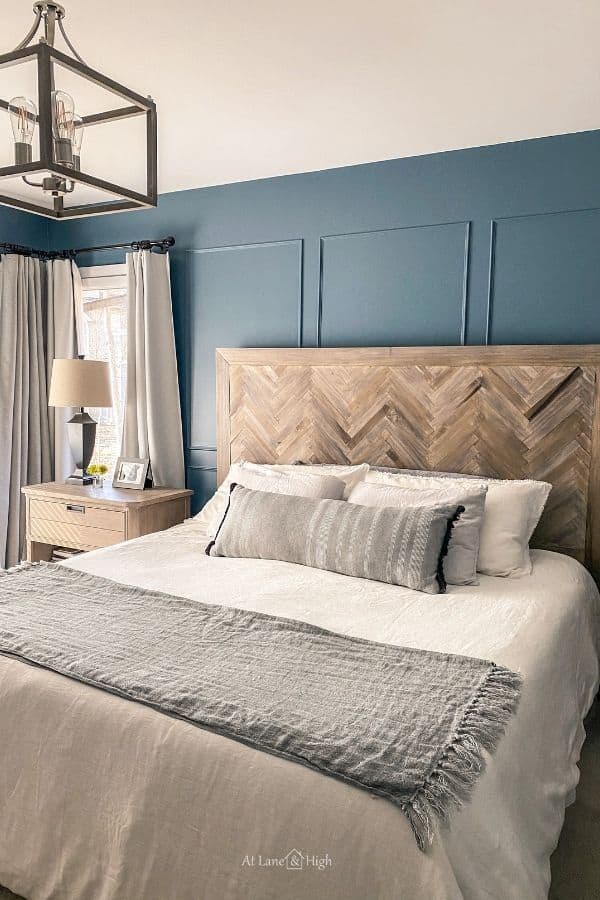
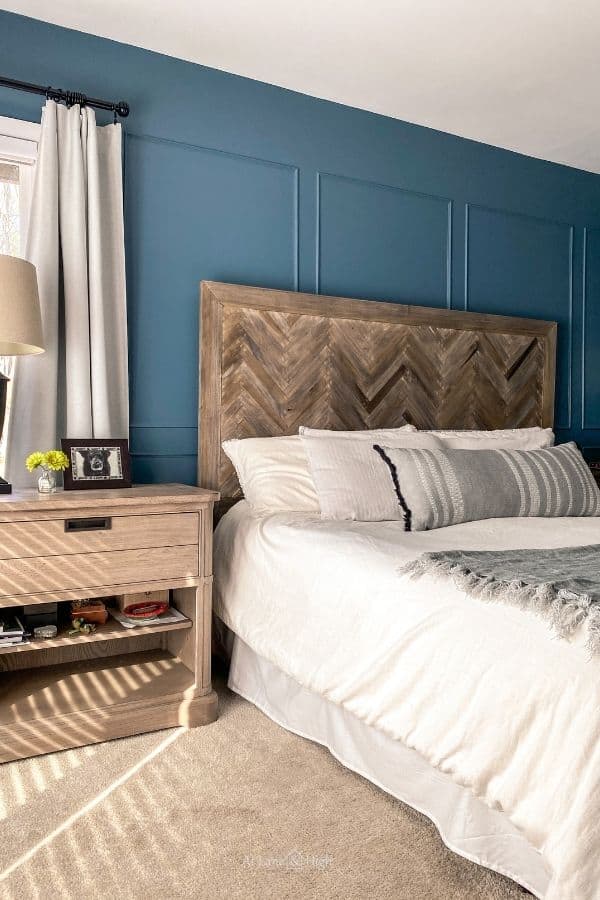
I know this is going to be a question so I will go ahead and answer it now, the paint color is Smokey Blue by Sherwin Williams. Isn’t it beautiful!
I didn’t want a bedroom that was gray on gray on gray….boring! This color definitely is not boring!
The headboard is made of poplar and plywood. I wanted to use white oak but it’s super hard to find and expensive! Poplar is a very similar wood so that’s what I went with.
Herringbone Headboard Inspiration
I searched and searched online for a herringbone headboard that I could use as my inspiration. A high school friend, Abbey, posted a picture on Facebook of her daughter and I geeked out over her headboard!
Her husband had made the headboard with white oak and it was stunning! Then I found this headboard on Pottery Barn’s website and it was sooo similar to the one Abbey’s husband made but had the finish I wanted for my room.
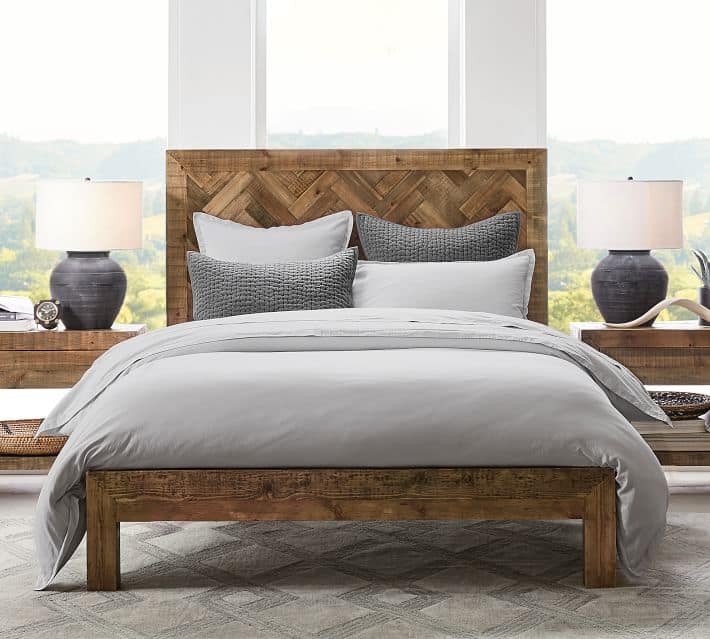
Isn’t it gorgeous! I love the pattern, the finish and the frame around the herringbone pattern. I plan to only make the headboard but I wanted mine to be exactly like this.
Materials
4×8 sheet of 1/2 inch plywood
1/4 x 4 inch by 4 feet pieces of poplar
Weatherwash Stain – This might be my new favorite stain!
Remember 1×4 wood is not 4 inches wide. Because of the way wood is manufactured the width is actually about 3.5 inches.
Tools
Table Saw – So thankful I have this saw. It was inexpensive.
Miter Saw – I just got a sliding miter saw and I am so in love with it!
Nail gun – Best nail gun ever! This was a fabulous purchase, came with two nail guns and a stapler.
Kreg Jig – One of my favorite tools. I have been able to use this for so many projects, I just love building furniture with this thing!
Kreg Jig screws
The center of the headboard is plywood with the 1/4 inch poplar cut down to make the herringbone pattern on top (nailed in with the nail gun). The frame is made of 1×4 poplar and this is what is screwed into the metal bed frame on the outside edges.
DIY Herringbone Headboard Plan
The first thing you need to do is decide how tall you want your headboard. I decided I wanted mine to be 5 feet tall.
Then decide where you want your headboard to start, distance from the floor. I wanted mine to start 22 inches off the floor. I determined this by taking a tape measure and seeing how far off the floor my mattress is.
So my headboard goes up to 60 inches off the ground but starts 22 inches off the ground, which makes the center headboard portion 38 inches tall. This includes the frame which consists of 1×4 wood on the top and bottom. (That’s 7 inches of the frame.)
For the width I measured the distance in between the metal bed frame where the headboard will be screwed in. This was 73 inches.
The plywood that will be the base for the herringbone pattern will then be 73 inches wide and 31 inches tall.
The frame around the edges adds 7 inches so the entire headboard when finished will be 80 inches wide and 38 inches tall.
How to Build the Herringbone Headboard
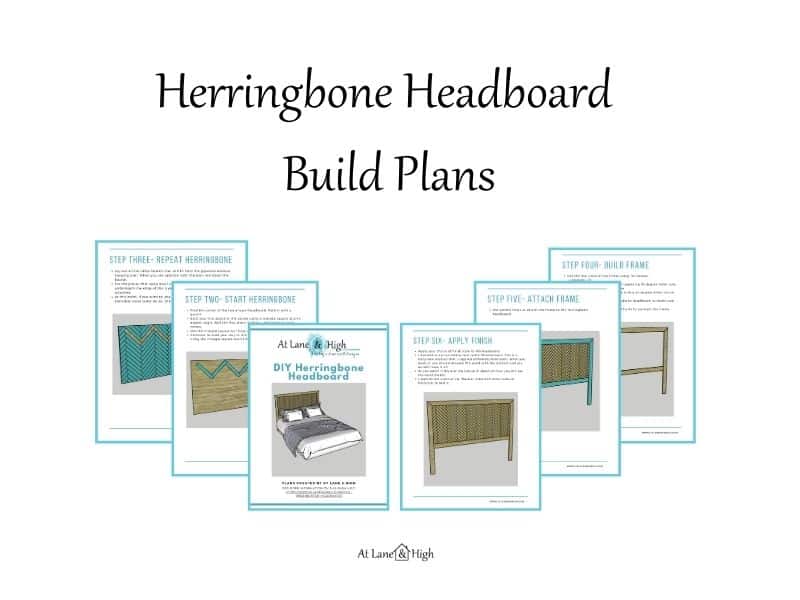
If you are interested you can print these build plans right at your computer at home!
Step 1 – Cut the wood
***As always safety first! Please wear proper eye and ear protection when cutting wood.
Have the plywood cut to your dimensions. This is best done at the store if you can. We didn’t and the cut we made on the longer length wasn’t exactly straight, I wish we would have had this done at Home Depot.
Cut your 1/4 inch pieces of poplar down to your desired width and length. Mine ended up 1 3/4 inches wide by 12 inches long.
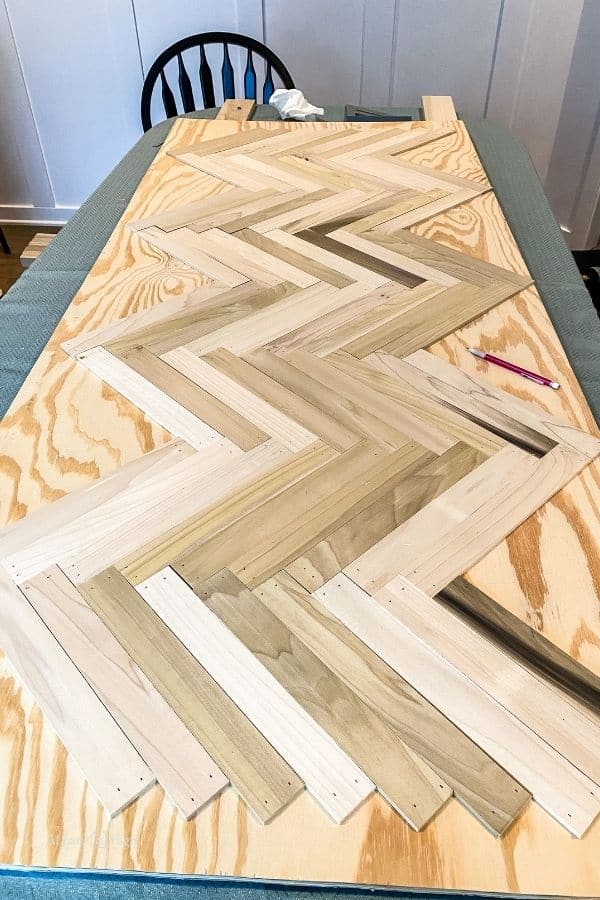
Step 2 – Create the Herringbone Pattern
Find the center of the top of your headboard. Mark it with a pencil.
Start your first board in the center using a triangle square. Using your nail gun, nail the first piece in place. I did a nail at each corner.
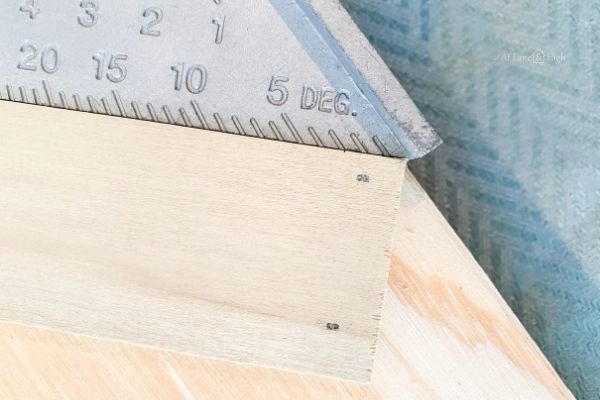
Use the triangle square for lining up the next one too.
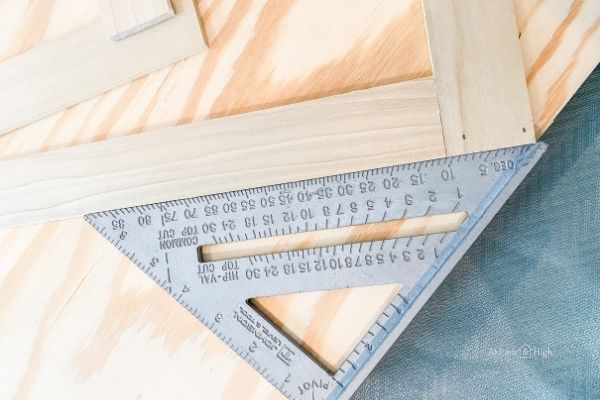
Continue to work your way to the right and left of the center, using the triangle square each time.
Would you like to save this?
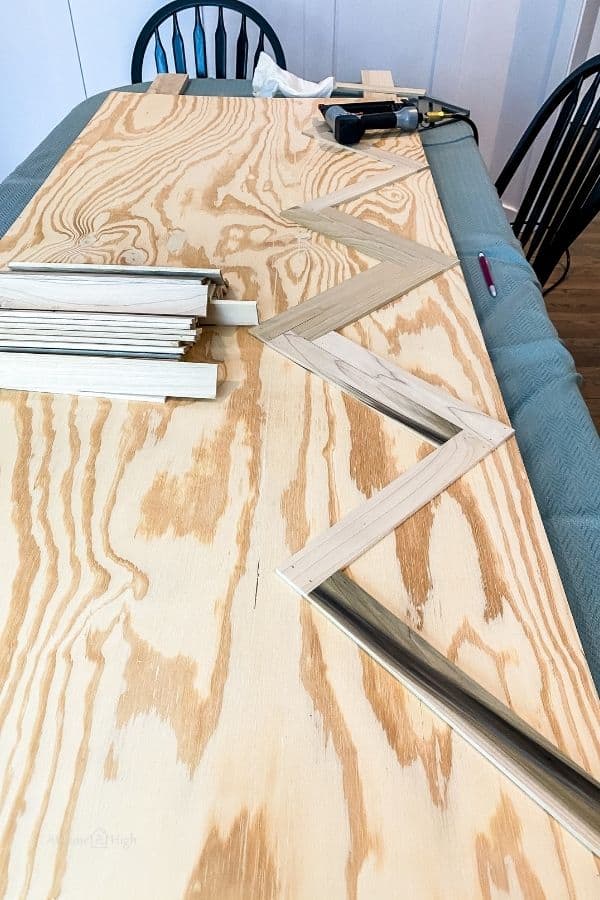
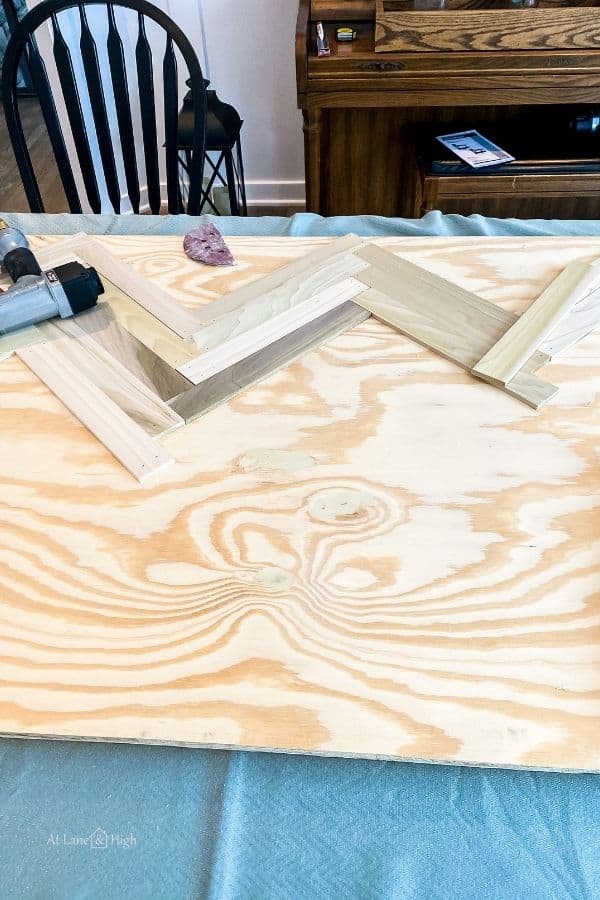
Once you get all the way down lay out all the other boards that will fit onto the plywood without hanging over. When you are satisfied with the look nail down the boards.
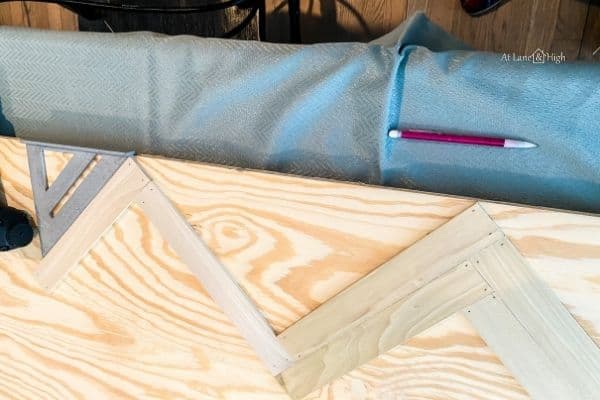
How to handle the edge pieces.
For the pieces that hang over, I used my pencil to mark underneath the edge of the plywood then made the cuts and attached them.
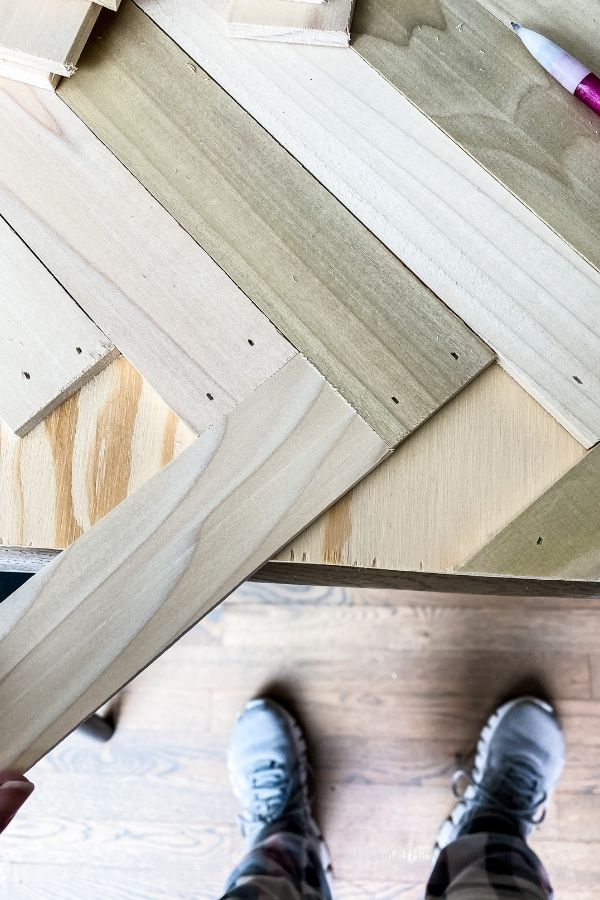
This was the most time consuming part but once you are done the look is so amazing!
On a side note, this is where my miter saw decided to break! UGH! Set me back a couple weeks and left my poor dining room a disaster, LOL. Not much I could do about it though!
At this point, if you want to, you can fill the nail holes with stainable wood putty do so, and sand it down once it’s dry.
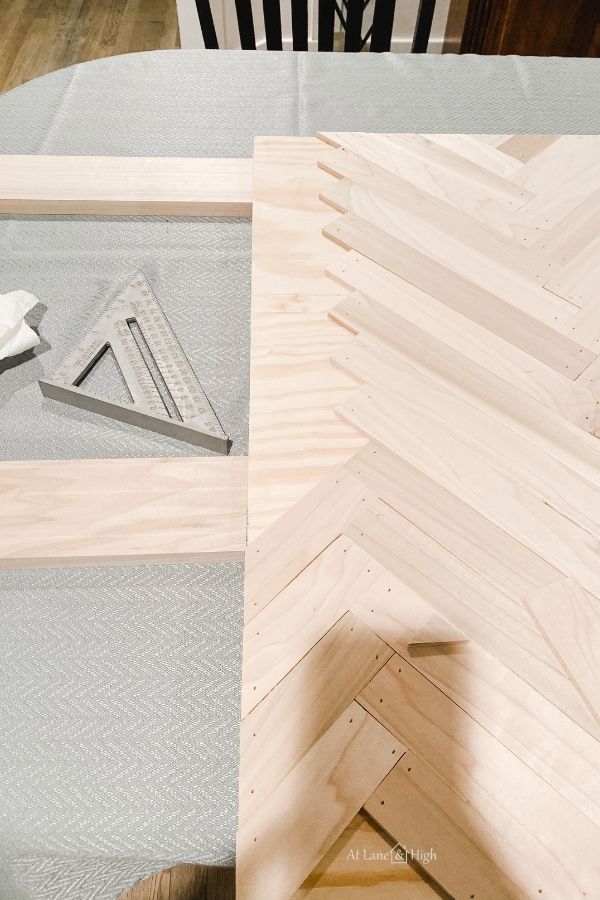
Step 3 – Make and attach the frame.
I made my frame 60 inches tall. I mitered the corners at the top and did straight cuts at the bottom.
Once your cuts are made lay everything out to make sure you are happy with them.
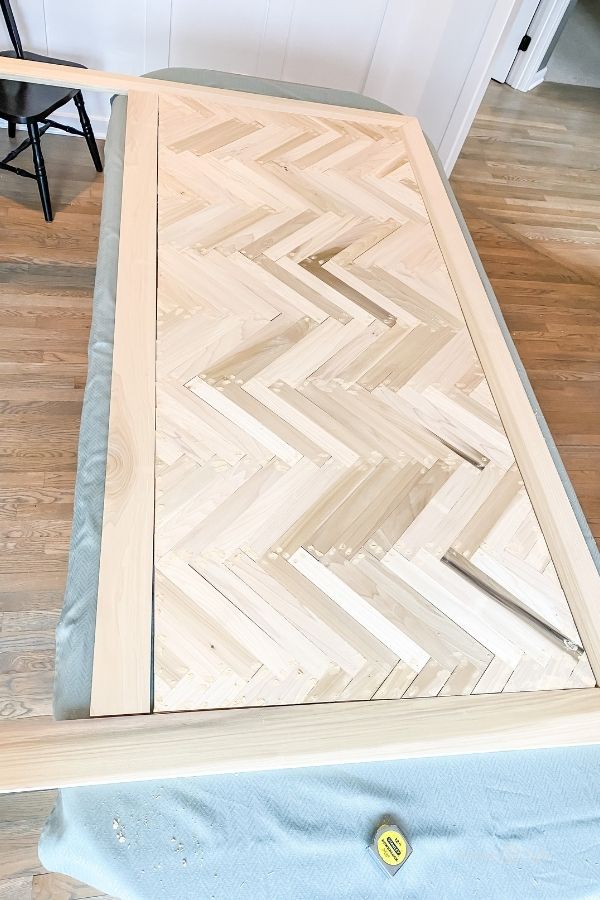
Once you are happy with the frame use your kreg jig to make pocket holes in the 1×4’s to connect to the plywood, as well to each other where they meet.
Step 4 – Apply your finish
There are a number of different things you can do to finish off your headboard. I decided to try something new called Weatherwash.
This is a fairly new product that is applied differently than stain. When you apply it you should saturate the wood with the product and you do NOT wipe it off.
As you watch it dry over the course of about an hour you will see the wood darken. It’s pretty cool!
It’s made to have your wood look like weathered wood but they have several different color finishes.
I chose Rusted because I liked the way it looked on the poplar wood. On the website they have examples of each color and how it looks on different kinds of wood.
I applied 2 coats of Weatherwash and three coats of Polycrylic to seal it.
*You can’t buy Weatherwash in the stores yet, it’s too new. You can order it from Home depot (link included) or right from their website.
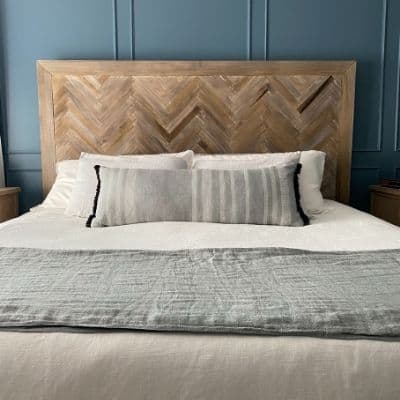
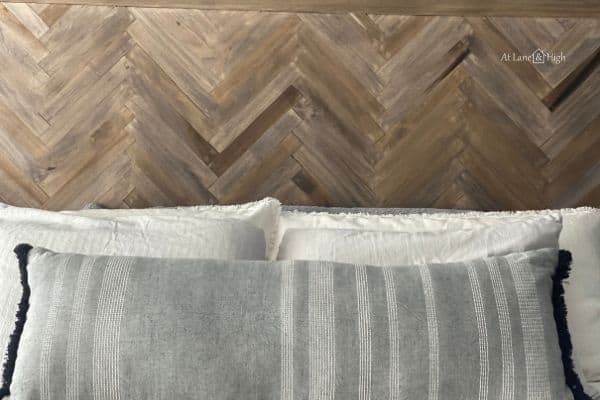
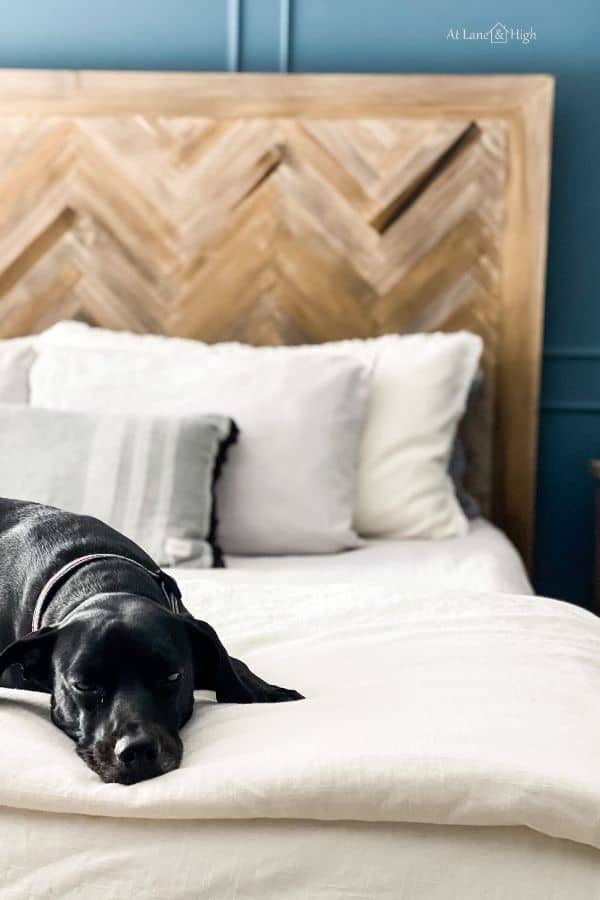
The Finished Herringbone Headboard
This is the finished headboard attached to the bed. I simply love how it turned out!
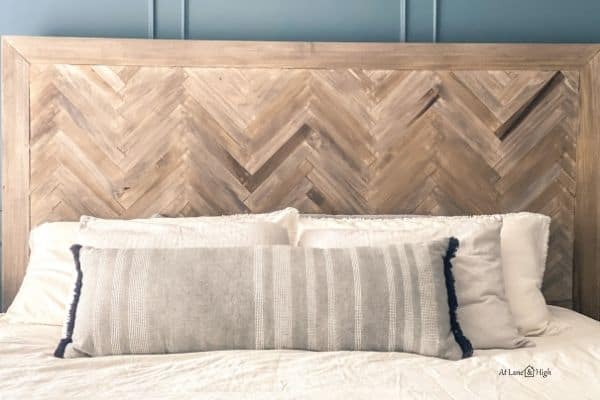
What do you think? Is it similar to the Pottery Barn headboard?
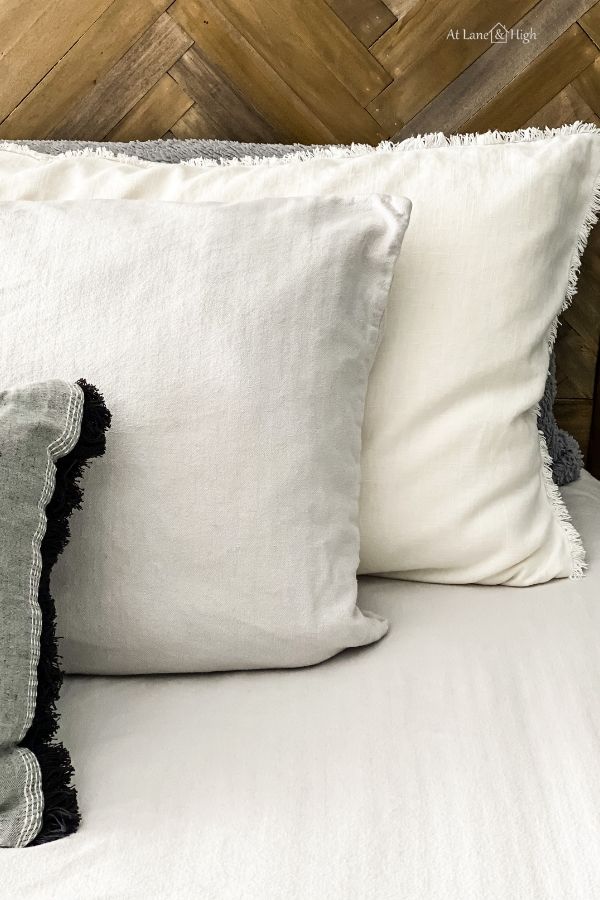
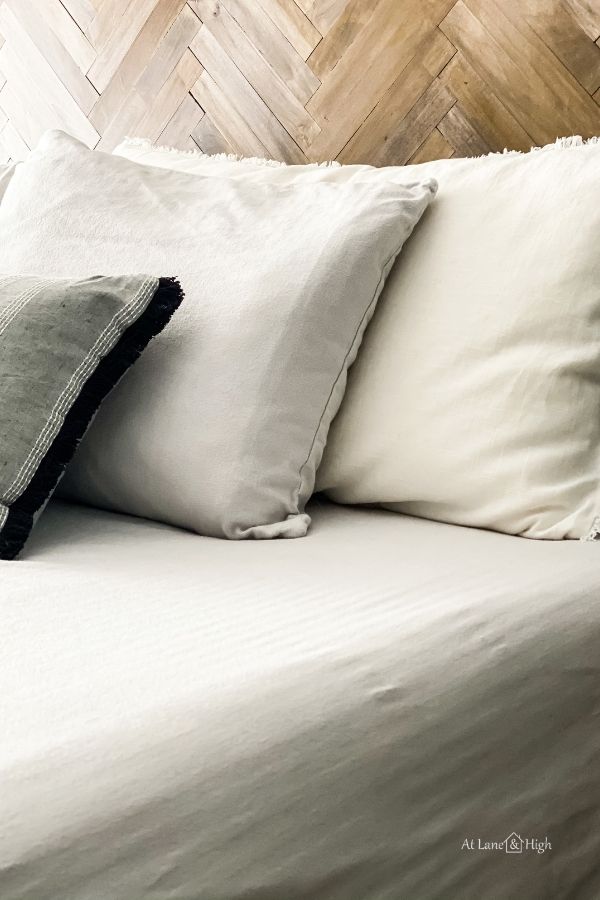
The New Sheets
If you are redecorating a bedroom then you have to get new bedding!
The sheets are Boll and Branch flannel sheets in silver pewter. I was pretty excited when they approached me about supplying the sheets for this project because I had seen the commercials and wondered what they were like.
Let me tell you they do not disappoint! These sheets are amazing!
I love the feel. They are soft and the weave on the sheets are very tight. Flannel sheets do not usually have a thread count but if they did these sheets would have a count in the billions!
Because of the tight weave, the sheets feel not heavy but tight, very well made.
Let me tell you, my husband loves these sheets. He is a Marine who never used to even sleep under sheets (because he didn’t want to make the bed, lol). He gets upset when I change to another set of sheets if I need to wash these, he likes them that much!
I also love the size of the sheets. I hate it when you get under the sheets and then they barely cover you.
My husband uses a body pillow and my dog also sleeps under the covers. Add that to your normal body and these sheets not only cover you but they come down the sides of the mattress still!
The New Comforter and Duvet
The duvet is the Casaluna duvet with the Casaluna duvet insert. I chose this because the price was really good and the reviews for this line of products at Target were awesome!
When we decided to go with the dark and moody walls I decided we needed to go white on the bedding, even though we have a black dog LOL. I picked up the lumbar pillow at Target too, it’s from the Hearth and Hand line.
I think overall even our dog Lilly approves of the master bedroom renovation, what do you think?
Don’t forget you can get the plans for this DIY Herringbone Headboard and print them out right at home!
Related Furniture posts:
- DIY Blanket Ladder
- The Best Wood Stains for Pine
- How to Build a Bench From Scratch
- DIY Built-ins Using Big Box Store Cabinets
- How to Make a Wood Stump Side Table
- How to Fix a Missing Chunk of Wood with Bondo

I hope you love my new DIY Herringbone Headboard as much as I do! I am so excited to have a room that actually looks like an adult lives in it and not a teenager! Haha.

As a licensed Real Estate Agent and an avid home decorator, I strive to give my clients the very best I can when it comes to staging, selling, and decorating their homes. I have lots of experience with paint color choices and love to DIY my home so I can have everything just the way I want it. I share my ideas and projects with the world in the hopes that I can help others have their homes just the way they want as well.


I made this! Thanks for the inspiration! And I love my new Kreg Jig. I can’t seem to attach a pic to this though or I’d show you!
That is wonderful! I am so happy to hear this!!!
Can you show the back of the headboard? I’m not sure I’m understanding how it all came together?
Hi Marie. The back is just the plywood that the small pieces are attached to. The small pieces of wood are attached to the plywood and then it’s all framed out with the 1X4’s.