
How to DIY Industrial Pipe Shelves
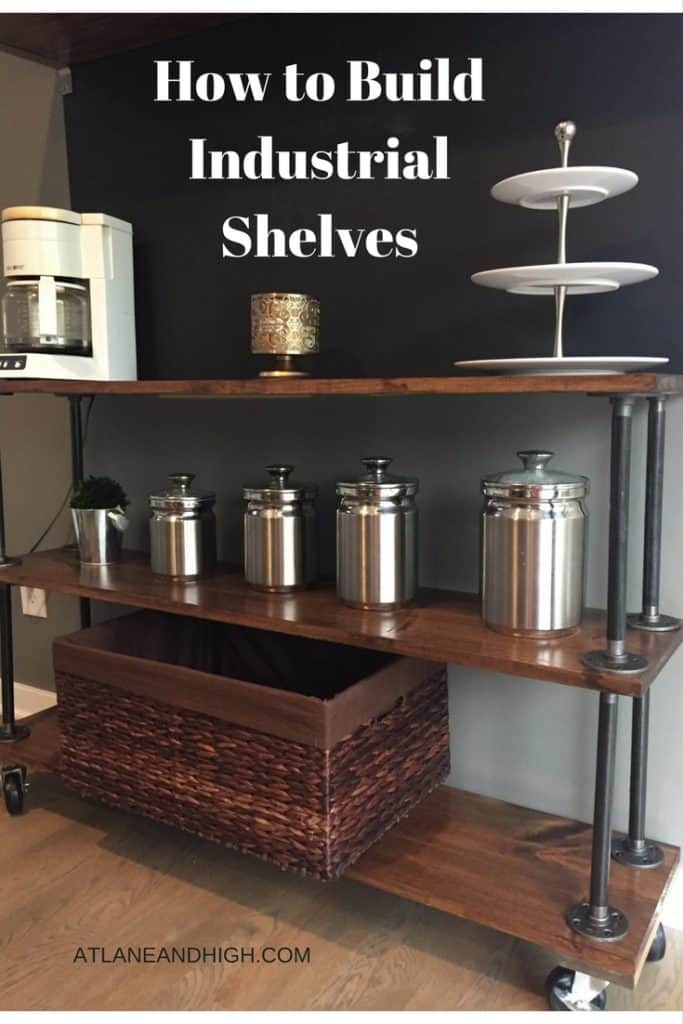
These DIY Industrial Pipe Shelves added a great modern farmhouse vibe to my breakfast nook. Today I am sharing all the steps so you too can create these Industrial Pipe Shelves.
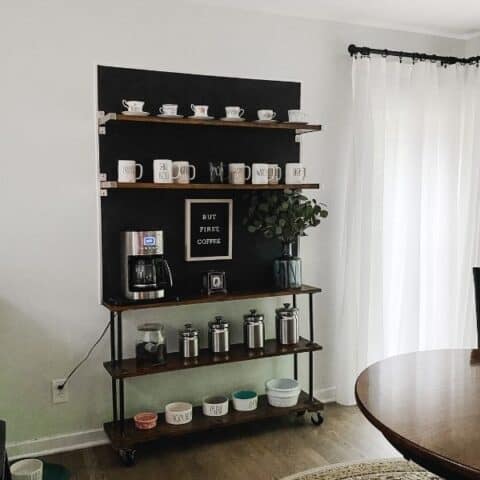
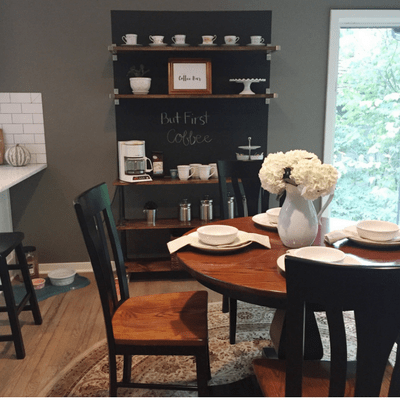
I recently participated in the $100 Room Challenge and I created an Industrial coffee bar in my breakfast nook. Rustic and Industrial looks are very hot right now in home decor.
I searched high and low for a set of shelves and couldn’t find anything. I needed something that wasn’t very deep due to spatial concerns, I didn’t want any shelves that would crown the kitchen table.
So I decided to build my own!
*This post contains affiliate links. For more details see my full disclosure.
DIY Industrial Pipe Shelves
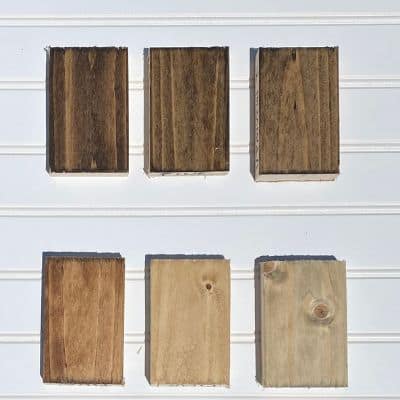
The first thing you need to decide is how you want your shelves to look. What kind of wood do you want to use, what color stain will you use, and what dimensions do you want it to be?
You see these are really important for your final product. I decided that I wanted my shelves to be on castors so I could move it around if I wanted to.
I also decided to use 1×12’s as the wood so that the depth would be less than 12 inches. My husband and I decided to center the shelving unit on the wall between the kitchen counter and the window.
Materials
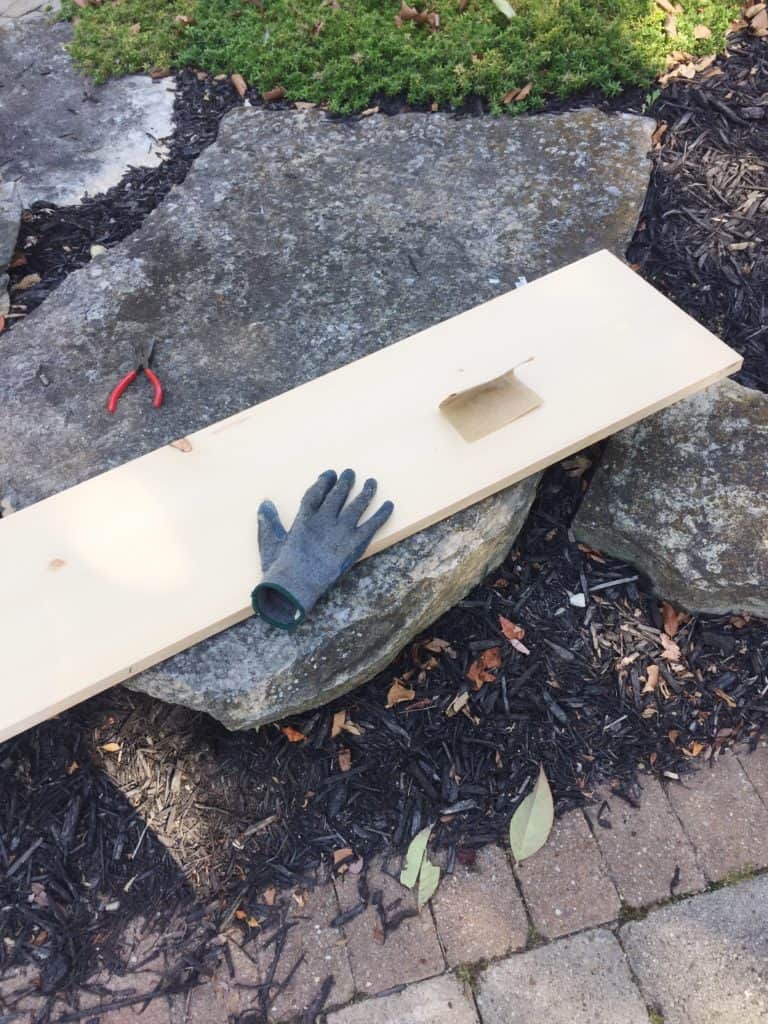
- 1X12 foot board in 12 foot length that I had cut at the store down to 3 four foot boards.
- Stain – I used Special Walnut by Minwax, it’s one of my favorites!
- Polyurethane – I used this one by Minwax
- 8 Twelve inch pipes (called pipe nipples….why I have NO idea) – If you want your shelves to be taller you can get 18 inch or shorter you can get 8 or ten inch…..its customizeable!!!!
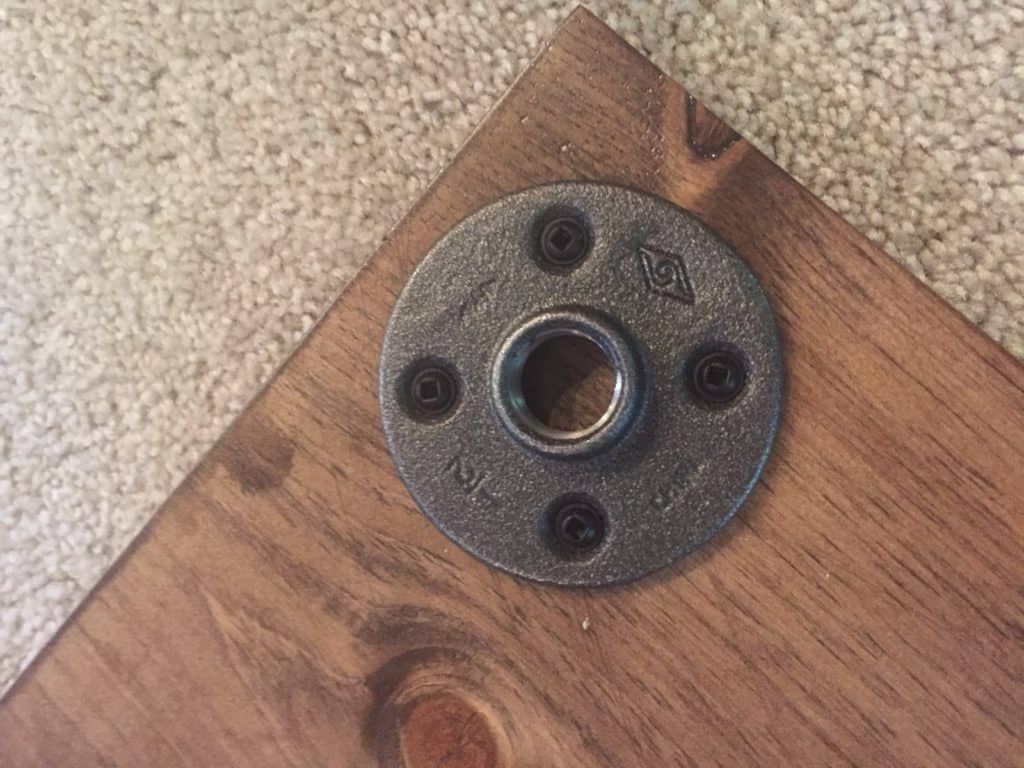
- 16 flanges – I found the cost of these at Home Depot and Lowes, even Menards to be a bit high. I mean, when you buy one $4.50 isn’t a big cost but when you need 16 at $4.50 that kind of blows your $100 budget. So I found mine at Supplyhouse.com for waaaaaaaay cheaper!
- Casters for the bottom. This is totally optional. You could leave the board on the floor, you could add feet, it’s all up to you! I like the look of casters though, it’s more industrial in my opinion.
- Wood screws
- Drill
- Hammer
Step 1 – Prepare the Wood
Take your boards and give them a good sanding. I started with 80 grit, then 120 and finished with 220 for the smoothest surface. You have to sand both sides of your board.
Then you need to lay them out, either on saw horses or on the ground, I laid them out on my garage floor with a blanket and garbage bags under to catch any drips. You need to stain both sides of your boards.
Follow the directions on the stain, you can do multiple coats if you want for a darker color.
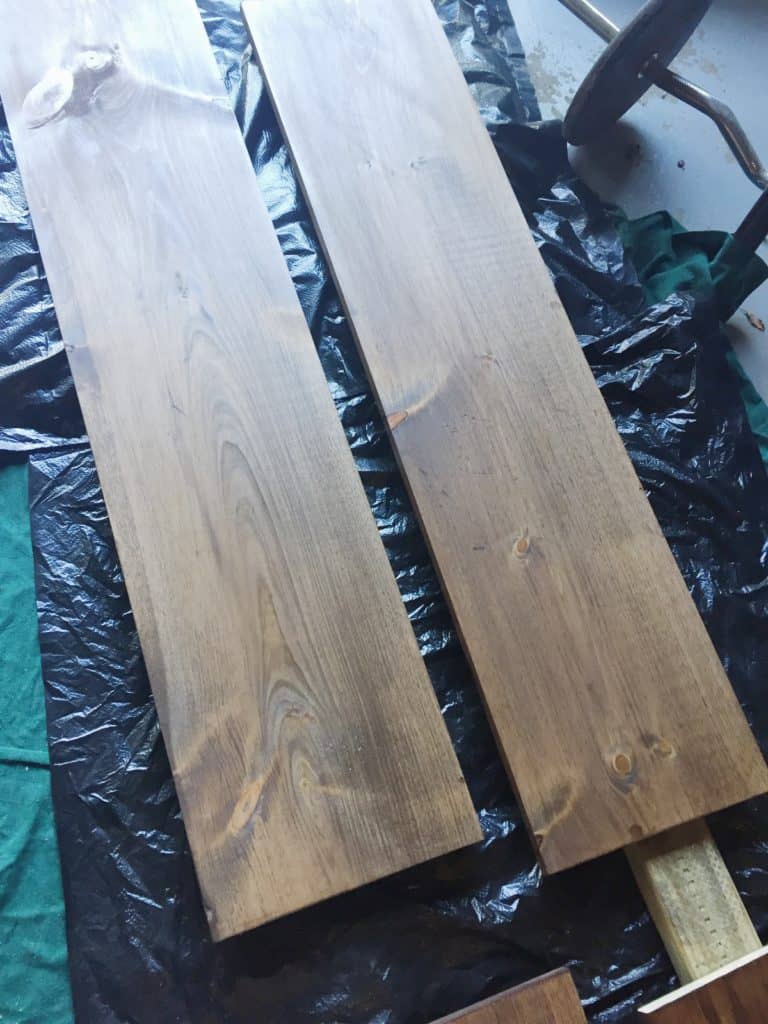
Once the stain is done and you let it dry for 24 hours and time to poly! Follow the directions on the can.
You need to do a light sanding in between coats with 220 grit sandpaper.
I did 3 coats of poly and I kind of wish I had done 5…just because it’s used as a coffee bar so there will be water getting on the top shelf. If you aren’t using it for a coffee bar then you don’t need to do 5.
Make sure you let it dry for 24 hours in between coats.
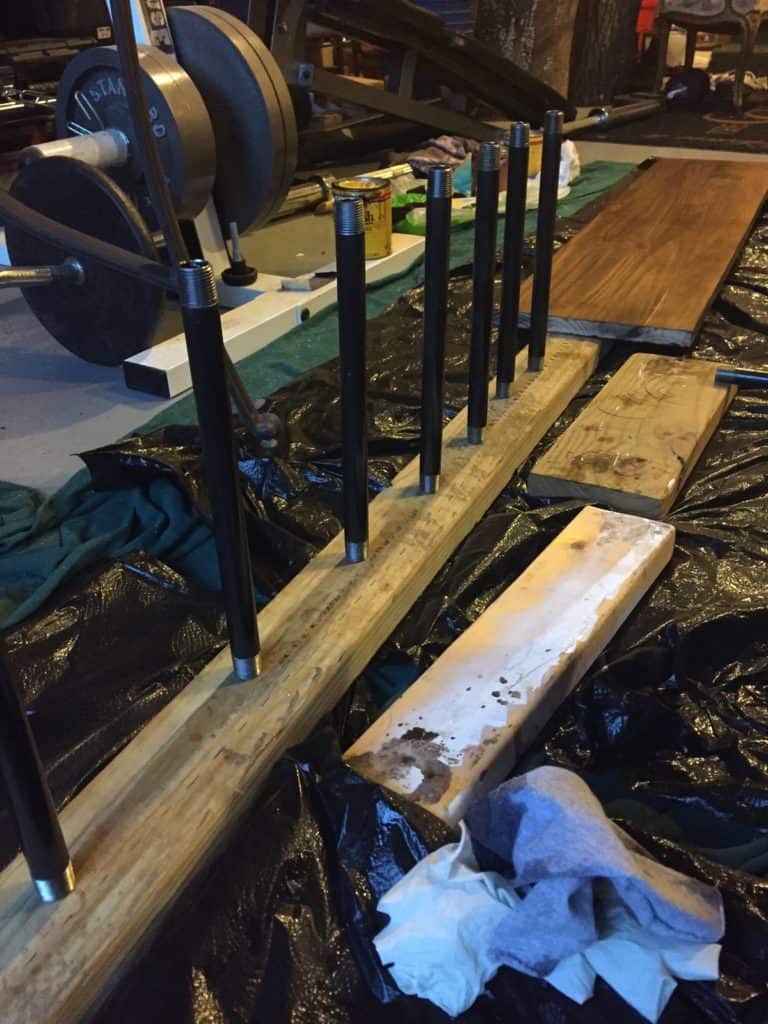
Step 2 – Prepare the Pipes
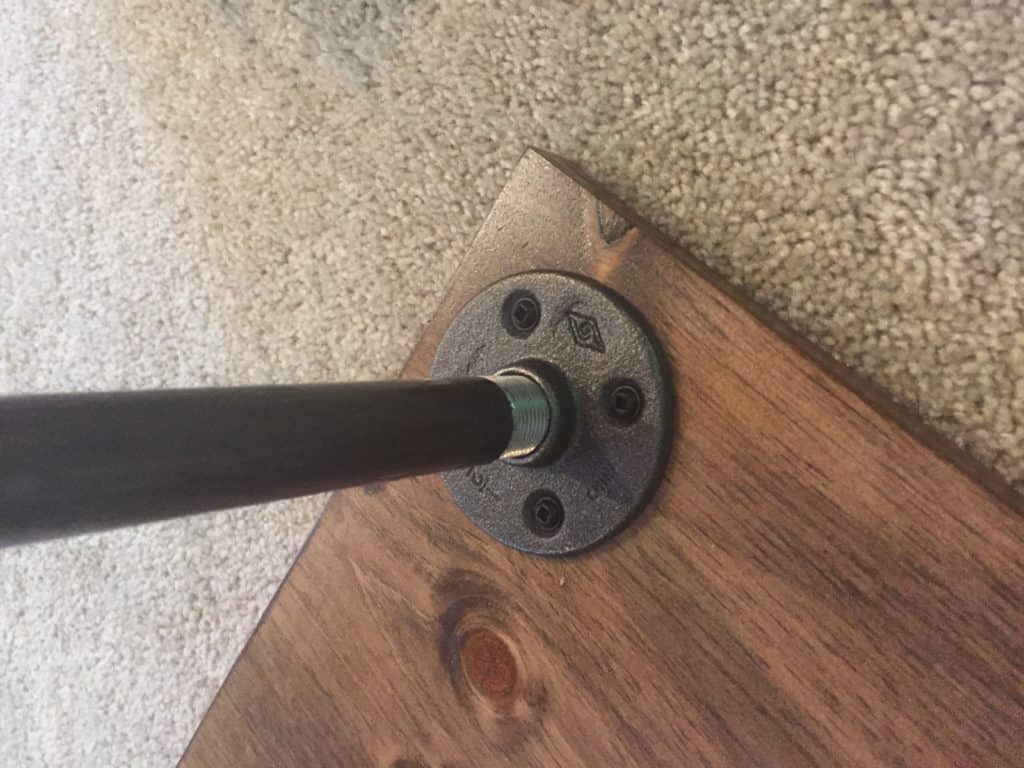
Poly the pipes….I know you are like whaaat? The pipes will rust if you don’t treat them with a clear coat. I used the same poly that I used on the boards.
Just make sure you don’t get it on the threaded part of the pipes. Let dry at least 24 hours. You can do this at the same time as when you poly the wood if you have the room.
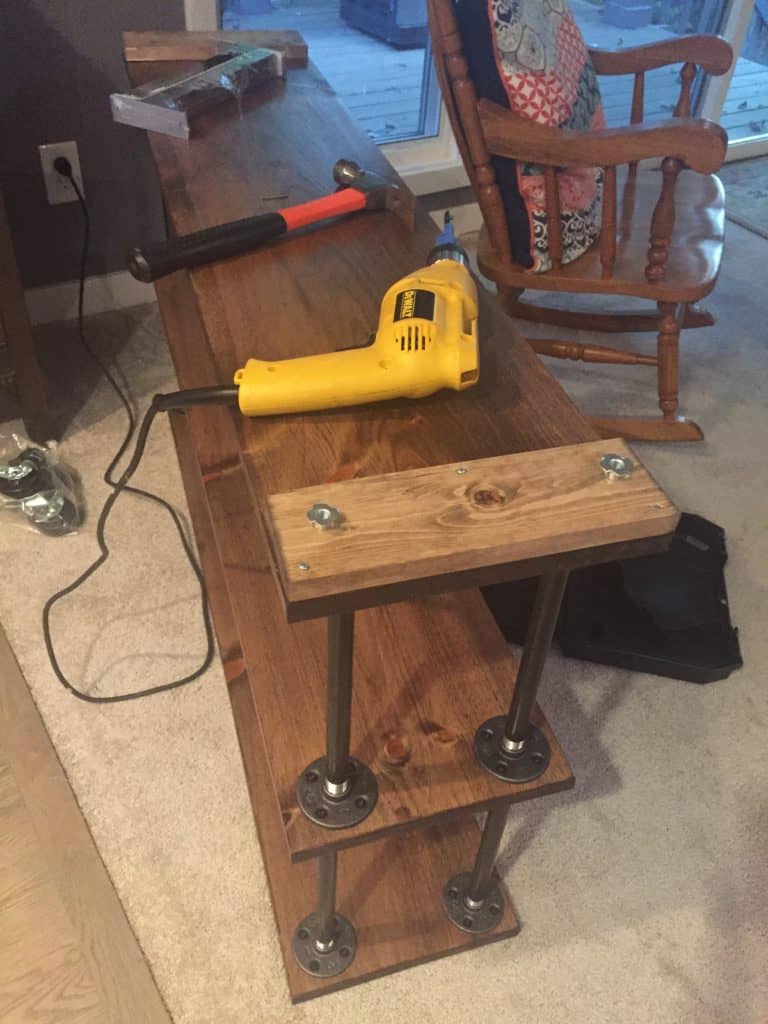
Step 3 – Put Everything Together
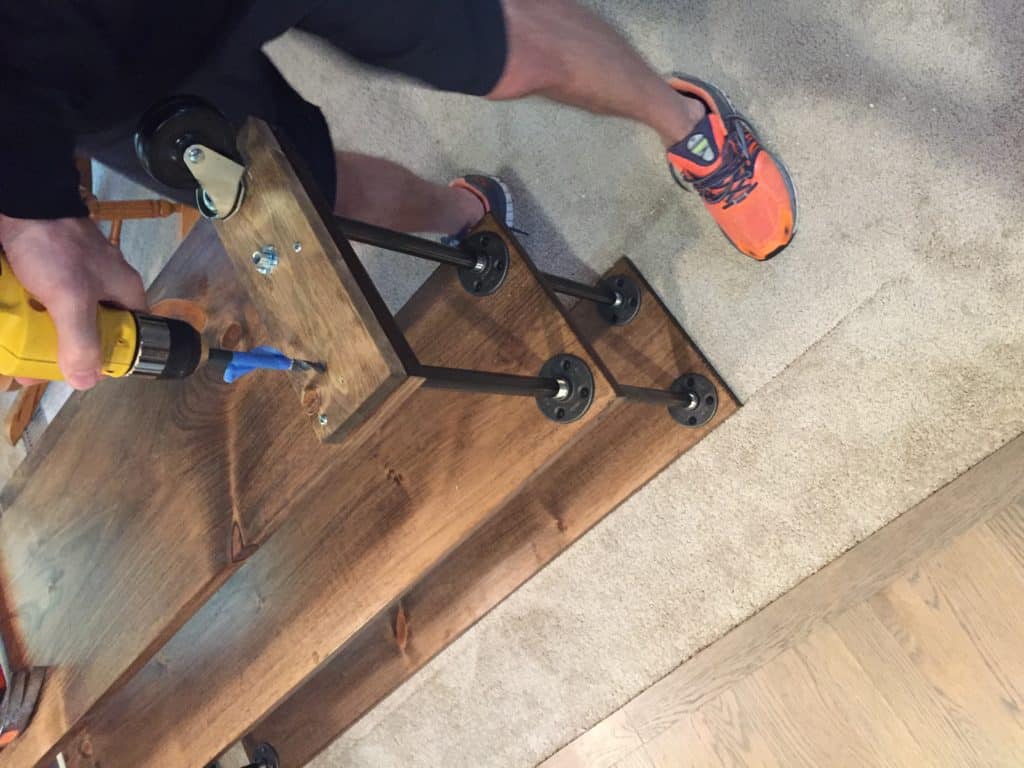
ASSEMBLY!!! This is totally the fun part! Get yourself some good wood screws, I went to the woodworking store near my house. Make sure the screws are long enough to go into the wood but not so long they will go completely through.
Would you like to save this?
Screw a flange into the corner of one board, then another corner until all 4 corners have a flange screwed in. Attach the pipes and attach the other flange to the pipe.
Now you are going to turn it over and put the flanges on top of another board then screw it in. Then repeat this with the last board, attaching the flanges, then pipes and flip it over on top of the set of 2 shelves you already have together and attach.

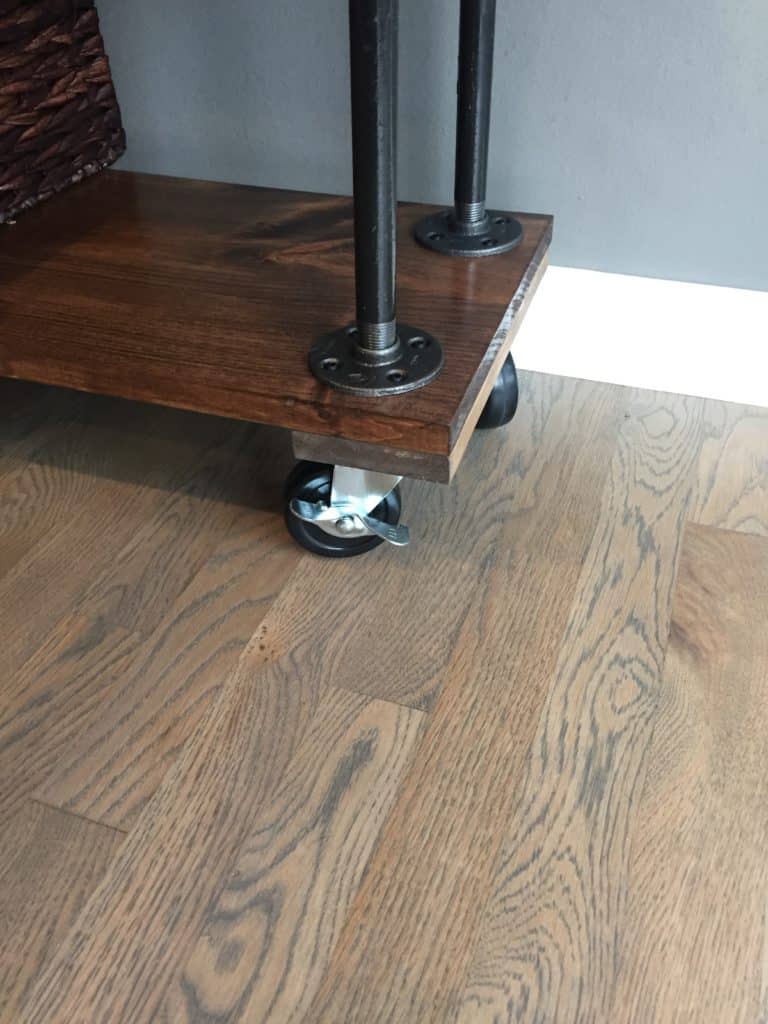
Step 4 – Add The Casters
Casters…I highly suggest you get casters like this one. They screw straight into the bottom with 4 screws and your rolling, literally!
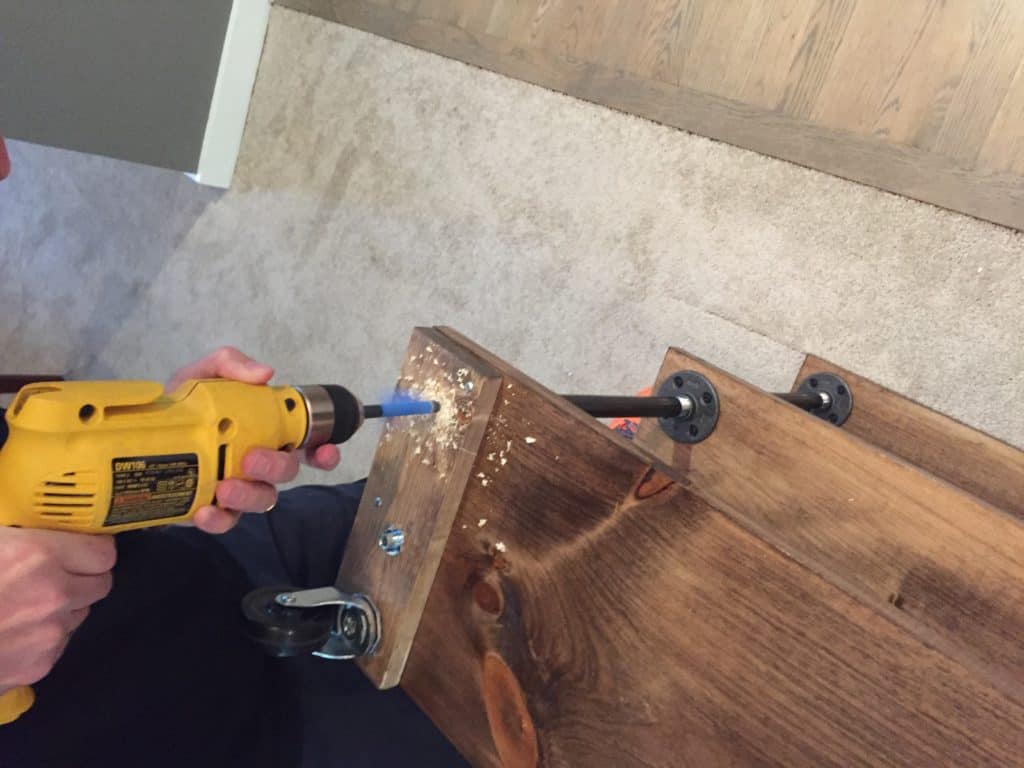
Unfortunately, I had some unused casters that I needed to use and they weren’t nearly as easy to attach. First I had to add another board to the bottom to make the wood thicker. the reason I had to do that was the threaded section on the caster was longer than the one-inch board, it was about 1 1/2 inches.
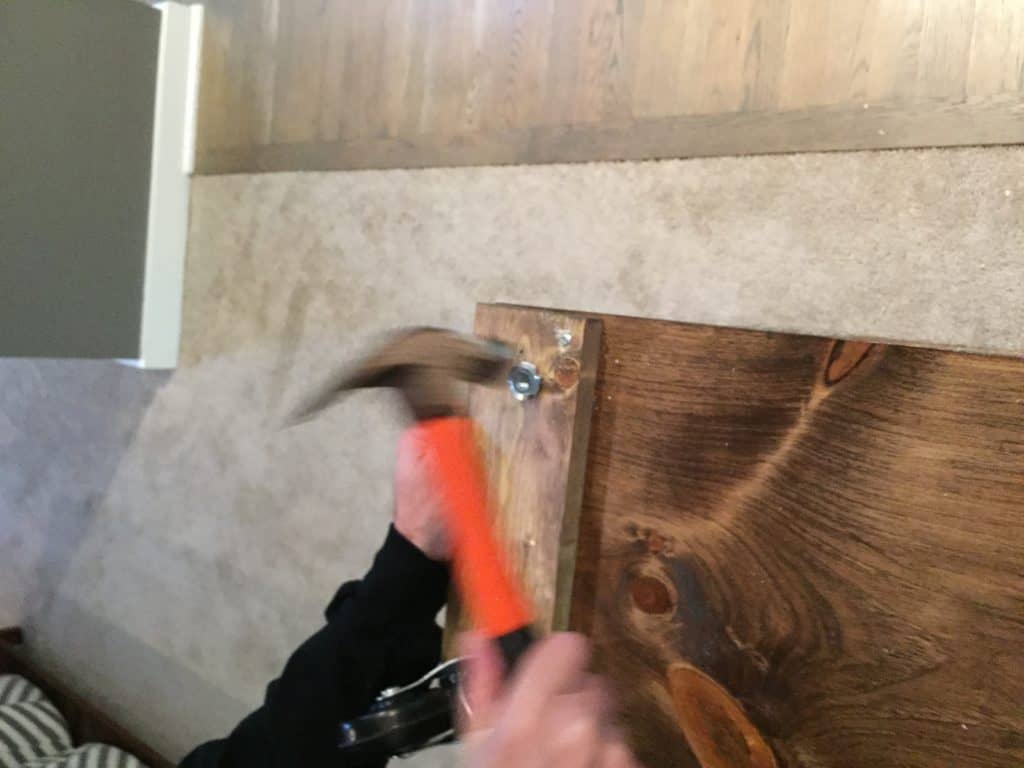
I added a piece of wood to the bottom on each end, screwed a hole in the bottom the length of the threaded section. I (or rather my husband) hammered in a tee nut which allowed me to thread the caster through securely.
Yeah, way too much work! Just get the ones that you screw into the bottom and you are done. It’s a do as I say not as I do situation if you know what I mean.
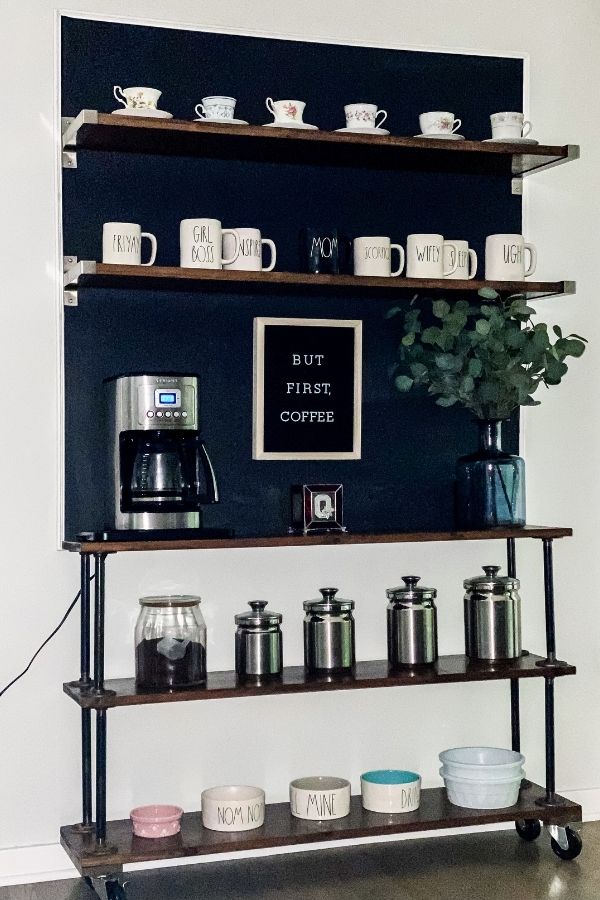
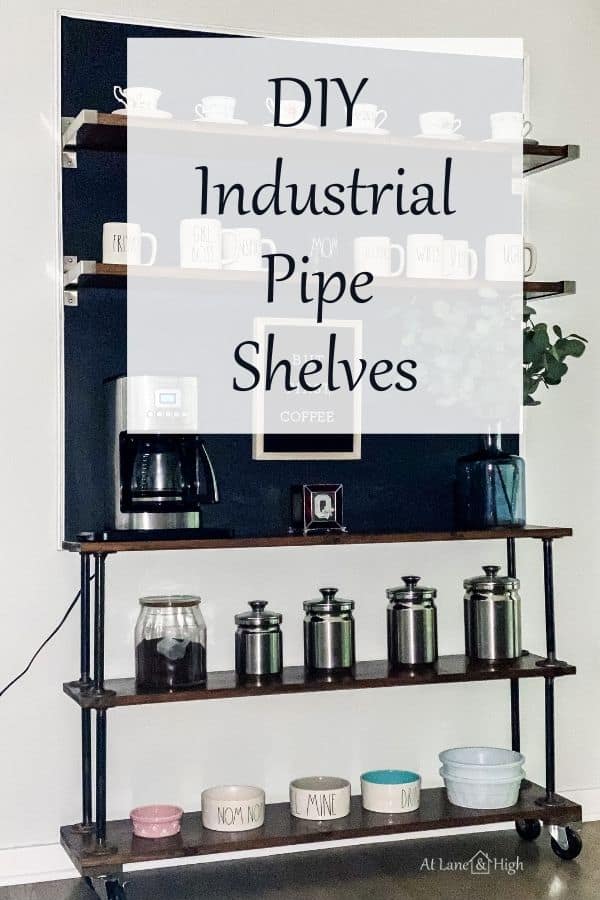
DIY Industrial Pipe Shelves Finished Product
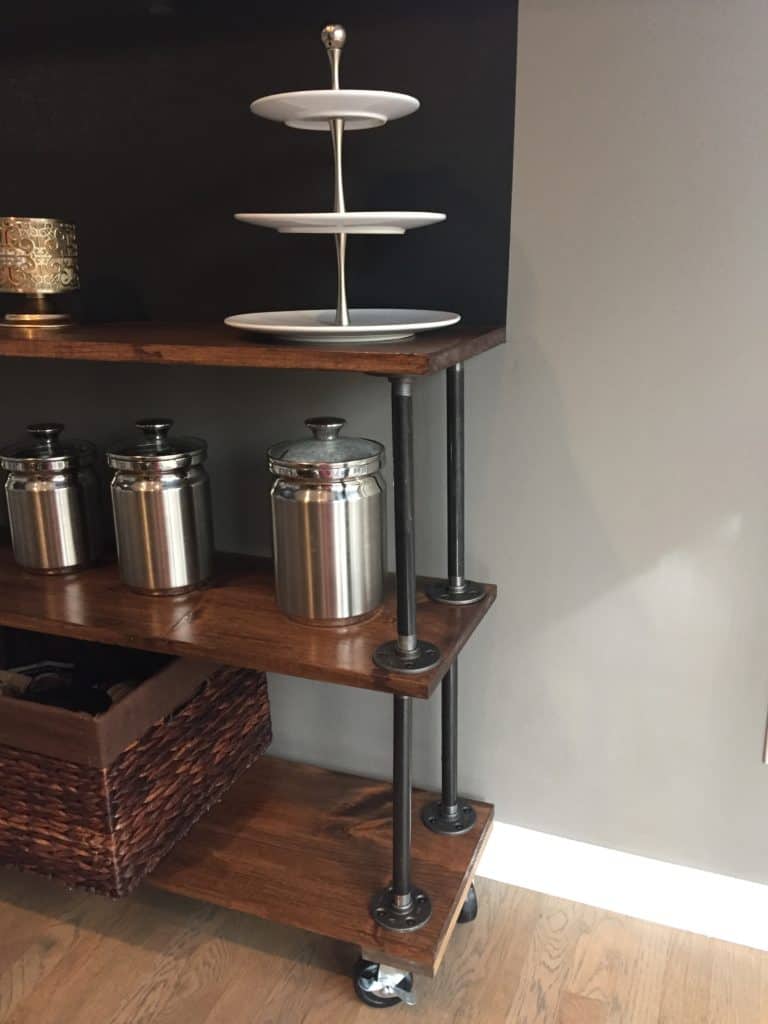
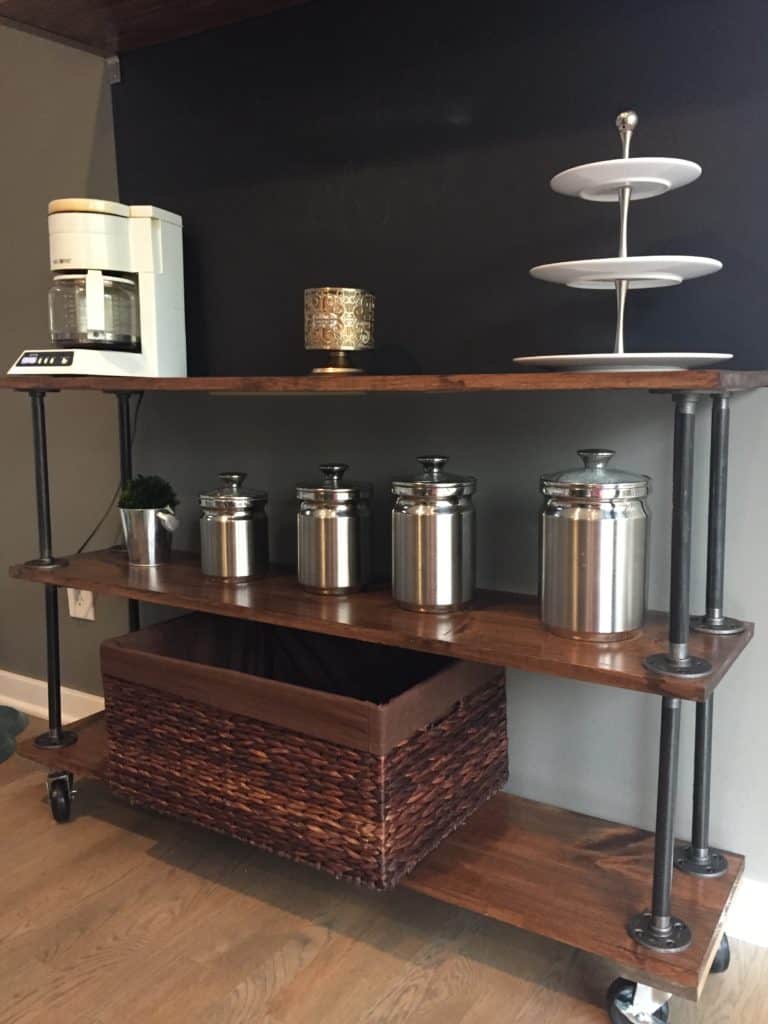
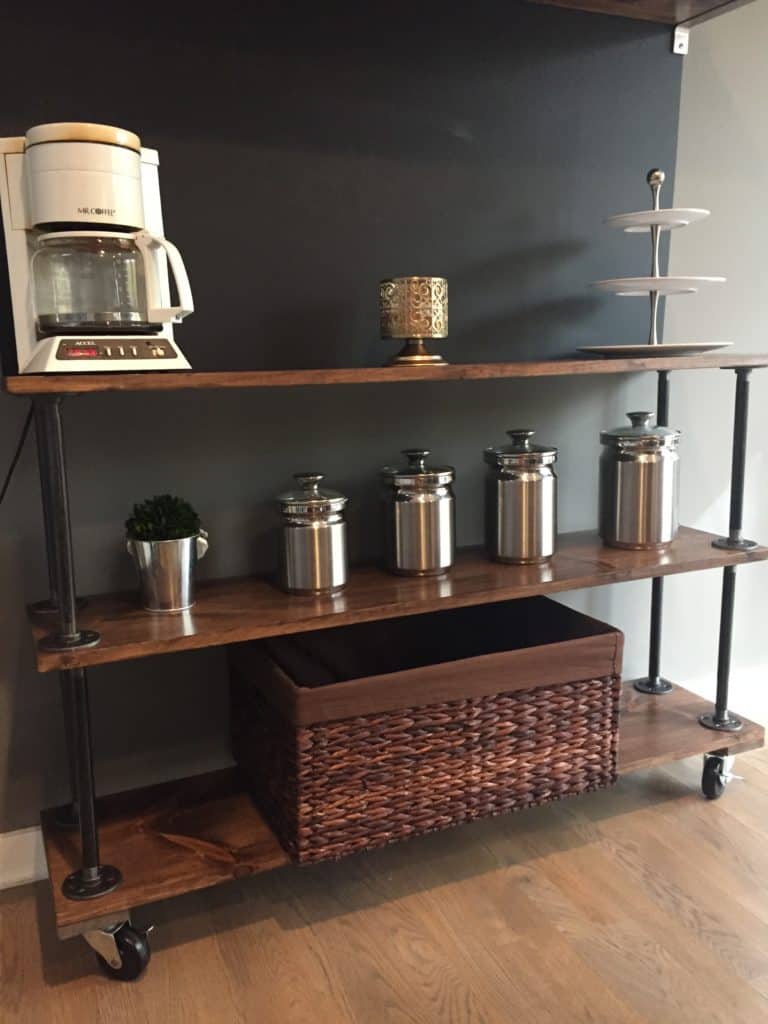
I did some updating since we first created this farmhouse coffee bar. As you can see I added curtains, molding around the chalkboard. We are also in the process of painting the entire first floor, going from a warm gray (which looks very muddy in this house) to a cool-toned gray (almost off-white).
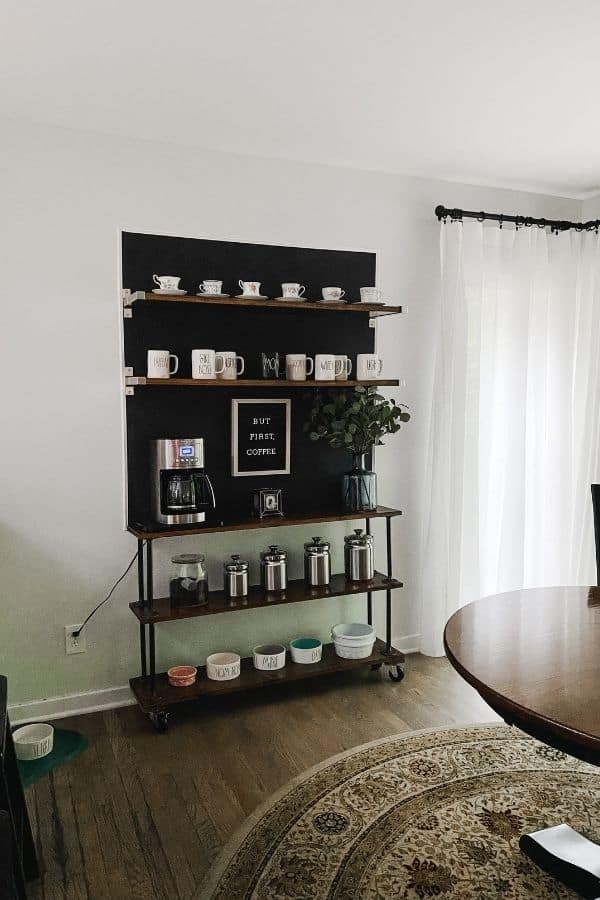
I probably should have unplugged the coffee maker for a better photo, LOL. I guess this is real life though! Also notice we got a new coffee maker. Old faithful finally went kaput!
These shelves are super easy to do, they are a little time-consuming because you have to wait for paint and stain to dry, but super easy to do.
Check out these related DIY Furniture Projects:
| How to Make a Table from a Tree Slice |
| How to Build Industrial Shelves |
| How to Refinish a Dining Room Table How to Stain, Paint and Reupholster a Chair |

How to DIY Industrial Pipe Shelves
For a modern industrial look, I am teaching you how to DIY Industrial Pipe Shelves.
Materials
- 1x12x12 wood
- Stain
- Polyurethane
- Pipe
- Flange
- Casters
- Sandpaper
- Foam Brushes
- Wood Screws
Tools
Instructions
- Have the wood cut at the store in four foot lengths.
- Give the wood a light sanding on both sides.
- Stain the wood on both sides
- Apply polyurethane on both sides of the wood
- Apply polyurethane to the pipes, staying away from the threading.
- Attach 4 flanges to a wood shelf.
- Screw the pipes into the flanges.
- Screw another set of 4 flanges into the other side of the pipes.
- Flip the wood with the pipes and flanges attached over onto another piece of wood and attach to another piece of wood.
- Continue this process until all pipes and flanges are attached to the wood.
- Flip the whole thing upside down and attach the casters.

As a licensed Real Estate Agent and an avid home decorator, I strive to give my clients the very best I can when it comes to staging, selling, and decorating their homes. I have lots of experience with paint color choices and love to DIY my home so I can have everything just the way I want it. I share my ideas and projects with the world in the hopes that I can help others have their homes just the way they want as well.


These turned out great! Love DIY furniture projects!
Well Holly then you should stick around! Hahaha, I have a dining room table I am getting ready to refinish….3 different kinds of chairs that are getting a transformation and an antique buffet that is going to get a new lease on life! Thanks so much for your kind words.
Literally just said to my husband that I wanted shelves like this for behind our couch! I absolutely love it!
That’s so great Amanda! If you do it please send me a pic! I would love to see how they turn out.
These shelves really turned out amazing, that stain is beautiful and these really work so well for your coffee bar.