
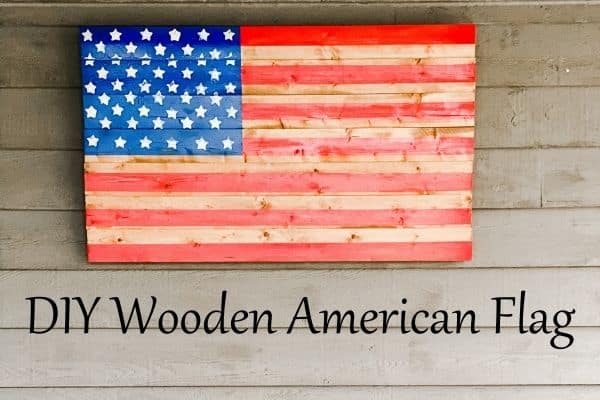
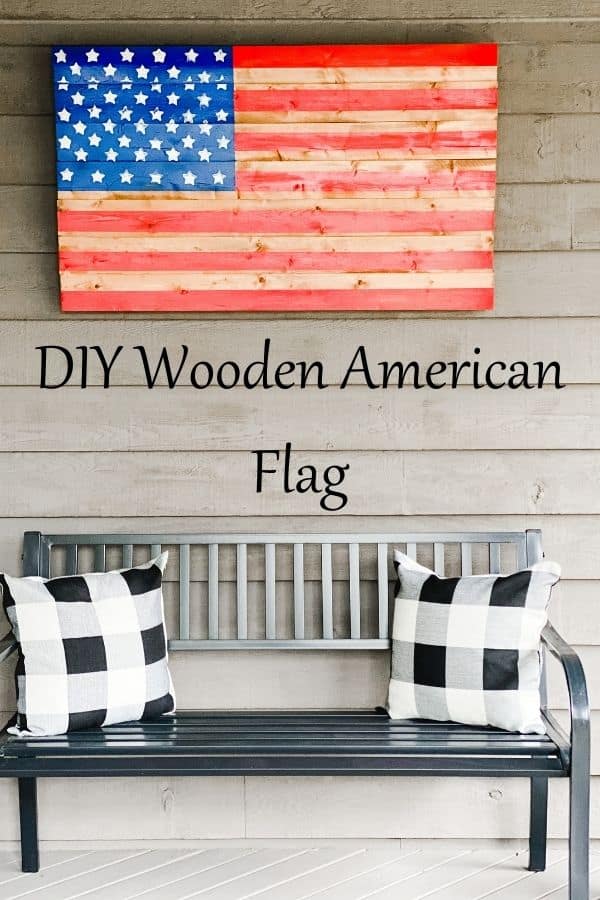
DIY Wooden American Flag You Can Hang All Year Long
Show your patriotic spirit by creating this DIY Wooden American Flag for your home that you can hang proudly all year long!
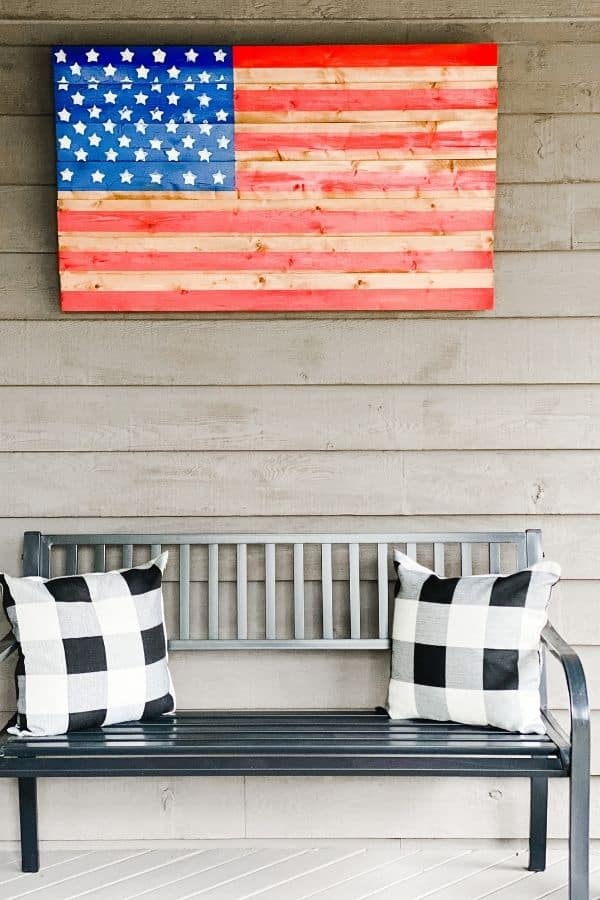
With Memorial Day so close I was inspired to make something patriotic for a wall on our front porch. A Wooden American Flag was a perfect choice!
I have been thinking a lot about outside spaces with the weather FINALLY warming up. I truly thought it would never get here.
On my front porch, I always have a wreath on the front door. To the left of the door, I want to put a Welcome sign.
To the right of the door I have a large picture window and the wall perpendicular (the garage wall) there is nothing. I knew I wanted a bench there but what to put above it? A Wooden American Flag of course!
*This post contains affiliate links, see my full disclosure for details.
DIY Wooden American Flag
There are a few things to decide before you start.
What type of wood is used for the American flag?
First, you need to decide what material to build this with. I saw a tutorial for this project using a wood pallet.
When you use pallets you have to be careful about which ones you use. Some have been treated with chemicals and are not good for inside use.
Because of this, I decided to go with 1X4 pieces of wood. It does cost a bit more, considering you can get palettes free a lot of the time, but I wanted to be safe that there wouldn’t be any chemicals.
Wooden Flag Dimensions
Now you have to decide how big you want it to be, then figure out what the dimensions your flag will be.
Measure the space that you want to hang your flag. Take the height as well as the width and determine your width from the measurement you took.
A standard size flag is 3’X5′, so your wood flag dimensions need to be 60% tall as it is wide.
Calculating Wood flag dimensions
Here is the easiest way to do the math. Decide how wide you want it. On your calculator take that width and multiply it by .60 and that will give you what your height should be.
For my flag I wanted it to be 3.5′ wide so 3.5 feet converted to inches is 42 inches. (Multiply 3.5 by 12)
Forty Two times .60 equals 25.2 inches.
You can stop here if you want to work in inches. Your flag will be 42 inches wide and 25.2 inches tall.
Or if you prefer to work in feet you need to divide 25.2 inches by 12 to turn it back into feet and you get 2.1 feet! your flag will be 3.5 feet wide and 2.1 feet tall.
Materials and Tools:
- 4 1x4x8 pieces of wood, I went with Pine
- Screws, mine were 1 1/4 inch
- Blue Spray Paint
- Red Spray Paint
- Painters tape and some newspaper (or Magazine)
- Star Stamp or foam piece in the shape of a star
- Electric Drill
- Saw to cut the pieces down, I used a miter saw but you could use a hacksaw
- Your choice of stain color (this is what I used)
- Polyurethane
- D Rings to hang
*Depending on the size of flag you choose to do you might need more or less wood for this project.
How do you make a custom wooden flag?
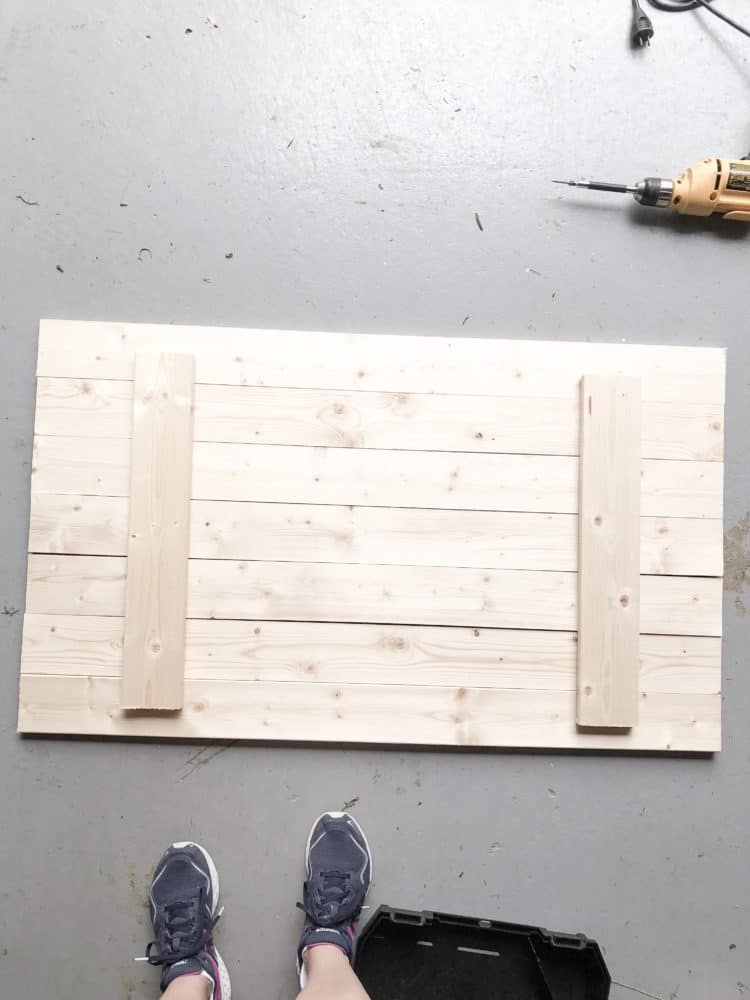
1. Cut Down Your Wood and Attach The Brace on the Back
You need 4 1X4 pieces of wood at 8 feet long. I cut them down into 5 pieces at 3.5 feet and laid them on the floor.
I then measured from the middle of the top board to the middle of the bottom and got about 21 inches. So with the remaining wood, I cut two pieces at 21 inches. These pieces will serve as brackets holding it all together.
Using wood screws, (mine were about 1 1/4 inches long) attach the 21-inch board on the back of the other boards, making sure to leave about 3/4 inches from the top and bottom.
Make sure you put a screw into each piece, and you might want to drill a pilot hole because we did have one screw split the wood. Only one but I wish I had drilled pilot holes so it didn’t happen.
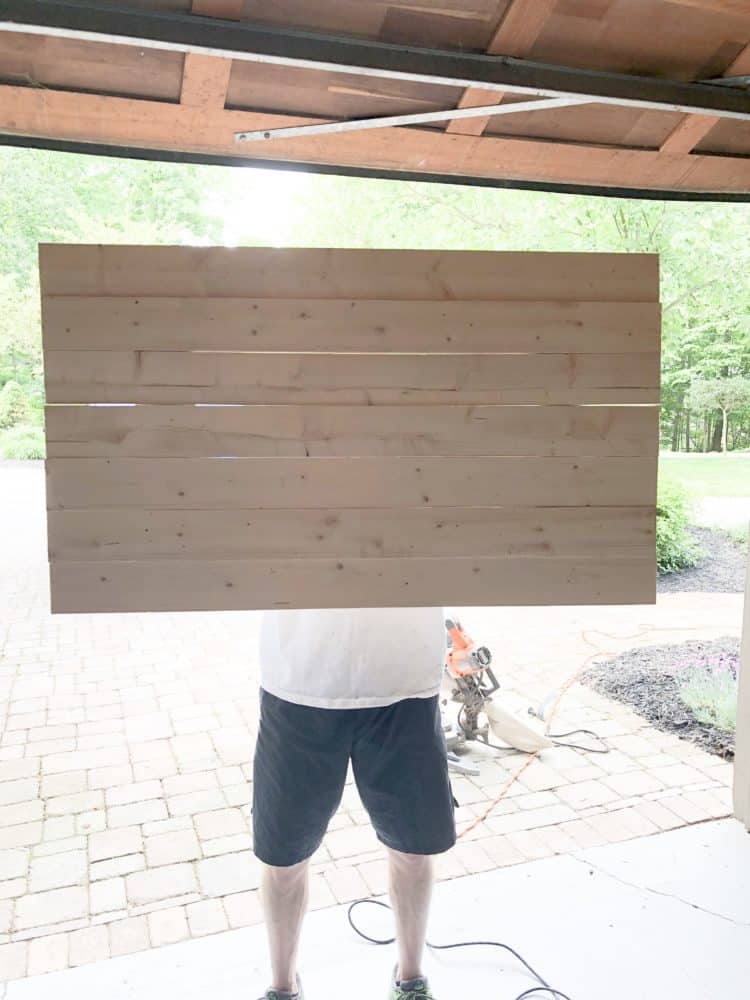
Turn it over and here is your wooden blank canvas!
2. How to Paint your Wooden American Flag
Math time again!
There are 13 stripes that will go horizontally on the flag.
Take the number of inches tall you arrived at earlier and divide it by 13. That’s how tall the stripes need to be.
So for my flag, my height will is 25.2 inches. Divided by 13 I get 1.938 inches tall for each of the 13 stripes.
Would you like to save this?
Make a mark on each side of the flag where each stripe will be with a pencil. Now using a yardstick or level connect the pencil marks to make the thirteen stripes in pencil.
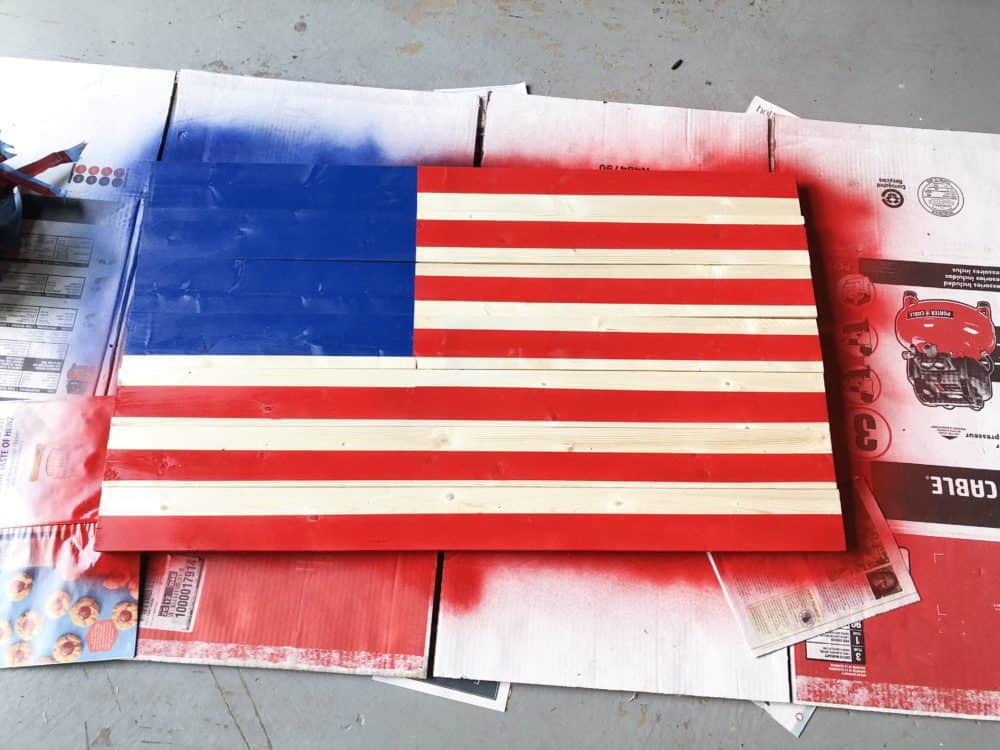
You need a red stripe on top and a red stripe on the bottom.
Painting the blue section
Going from the top count down 7 stripes, this is how tall the blue section will be.
I made the blue section a little more than 1/3 and a little less than 1/2 the width.
I really eyeballed what I thought would look good. Mark that box off with tape, cover the rest of the board with newspaper and spray paint blue.
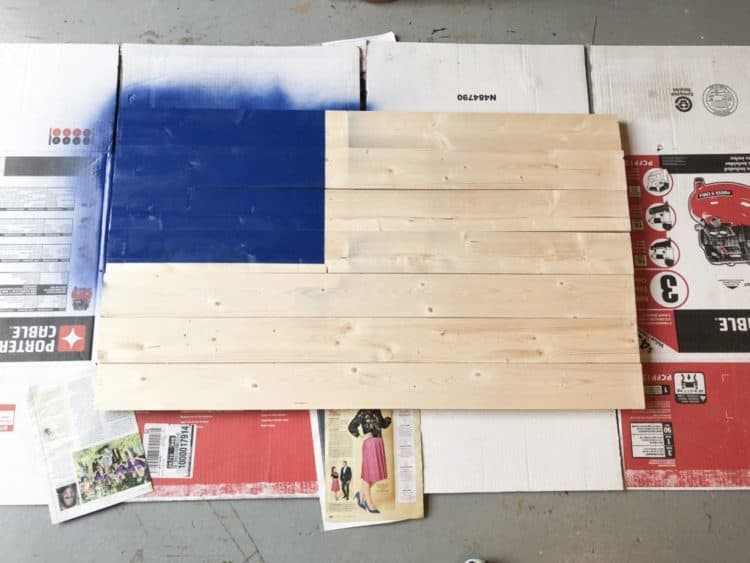
It may take a couple of coats depending on the paint, remember light coats are better than heavy coats. Remove the tape and let dry completely.
*Do you notice my mistake? I didn’t tape the pieces of the magazine together and the force of the spray paint coming out moved the magazine pages enough to let some paint underneath. Not a big deal, easily sandable but learn from my mistakes! LOL
Related Wood Project Posts:
- How to Make a Wood Stump Side Table
- How to Build Industrial Shelves
- DIY Board and Batten
- How to Build a Rustic Wood Frame
- How to Inexpensively Create a Reclaimed Wood Wall
Painting the Stripes
Use tape on the white stripes and completely cover making sure to secure the edges so there is no paint bleed. Also completely cover the blue section that you already painted.
Spray on the red stripes with the red spray paint.
Again, it may take a couple of coats but remove the tape once you are done and let it dry completely.
Applying the Stars
It’s star time, this is tricky because you want good spacing here.
I found a stamp at Michael’s that worked perfectly for mine. Stamp on the stars making 5 rows of 6 stars and 4 rows of 5 stars.
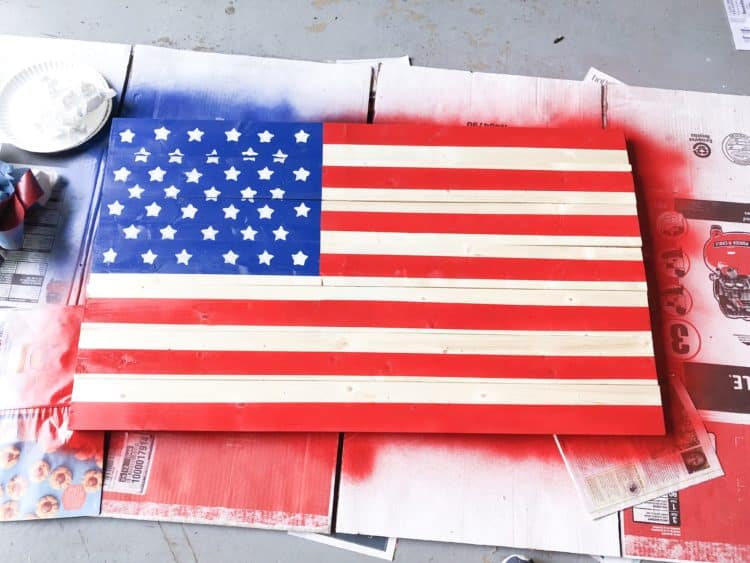
In this picture you will notices that I do not have enough stars….mistake number 2! I ended up having to tape it up and spray the blue again and completely redo the stars.
I was okay with it, I mean seriously who is going to stand there and count all the stars, but my Marine husband was like, no can do. So we fixed it. All it really cost me was time.
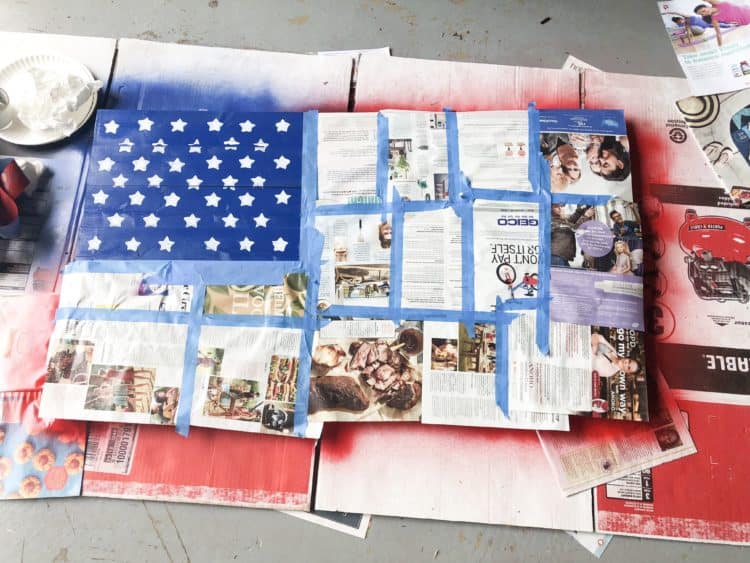
So I taped it back up, making sure to tape all the magazine pieces together so I didn’t get any spray under them like before. And then I redid the stars.
It’s okay if they don’t stamp on perfectly, I like a little bit of a rustic look. Let this completely dry.
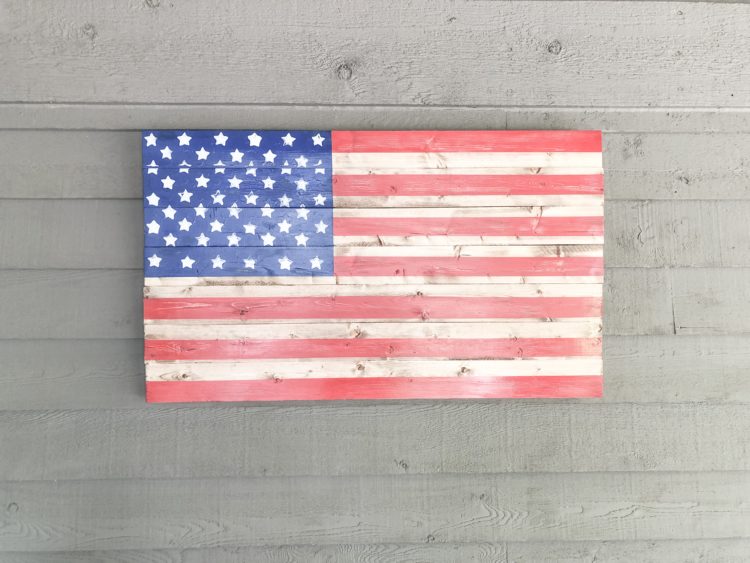
Aging your DIY Wooden American Flag
Time to age it! I used some 120 grit sandpaper to rough up some spots, you can do this as much or as little as you prefer. I preferred to go with a light hand on the sanding.
Then I used some stain to go over the top of everything to give it more of an aged look.
Finish off with some polyurethane for protection!

Additional Tips for your Wooden American Flag
Give the project a few days to fully dry if it’s humid before you flip it over and add the D rings for hanging.
Don’t forget about the edges, I did at first and in one spot you can see blue where there is supposed to be a white stripe, I won’t tell if you won’t!
For real, the hardest thing about this project is waiting for the paint to dry. You could totally do this in a weekend if you wanted, I would get it started on Friday night to make sure you have it done by Sunday night.
Other Patriotic DIY’s:
- DIY Wood Firecrackers for Fourth of July Decor
- Cheap and Easy No-Sew Pillow Covers
- Patriotic Outdoor Decor for your Deck or Patio
- Cheap and Easy July 4th Decorating Ideas

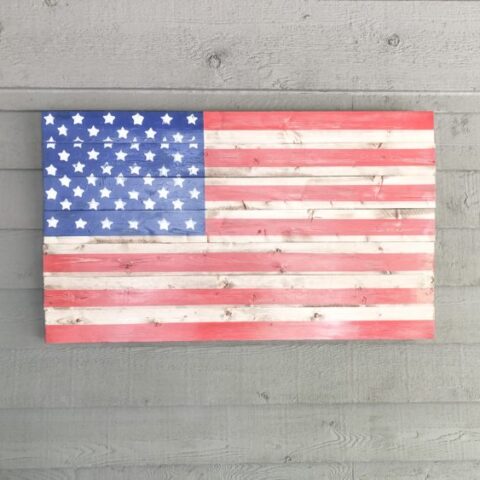
DIY Wooden American Flag
Learn how to crate this DIY Wooden American Flag to display all year round.
Materials
- 4 1x4x8 pieces of wood
- 1 1/4 inch screws
- Painters Tape
- Blue Spray Paint
- Red Spray Paint
- Stain
- Polyurethane
- Star Stamp
Tools
- Electric Drill
- Miter Saw
Instructions
- Determine your dimensions. (The height should be 60% of the width.)
- Cut your wood to the correct length.
- Cut a brace for the back and screw to each piece of wood.
- Determine how tall each of the 13 stripes will be. Mark on each side of the wood.
- Count 7 stripes down and that is how tall your blue section will be. The width should be a little more than a third and a little less than half the width of the whole thing.
- Tape off and spray paint the blue section.
- Tape off the white stripes and blue section and paint the red stripes.
- Stamp on the white stars.
- Sand some areas to create an aged look, then add some stain to accentuate it.
- Polyurethane the whole thing.
- Once dry add the D rings on the back to hang.
Notes
The additional time of 3 days is dry time for the paint and poly.

As a licensed Real Estate Agent and an avid home decorator, I strive to give my clients the very best I can when it comes to staging, selling, and decorating their homes. I have lots of experience with paint color choices and love to DIY my home so I can have everything just the way I want it. I share my ideas and projects with the world in the hopes that I can help others have their homes just the way they want as well.


So how long is each stripe
I am wanting my flag to be 3×5
How tall and wide is my union
Thank you