
How to DIY a Reclaimed Wood Wall
You don’t need to spend tons of money on old wood to create a reclaimed wood wall that looks old. Today I am sharing all the steps you can do to create a reclaimed wood accent wall.
Adding a wood wall adds texture and interest to a room. I was able to add this wood wall to my lower-level rec room while keeping it all on a budget.
I recently finished my latest edition of the $100 Room Challenge and the big feature was my reclaimed wood wall. It was by far the big moment of the room.
*This post contains affiliate links. Please see the full disclosure for details.
What Type Of Wood To Use
There are a lot of options here. Some people use pallets, I personally am not a big fan.
There are certain codes you have to look for on pallets to make sure they don’t have chemicals on them which would be bad to have in your home. That sort of freaks me out so I don’t use pallets.
There is a product called Stickwood that you can use. It comes in many different colors and textures, anything you want you will find.
Stickwood is a peel and stick product that goes up really fast and I probably would have used it for this project but it didn’t fit into my budget for the $100 Room Challenge.
I decided to use 1×6 pieces of wood and all the stains I had on hand for this project which kept me inside my budget but also gave me the look I was going for.
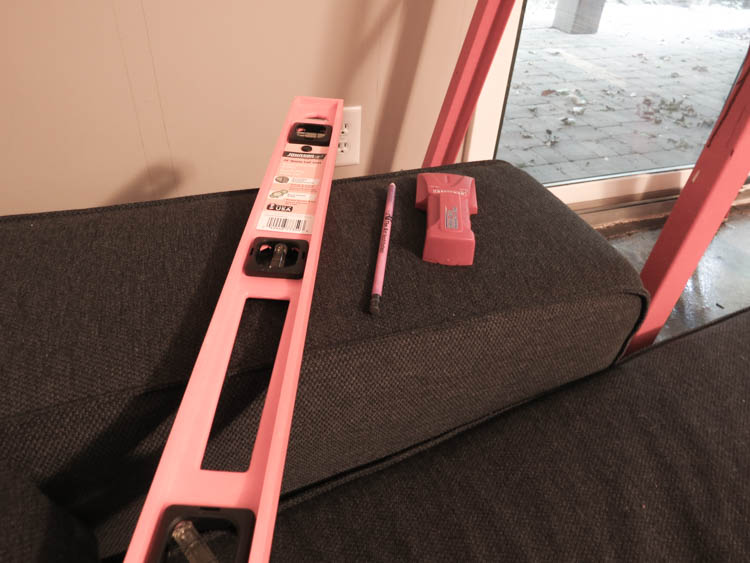
What Tools I used for the Reclaimed Wood Wall
Yes, I broke out all the power tools for this project but only because I now have them. Before I had them I still did these projects, I just used other things….like hand tools and good old ingenuity.
You can also ask a friend or neighbor to borrow a tool so you don’t have to buy it. Stores like Home Depot also rent tools.
- Jig Saw – to cut around the outlet and security system
- Miter Saw – to make the various lengths of wood
- Table Saw – to rip the boards down above the sliding door – the space was about 4 inches and the wood was almost 6
- Compressor and Nail Gun – to nail the wood to the wall
- Nails – I used 2 inch nails for this project, you could go with 1 1/2 but no shorter than that
- Stud finder – and no matter what your husband says, it’s not him! 😂
- Level
- Various Stains and Rags – to create the reclaimed wood look
DIY Reclaimed Wood Wall
For the $100 Room Challenge I had to makeover a room for less than $100, in under a month. My big project, which made a huge impact on the room was this wood accent wall.
This space is where my teenagers hang out with their friends so I wanted it to be a space that they could be proud of. Adding this element really took the room to another level and I am so happy with how it turned out. Let’s get into how you can create this wood wall in your home.
Step 1 – Determine how much wood you will need.
I decided to use 1X6 boards, you could use 1X4’s or 1X8’s depending on the space you are doing. The taller the ceilings you have maybe you might want to use the bigger boards if it’s smaller then 1X4’s might look better. I have 8-foot ceilings so I went with 1X6.
Decide what length you will get too. Menards is where I bought the wood and they came in 10 or 12-foot lengths. I went with the 10.
Measure the height and multiply by width and that’s how many square feet you need. If you use two 6-inch boards at 10 feet that is 10 square feet.
Please don’t forget that the wood says it’s 6 inches but they really measure about 5 3/4 so I always buy at least one more board…just in case. It would be awful to get all the way done and be short one board.
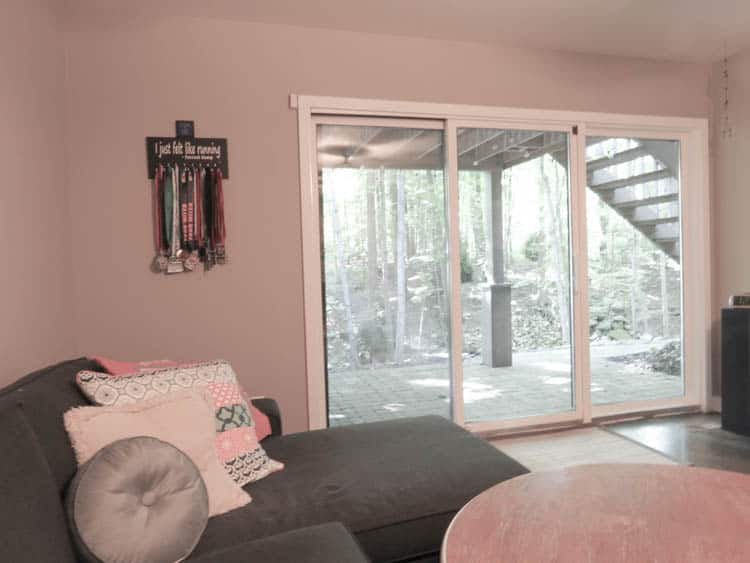
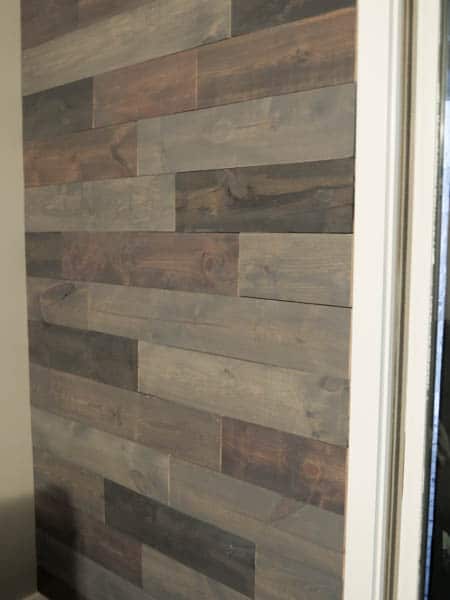
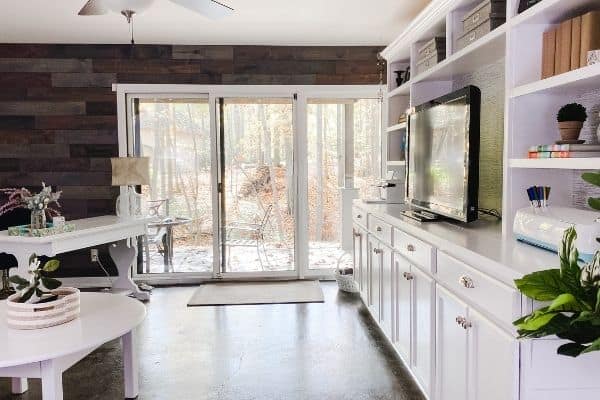
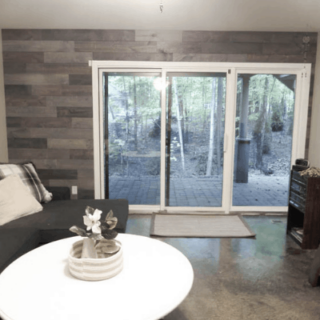
This is the wall I intend to use reclaimed wood on.
Step 2 – Stain your wood
I had 4 colors of stain, Red Mahogany, Special Walnut, Gray, and Jacobean all by Minwax. I decided to use all the colors, going a little more heavily on the Gray.
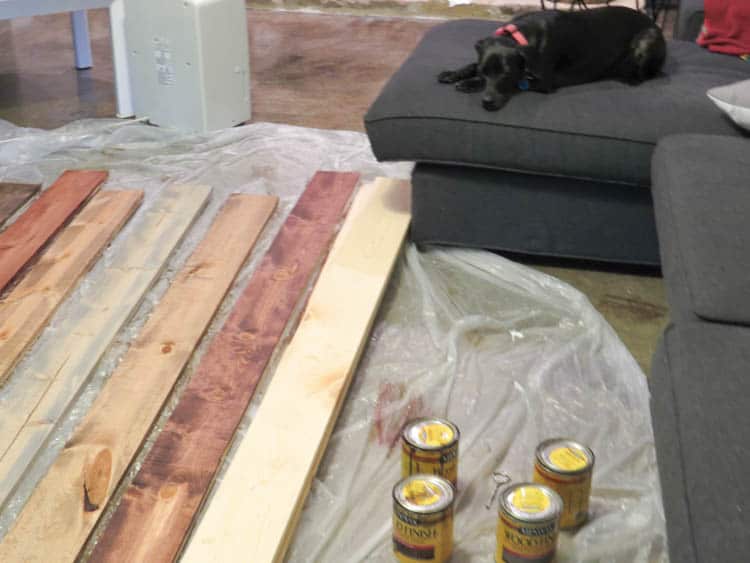
*tip – Leaving the stain on longer leads to a deeper color. Doing multiple coats leads to a deeper color.
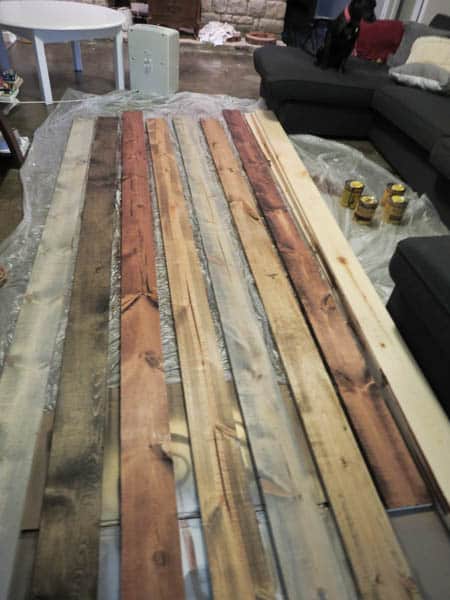
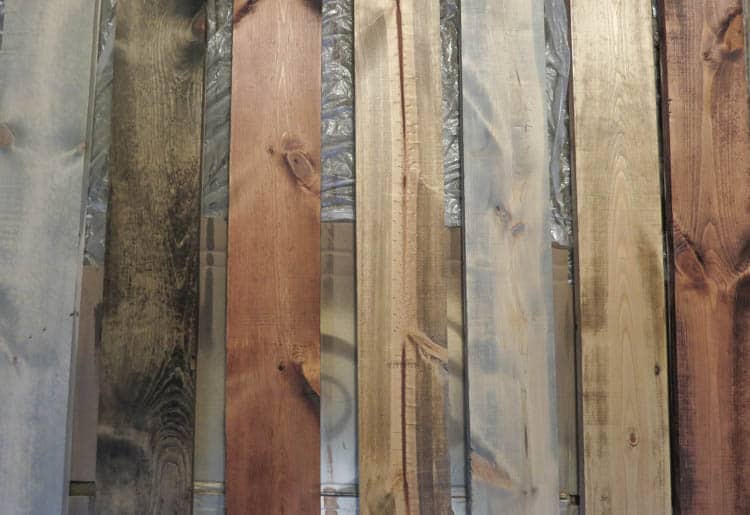
Once I finished staining all the wood I looked at it on the floor and didn’t like what I saw. I saw way too many colors of striking differences.
So I did a gray coat over every single board and miraculously the boards all went together now cohesively. They all have different undertones but the finished product is all gray.
Would you like to save this?
This is what gave them that reclaimed look which is exactly what I wanted. (Sorry, I forgot to take a picture of it after I added the gray! 😫)
Step 3 – Nail the wood to the wall
First, you need a stud finder to mark all the studs. Mark where the studs are on the walls using a pencil.
You can add furring strips to the studs and attach your wood to the furring strips or you can do what I did and nail the wood straight into the studs.
I didn’t want the wood wall to stick out further than the trim around the door so that’s why I went with nailing them straight to the studs.
Now take your wood and cut it to various lengths, this adds interest and creates the reclaimed look.
I measured and made sure that none of the joints ever were the same as the row above and the row above that.
Nail the wood to the marks you made where the studs are.
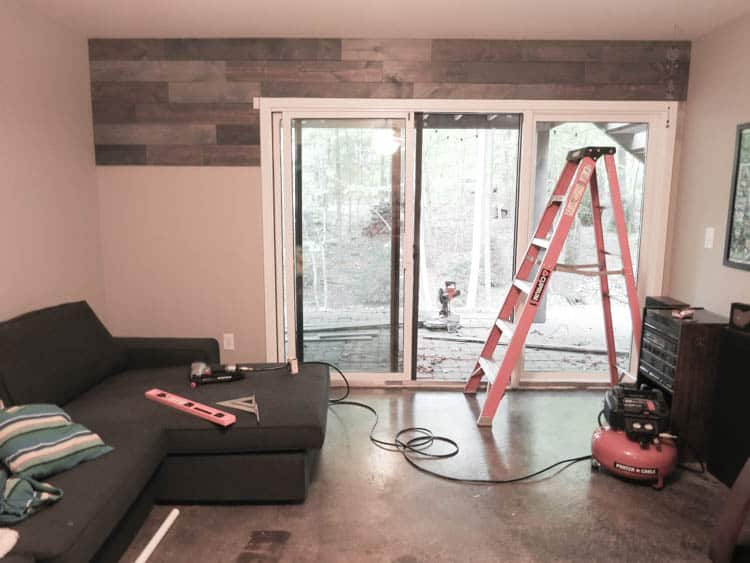
I started at the top of the wall and went all the way across above the door. Then I worked my way down to the left of the windows and door.
You should try to vary the colors of the wood I used as well, making sure not to have two of the same next to or on top of each other.

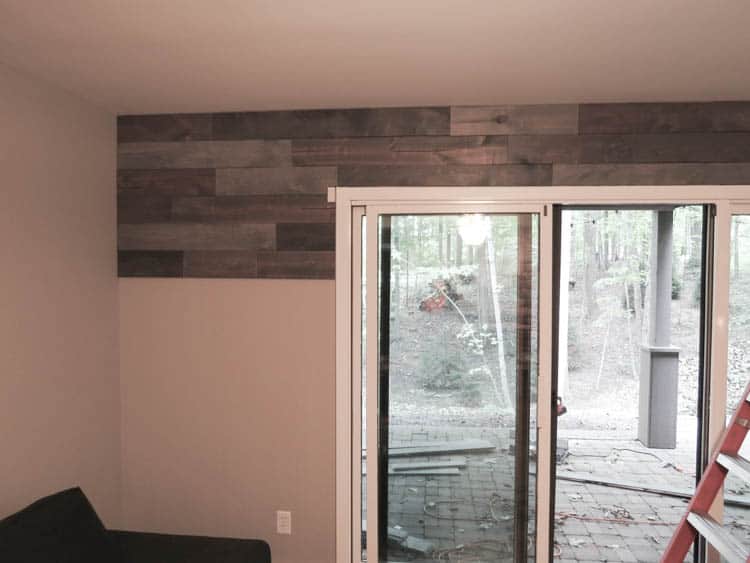
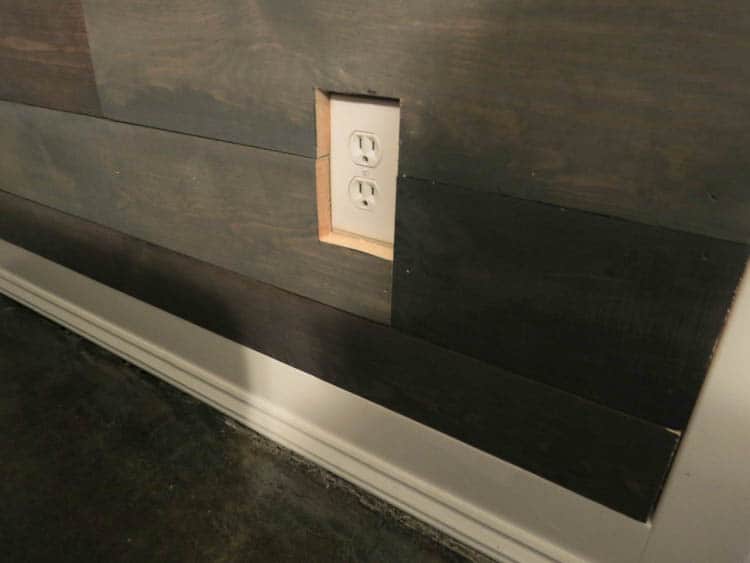
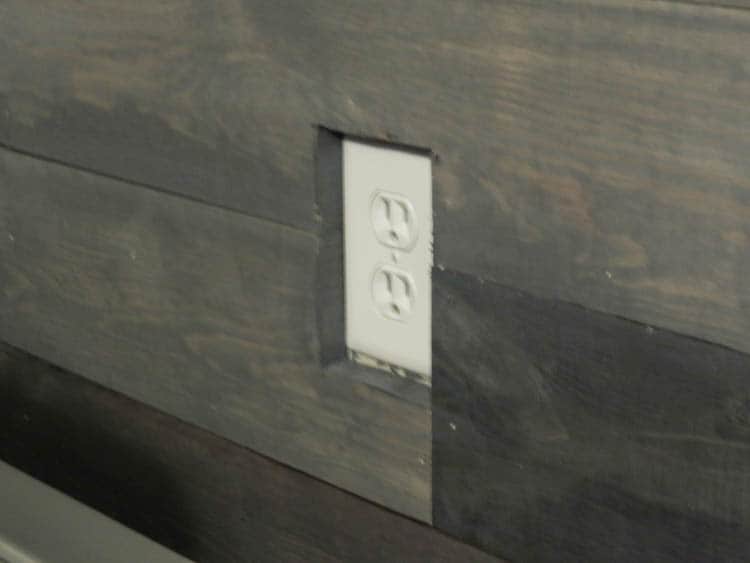
I cut around the outlet and security system with my jigsaw. You will see that there is now bare, unstained wood showing. After I was done I went back with a q-tip and gray stain and covered all that up.
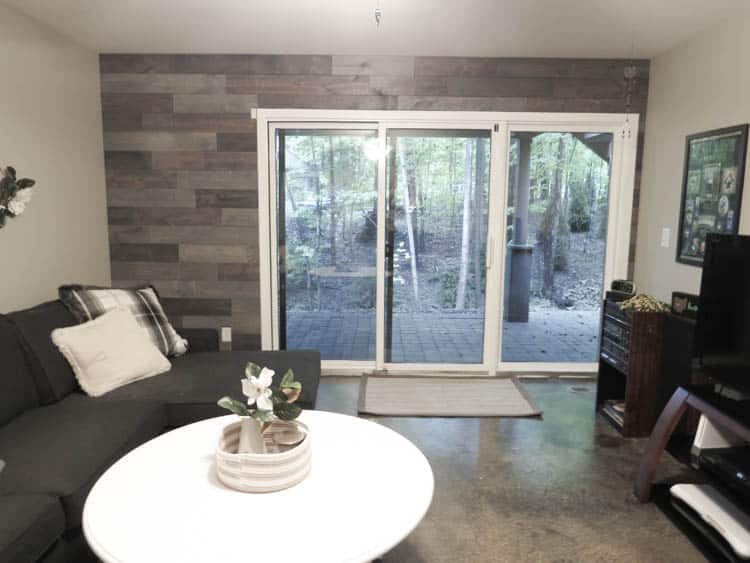
The Finished Reclaimed Wood Wall
Here is the final product and I am super happy with it. The reclaimed wood wall cost me about $55 because I already had all the stain. It’s so easy to add architectural details without breaking the bank.
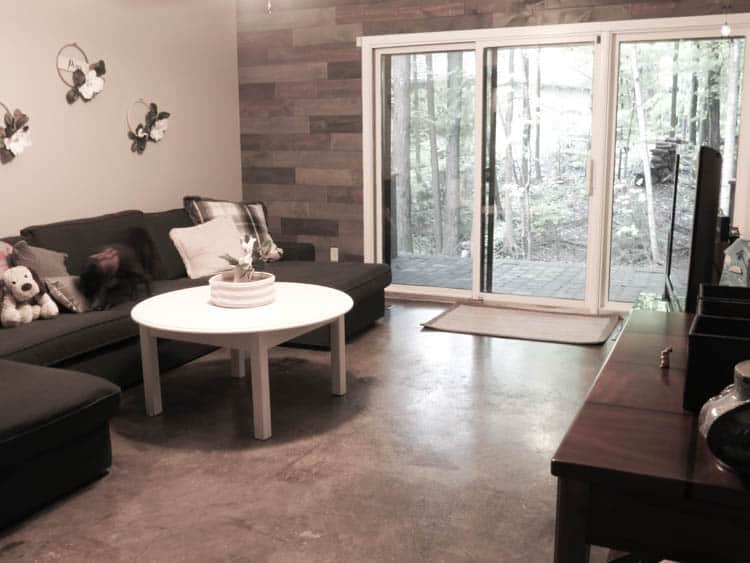
We have made some changes to this room. Originally it was the teen hangout space but since they are in college (or now married and living far away) I have claimed this room as an office/den space.
We gave our oldest the big IKEA couch and replaced it with the IKEA Uppland couch which is much smaller. That left room for my vintage desk. Also, you can see the built-ins on the other wall from the couch. That was one of my favorite projects I have ever done!
Other Accent Wall Posts:
- DIY Picture Frame Molding on the Walls
- How to Create an Accent Wall Using a Herringbone Stencil
- Amazing Accent Wall Ideas You Will Want to Try
- How to DIY a Board and Batten Wall Inexpensively


How to DIY a Reclaimed Wood Wall
Learn how to create a Reclaimed wood wall for not a lot of money!
Materials
- nails
- stain
- rags
- pencil
Instructions
- Choose what kind of wood you want to use, I used 1X6X10's.
- Stain the wood in various colors.
- Stain over all the wood with gray stain to give a common look.
- Cut the wood in various lengths.
- Mark the studs on the wall using a stud finder and a pencil.
- Nail the wood to the wall using 2-inch nails, making sure they are level.
- Cut around any outlets using a jig saw.
Notes
Allow the stain 24 hours to dry in between each coat.

As a licensed Real Estate Agent and an avid home decorator, I strive to give my clients the very best I can when it comes to staging, selling, and decorating their homes. I have lots of experience with paint color choices and love to DIY my home so I can have everything just the way I want it. I share my ideas and projects with the world in the hopes that I can help others have their homes just the way they want as well.


Beautiful job!! I’ve been wanting to try this for ages…you just may have inspired me…thanks for the tips! And thanks for the chuckle about the “stud finder”…hahaha
That’s wonderful Carole! You should totally do it!
It looks fantastic. I’m gonna do this in our next house ! Well done I love it!
Thank you Treana. It’s was so much easier than I ever would have imagined.
What kind of wood was it? Pine and did you sand it before you stained? And how many coats of stain did you use ? Thanks
Hi Kristian! I used pine from the Home Depot. I did not sand it, I wanted it to look more rough. That being said, if you have a really rough spot and feel like someone could easily get a cut I would sand that but I liked the rougher texture for the reclaimed look. As far as the stain goes, it’s a little complicated. The first coat was too light. On the second coat I decided to leave the stain on for a full 5 minutes before wiping it off. That seemed to do the trick but then I realized that using all the different colors was very harsh to my eye. So I went over everything with a coat of gray to tie them all together. They aren’t the same colors but having that gray on top made the wood look weathered in the way I was looking for. It really is all up to you. I have seen light colored wood walls, I have seem multi-colored. Whatever you like for your space is what you should do. I hope that helps.
Hi. Looks great and I am trying this now.. is the gray just regular gray?
Thank you.
Hi Tammy, yes the pieces of wood that are solid gray were done just using the gray stain. The other boards I used different stain colors then topped them all with gray to give it a cohesive look.