How To Prep Walls For Painting To Get A Smooth Finish
Painting is a great way to give a room a fresh feel but there are some important things you need to know in order to get the look you want. Today we will discuss how to prep walls for painting to get a smooth finish.
I have been painting since I was a kid. I was my dad’s official helper in all things DIY. He taught me a ton!
Since becoming an adult I have painted countless rooms. I mean seriously, I can’t even count the number of rooms. It’s too high.
So I do feel like I am a bit of an expert and I am sharing my knowledge with you on what you need to do to get that perfect smooth finish every time.
*This post contains affiliate links. For more details see my full disclosure.
How to Prep Walls for Painting
Prep work is always the most important step in any project you do, including paint. You don’t just walk into a room and slap some paint up.
There are a lot of things you have to do before you ever pick up a paintbrush. I often tell my husband it takes longer to prep and clean up than it does to paint!
Remove Furniture
The first thing you are going to do is remove as much furniture as possible. Moving it to another room would be ideal but if that’s not possible just bunch it all into the center of the room and cover it so it doesn’t get any paint on it.
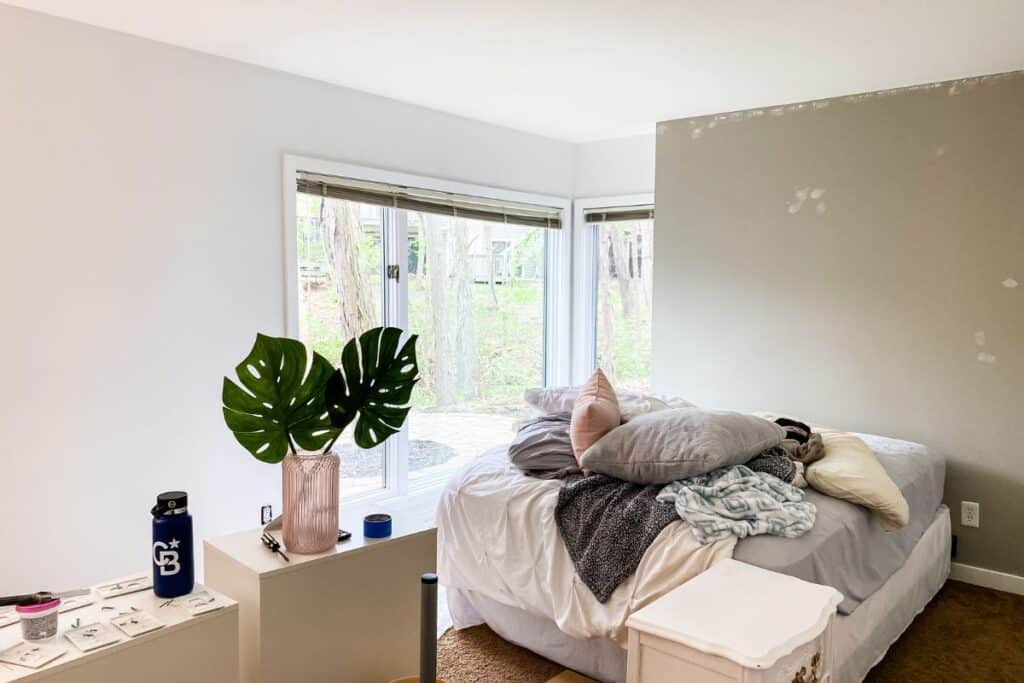
This is my daughters bedroom where I painted three of the walls Pure White by Sherwin Williams and the headboard wall a beautiful sage green. On the three walls I painted Pure White I moved the furniture into the center of the room.
Yes, it gets really messy but that’s how most projects go. Things get messy before they get pretty.
Repair any Holes in the Drywall
Once you have moved the furniture now it’s time to take down any artwork. Remove the nails or screws and repair the holes that are left behind.
Spackle is what you are going to need, as well as a putty knife. I like the pink spackle that dries white because you know when it is truly dry.
Use the putty knife and apply the spackle deep into the hole. Scrape off any excess.

Here you can see my daughter’s bedroom required a lot of spackling. She had LED lights around the top of the wall which of course when removed pulled off the old paint and left divets in the drywall.
Needless to say LED lights are now prohibited in my home!
Sand Uneven Surfaces
Use a fine grit sandpaper, or a sanding block, to sand the excess dried spackle off. If you have any other uneven surfaces on the walls give them a good sanding too.
This will help your paint to adhere to the walls better.
Clean
Now clean everything. Wipe down the walls and make sure you get all the dust and dirt off. You will be surprised how much dust collects on walls and baseboards.
Also, you might find a lot of cobwebs in the corner where the wall meets the ceiling. Get rid of those as well.
Remove the Outlet and Light Switch Plates
Using a screwdriver remove any outlet covers and light switch plates. Make sure you store them in a safe place and don’t lose the screws!
Tape off Anything You Don’t Want to be Painted

Would you like to save this?
This part is time-consuming but oh so important. Use long strips of blue painter’s tape mask off anything you don’t want painted.
For example, you will need to tape off any molding such as baseboards or trim around windows and doors.
If you are an inexperienced painter you might want to tape off ceilings as well.
I like to use long strips because there are fewer joints where paint can sneak through.
Use High-Quality Products
This one is so important. If you use low-quality paintbrushes and rollers they will shed. You will find bristles or little bits of roller cover on your walls after you have pained and you won’t get that smooth finish.
Once the paint is dried on these it’s really hard to get them off. So invest in good quality products that way and you will be able to use them over and over. I promise you will get your money’s worth.
I have a post about my favorite paint products that you should definitely check out.
Prime the Walls
Sometimes it is necessary to prime your walls before painting. I know a lot of paint manufacturers say that their paint is a combo of paint and primer but sometimes that is not enough!
Here are some instances when you will need to prime before you paint:
- you have new drywall
- you are painting a light color over a dark color
- you have stains on the wall that will bleed through
- you have paint that is chipping and pulling away from the wall
- you have a lot of spots that needed to be repaired and the walls are uneven
I also believe that old paint colors can alter the finished look of your new color. They might not bleed through but they change the finish of the new color ever so slightly and you might not like that look.
I know it sucks to have to go through this priming step but in the end you will be so happy you did!
How to know if a paint color is right for you?
The best way to judge if a color is good for you then you will want to put a swatch on the wall and look at it over a few days. Look at it in different lights and decide if you really like it.
You can do this by getting a sample from the paint store and using a brush to put it up on the walls, but then you are left with a can that you can’t do anything with. Those samples are used with poor-quality paint and aren’t meant for use on your walls permanently.
I recommend going with Samplize. They are a company that will send you a 12X12 peel-and-stick swatch of a paint color that you can stick to the wall. When you are done just peel it off and throw it away.
It’s easy and much less messy!
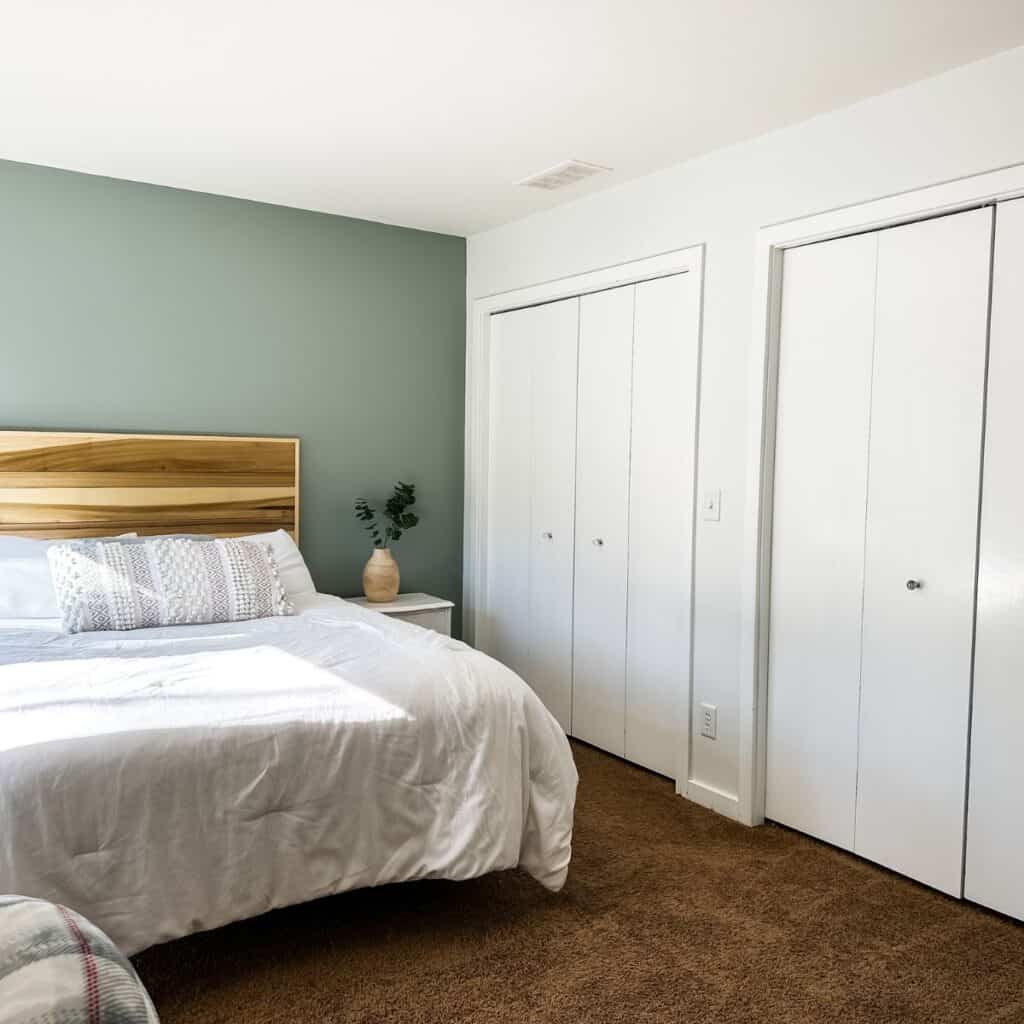
Here is the final view of my daughter’s bedroom after all the prep work and painting. It turned out gorgeous! The finish on the walls is stunning, and you can’t even see where the LED lights pulled the paint off the wall!
Now we just need to get her some new carpet!
Other Paint Posts You Might Like:
- The Right Way to Test Paint Samples in Your Home
- The Best Paint Brushes for Latex Paint
- 11 Must-Have Supplies for Painting a Room Like a Pro
- 5 Tips on Choosing the Perfect Paint Color for Your Home


How to Prep Walls for Painting

As a licensed Real Estate Agent and an avid home decorator, I strive to give my clients the very best I can when it comes to staging, selling, and decorating their homes. I have lots of experience with paint color choices and love to DIY my home so I can have everything just the way I want it. I share my ideas and projects with the world in the hopes that I can help others have their homes just the way they want as well.