5 Steps to Organize Tupperware and Food Storage Containers
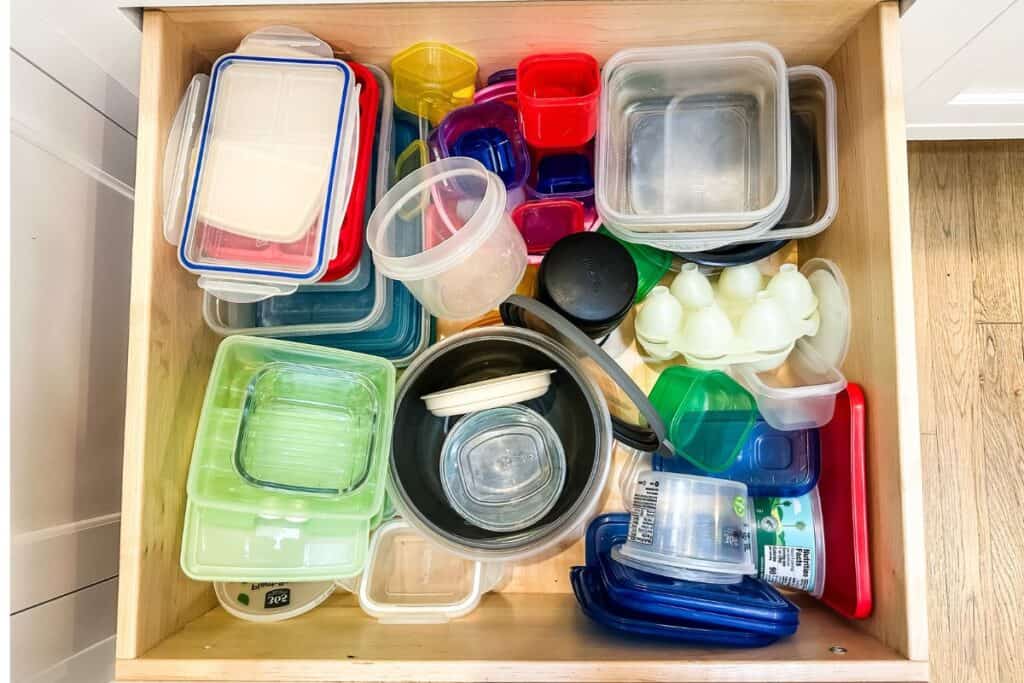
Most people have that drawer or cabinet that is just a disaster of food storage containers. Well, have no fear! I have 5 steps for you to organize the Tupperware and food storage containers in your home! It’s so easy!
I think Tupperware has become the universal name for plastic food storage containers. My Mom used to have Tupperware parties at our home when I was little. She still has so much stuff its awesome!
Now we tend to grab whatever is at the grocery store. Rubbermaid is another brand. No matter what brand you have you probably are constantly cleaning and organizing that are where you store it.
I decided to completely overhaul my food storage container drawer and I am going to share with you the 5 simple steps that I used to transform the space!
*This post contains affiliate links. For more details see my full disclosure.
Organize Tupperware and Food Storage Containers
Did you know that you aren’t supposed to put plastic food storage containers in the microwave? I did but honestly, I still do it sometimes.
It really breaks down the plastic and not so good chemicals can get into your food. So if you do please don’t do it anymore.
Do you put your plastic containers in the dishwasher? I do and have been the unlucky winner of a few melted lids. They just bounce around and can end up in the wrong place.
I decided that I am going to get away from the plastic and I am going all glass. If you still have kids who take these containers in their lunchbox then this might not be practical for you. But if you can it’s a much healthier option and they go right into the dishwasher with no problem!
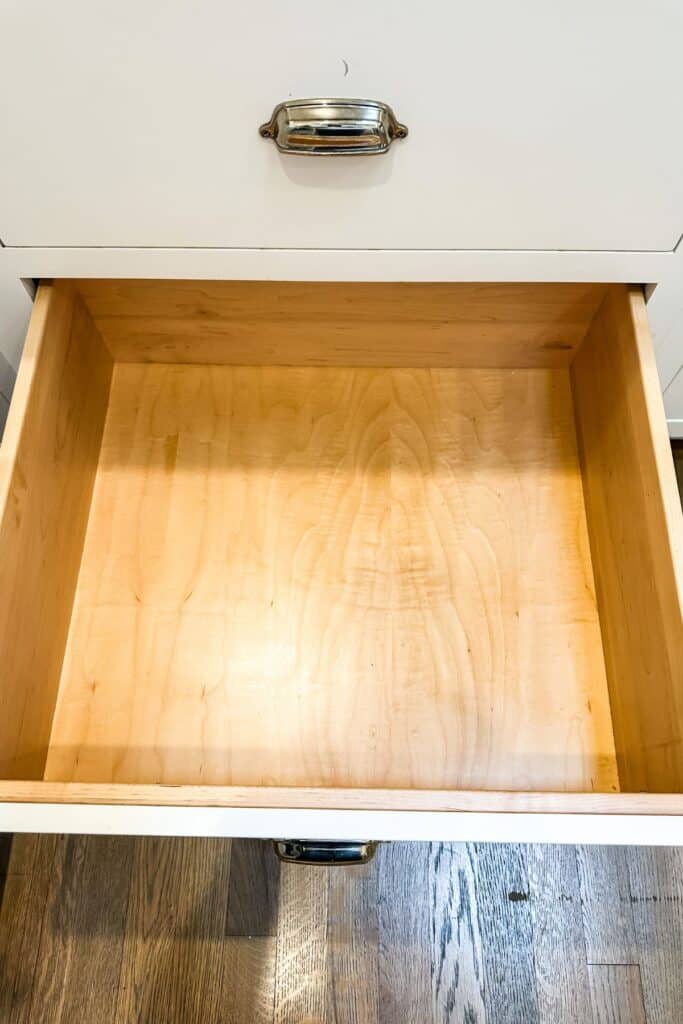
Step 1: Empty the Drawer or Cabinet
The first thing you want to do is empty the drawer or cabinet where you keep your food storage containers.
When you do this make sure you bunch like items together.
This is also a great time to wipe out the drawer or cabinet of any dust or crumbs that might have fallen in.
Step 2: Decide What to Throw Away
Anything that is broken or is missing something (like a lid) then it’s time to toss.
Anything that is in bad shape needs to get thrown away. I had several plastic containers that were in bad shape from going in the microwave, so out they went.

I had some leftover containers from my vegan parmesan cheese that I used as well as some plastic Rubbermaid that was in really bad shape that needed to go. Also this old take-out food container.
Step 3: Decide What To Donate
There might be some items that are still in good shape but you don’t use (or don’t want to use) and might find a better home somewhere else. Those items should be donated.
Would you like to save this?
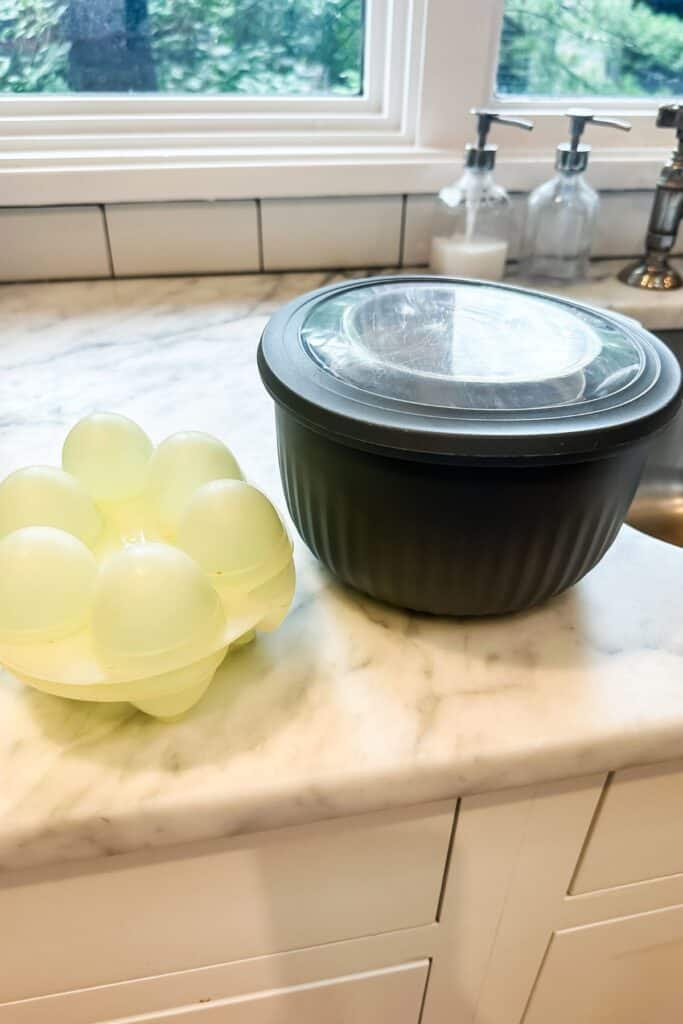
This big gray bowl was actually my daughter’s from college, one of the reasons my kitchen has gotten so cluttered is all the stuff she brought home.
I am going to give this egg jello jiggler mold to my daughter who has an 18 month old and another on the way. I haven’t used it in years and I think she will get lots of use out of it.
Step 4: Buy New Items to Replace What You Got Rid Of
You can find good glass containers or plastic ones almost anywhere. I would invest in new pieces any time you have some that need to be thrown away. So look at what you tossed and purchase new.
I went to IKEA and bought their glass containers and lids. They were out of the big ones so I will have to make a trip back soon but here is what I picked up.
You can find good glass containers at Walmart, Target, and even Home Goods. Just make sure that the lids are good ones that seal well.
We bought some a while back that don’t seal and you can’t put soup or anything liquid in them or you will have it all over the place.
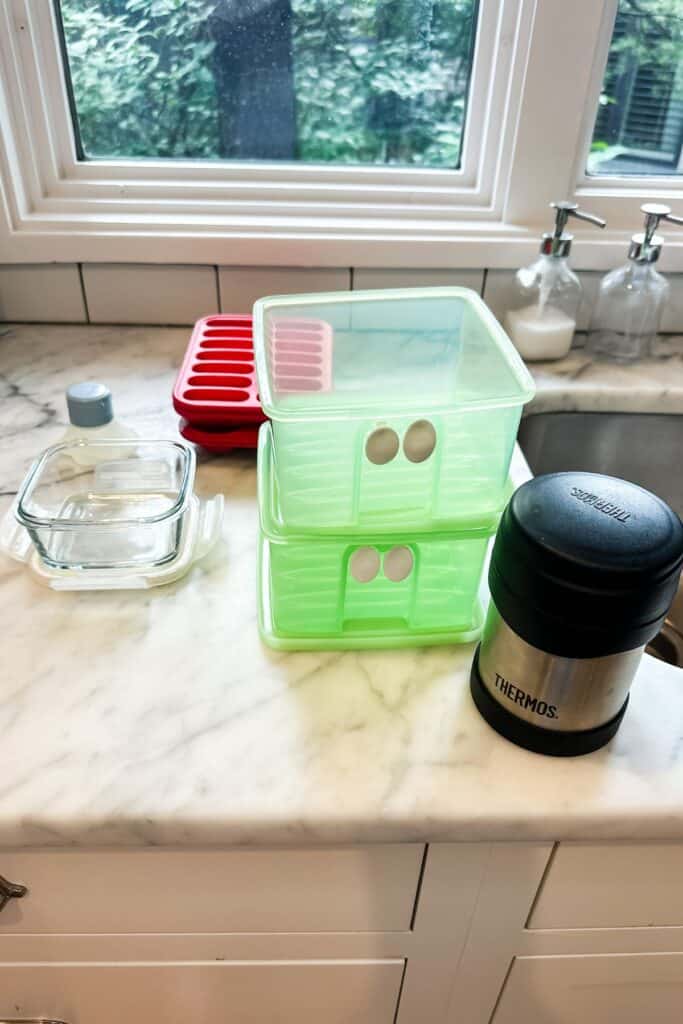
Here is what I decided to keep. These two green containers are from Pampered Chef and they are perfect for storing fruits and vegetables.
I also kept the thermos, silicon molds, the one good glass container I had as well as the salad dressing holder which my daughter uses all the time for taking to work. (It’s in the back behind the glass container.)
Step5: Put them back in the Drawer or Cabinet
Put like items together. Stack lids together, even better if you can stack them on their sides to take up less space.
Here is what my newly organized drawer looks like. I still have some empty space for bigger containers when IKEA restocks but I am very pleased with how it turned out.
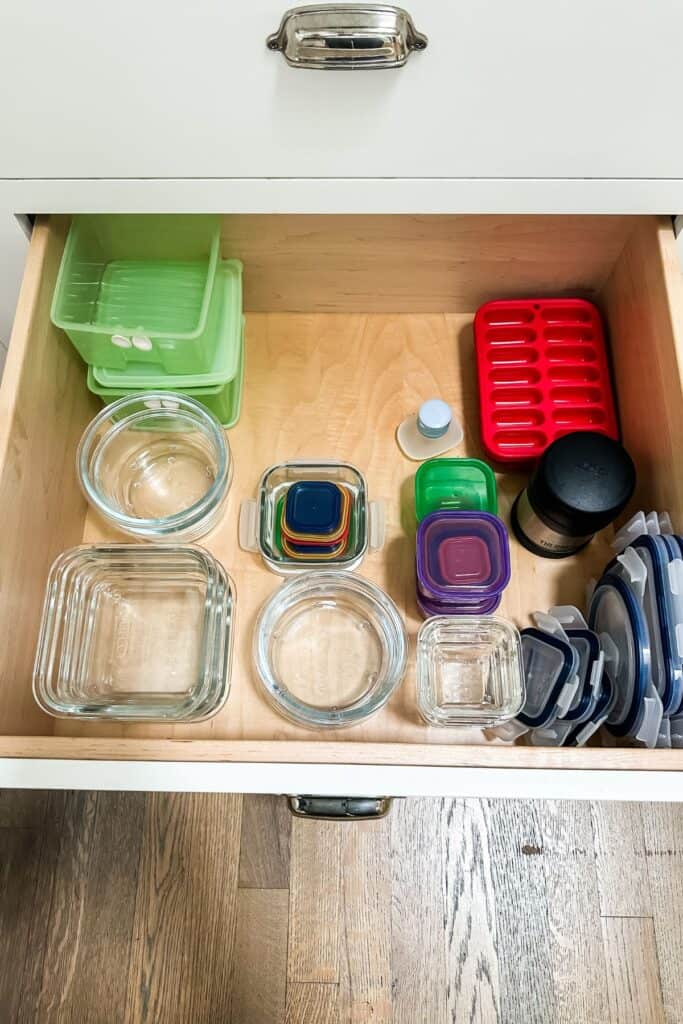
Here is everything back in the drawer. I love how organized it is and how I still have room to grow. I am sure as I use the new dishes I will see what I use a lot of and what I still need to get. It’s a work in progress but really, isn’t everything in life!
Other Organization Posts You Might Like:
- 15 Garage Organization Ideas You Can Do Yourself
- 21 Toy Organization and Storage Ideas
- 25 Craft Organization Ideas on a Budget
- The Best Jewelry Organizer Ideas
- 20 DIY Closet Organizer Ideas
- 25 Kitchen Cabinet Organization Ideas


Organize Tupperware and Food Storage Containers

As a licensed Real Estate Agent and an avid home decorator, I strive to give my clients the very best I can when it comes to staging, selling, and decorating their homes. I have lots of experience with paint color choices and love to DIY my home so I can have everything just the way I want it. I share my ideas and projects with the world in the hopes that I can help others have their homes just the way they want as well.