DIY Spackle Art: Inexpensive and Gorgeous
I am completely in love with this DIY Spackle Art! It’s so cheap to create a large piece of artwork. Let me show you how to do it.
My daughter and I created this DIY Spackle Art for her college apartment bedroom. She had a large wall and needed something big. And we didn’t want to spend a ton of money on it, so we created our own spackle wall art!
Scroll to the bottom of this post for printable directions.
*This post contains affiliate links. For more details see my full disclosure.
DIY Spackle Art
What you use for this project is totally up to you. Most people use a canvas but they can get really pricey!
You could use wood but. You just have to keep in mind that wood will make it a bit heavy. As long as you have the proper hanging materials then you should be okay.
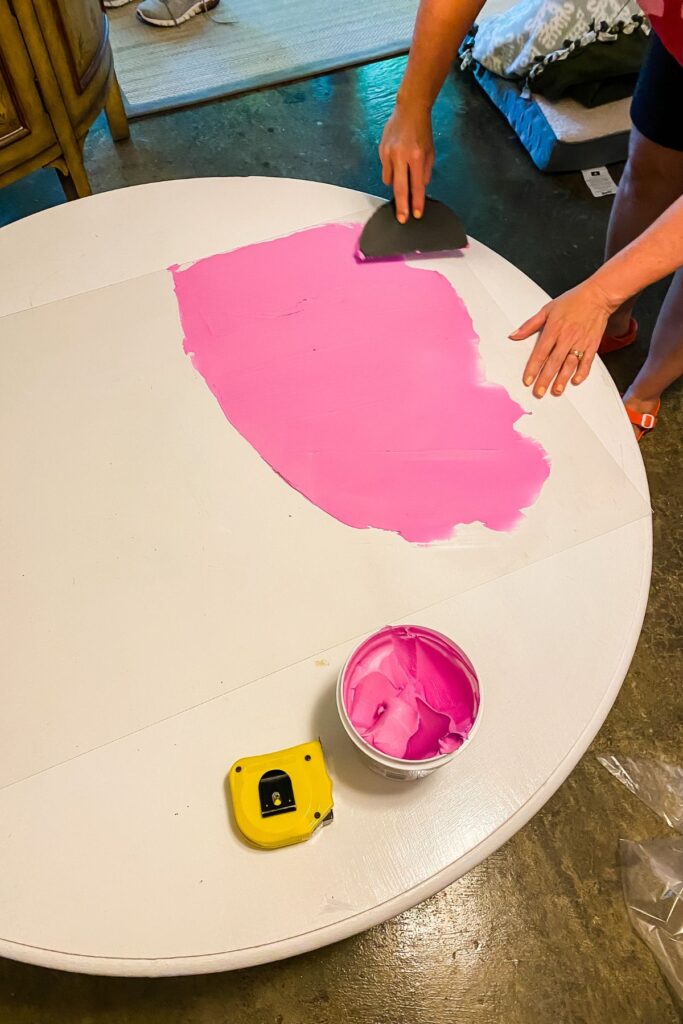
We chose to get a frame from IKEA. It was less than $30 and we applied the spackle directly to the plexiglass.
Materials:
We only spent about $35 on the whole thing. We bought the spackle and the frame, the rest of the things I already had on hand.
- Frame
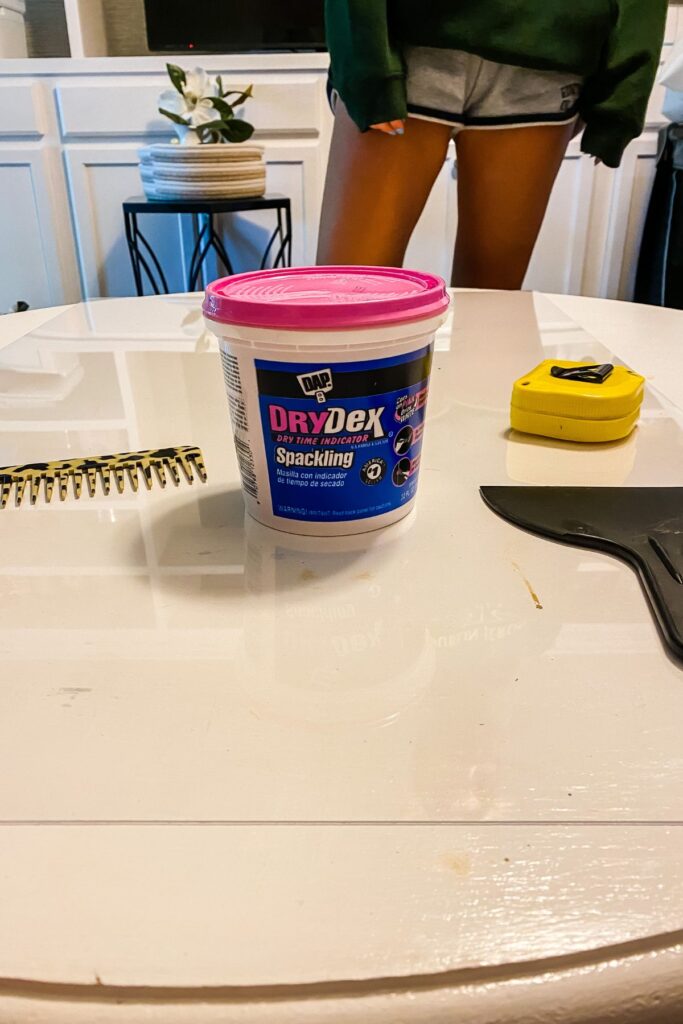
- Spackle
- Putty knife
- Comb
- Paint (this is optional)
Step 1 – Apply the Spackle
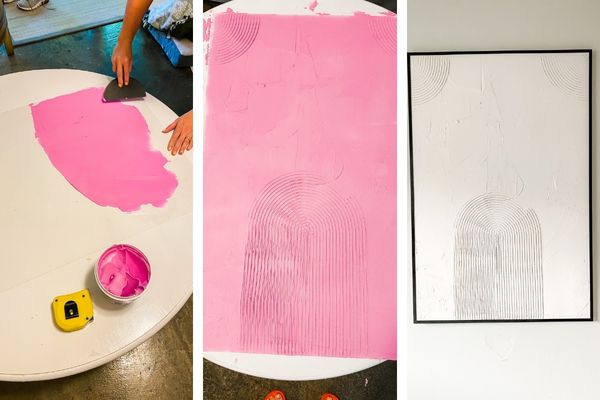
Using the putty knife apply the spackle to your plexiglass (or canvas). This is more art than science. I applied as thin as possible to keep the artwork from becoming too heavy.
You can apply some areas thicker for added texture. That is the cool thing about this kind of art, it’s the texture that makes it awesome!
Would you like to save this?
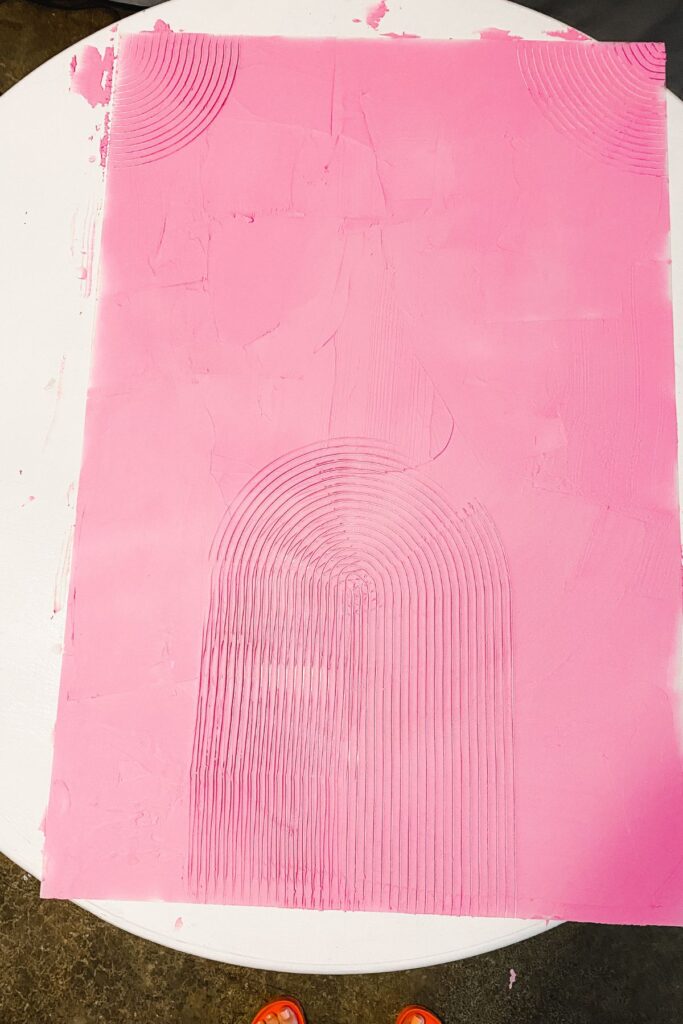
Step 2 – Comb in more texture
Using a comb that my daughter picked up from the dollar store she added ridges. You can put them in any way your want to. Again more art than science.
What is great is if you mess this part up or you aren’t happy with how it turns out, just run the putty knife over the spackle and start over!
Step 3 – Dry Time
Your dry time will vary depending on how thick your spackle is. Mine was mostly thin, except for a few areas so all we needed was about 24 hours.
You will know when the artwork is dry because the pink spackle will turn white.
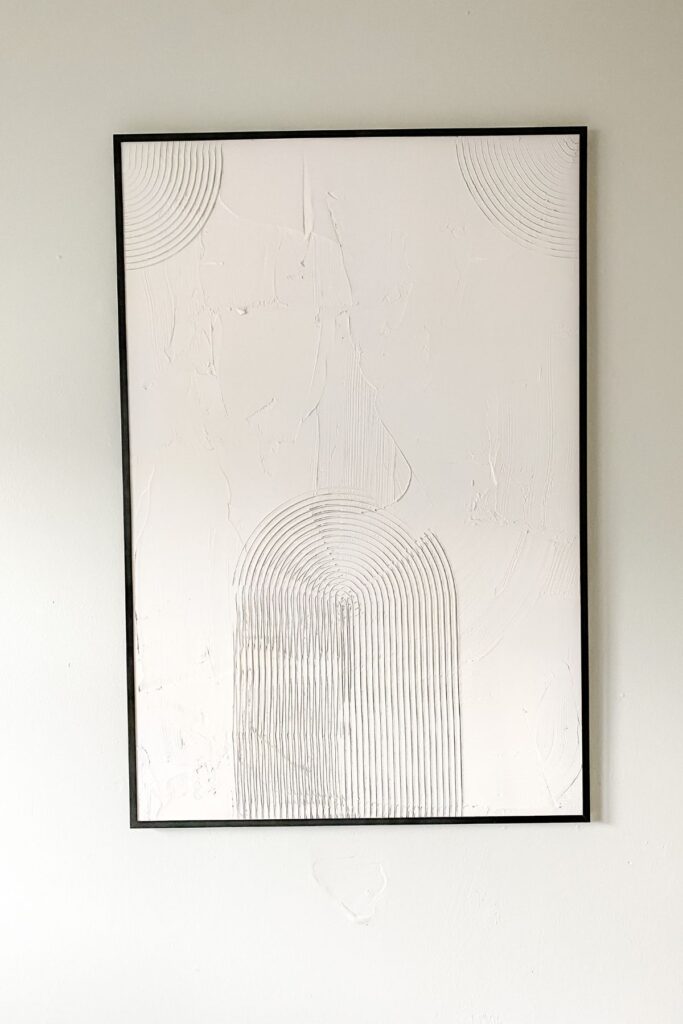
Step 4 – Paint
We wanted the spackle art to be white but unfortunately, we had a small spot where the spackle was still pink. So using some white spray paint we covered that up.
You can do whatever you want with the paint here. You can do one color all over or several colors, it’s totally up to you.
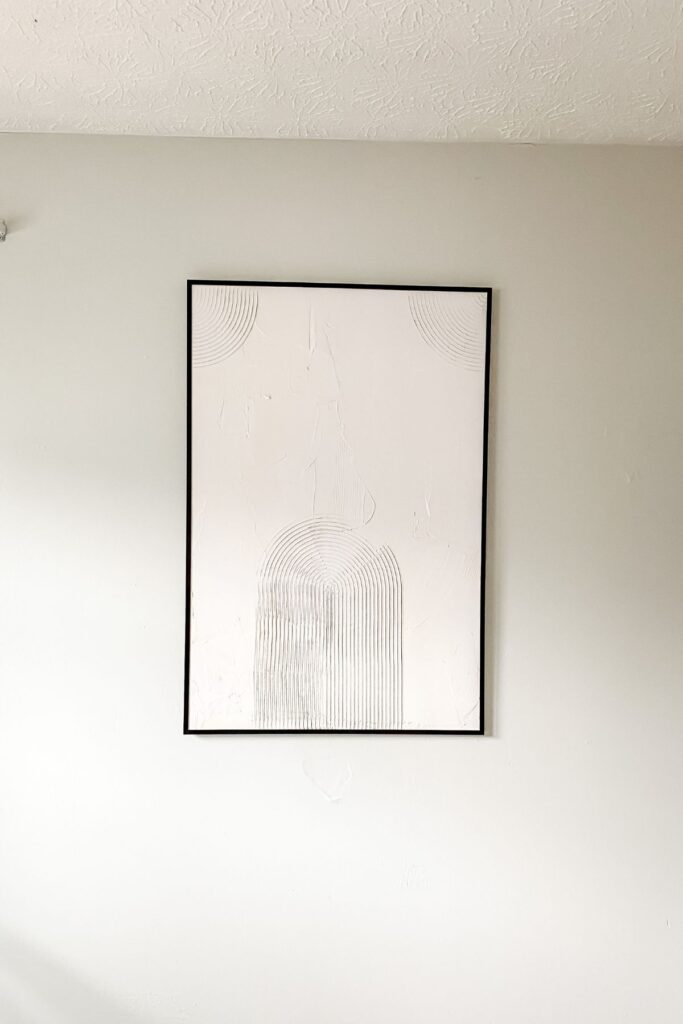
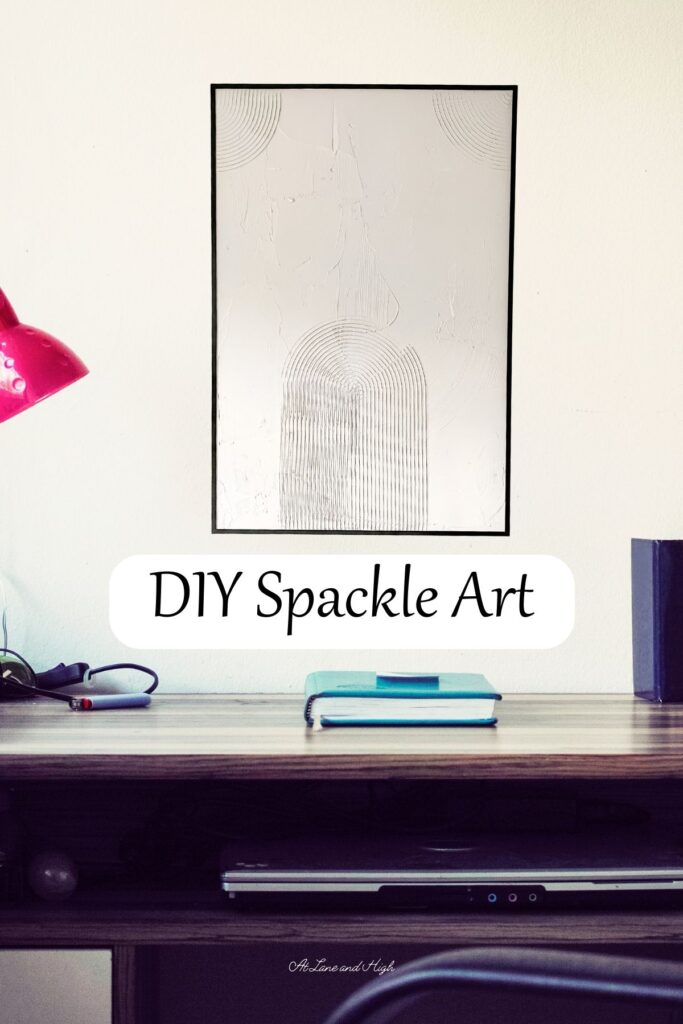
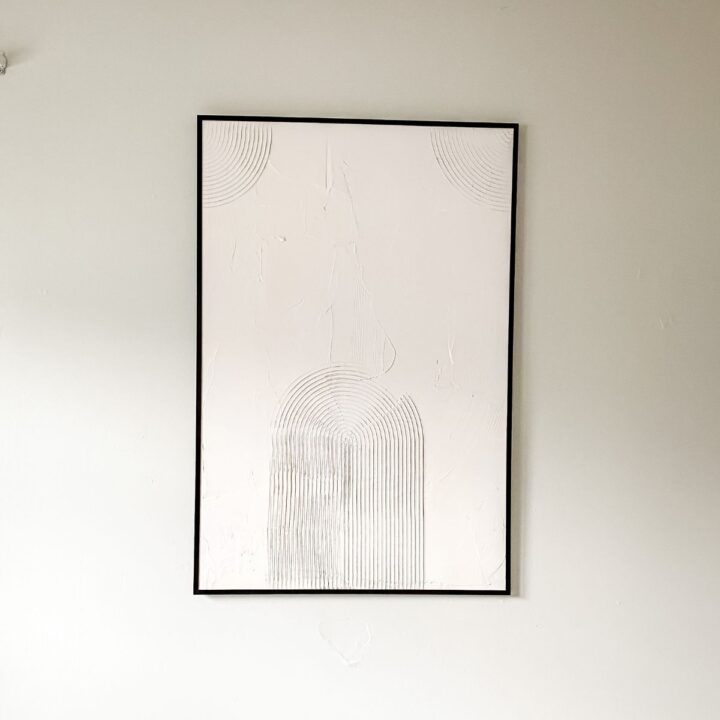
The Final DIY Spackle Artwork
Here it is! Talk about an easy project that doesn’t cost a lot of money.
As you can see it’s very easy and cheap to use spackle for art! The quick answer here is yes!
Yes and this is the most common way to do this project.
That is the whole point of this project. The spackle makes the most amazing texture and it’s very easy to work with.
All you need is a putty knife and spackle to create a gorgeous texture on canvas.

DIY Spackle Art
Create this beautiful piece of DIY spackle art for your home!
Materials
- Spackle
- Picture frame
- Paint
Tools
- Putty Knife
- Comb
Instructions
- Apply spackle to the plexiglass cover with the putty knife in a thin layer.
- Using the comb create ridges in the spackle in whatever design you want.
- Allow at least 24 hours to dry.
- Once it's dry you can add some paint if you want.

As a licensed Real Estate Agent and an avid home decorator, I strive to give my clients the very best I can when it comes to staging, selling, and decorating their homes. I have lots of experience with paint color choices and love to DIY my home so I can have everything just the way I want it. I share my ideas and projects with the world in the hopes that I can help others have their homes just the way they want as well.