
How to Refinish Wood Stairs That Were Carpeted
Today I am going to show you how to refinish stairs that were carpeted to create beautiful wood that will wow your visitors.
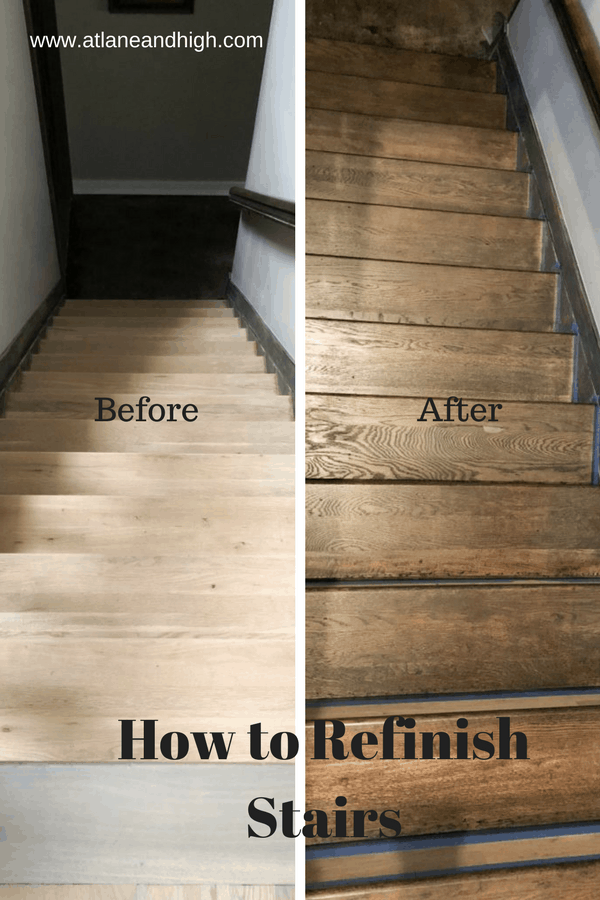
When we moved into the house we had this ugly brown carpet on the staircase down to the lower level and all over the lower level. Man, I can’t even explain to you how ugly this carpet was!
To start off the carpet removal process I pulled up the carpet in the basement family room and stained the concrete. My dog developed a bladder issue and started using this area for her own personal potty. YUCK!
Now I am moving on to the stairs. My husband was critical in this project. He did all the hard work, and no he didn’t pay me to say that! haha

*This post contains affiliate links. See my full disclosure here for details.
How to Refinish Wood Stairs
This stair project is probably one of my favorite that I have done around the house in the last 5 years. It all started with refinishing the stairs and then I added box molding to the walls.
This space looks so much more updated. It’s also so much brighter! Before you couldn’t see the basement floor from the top of the stairs when the lights were off and now with the changes I have made you can!
Materials and Tools Needed to Refinish a Staircase
This weekend was part one of the project. My husband and I did all the prep work and next weekend we will begin the finishing process.
These are all the materials and tools you need to complete this project.
- Orbital Sander
- Sandpaper-80 grit, 120 grit and 220 grit
- Mouse Sander – and sandpaper in the same grit as the other sandpaper
- Stain
- Polyurethane
- Pliers
- flat head screwdriver
- safety goggles
- foam brush
- rags
The First Step In How to Refinish Wood Stairs: Remove Carpet
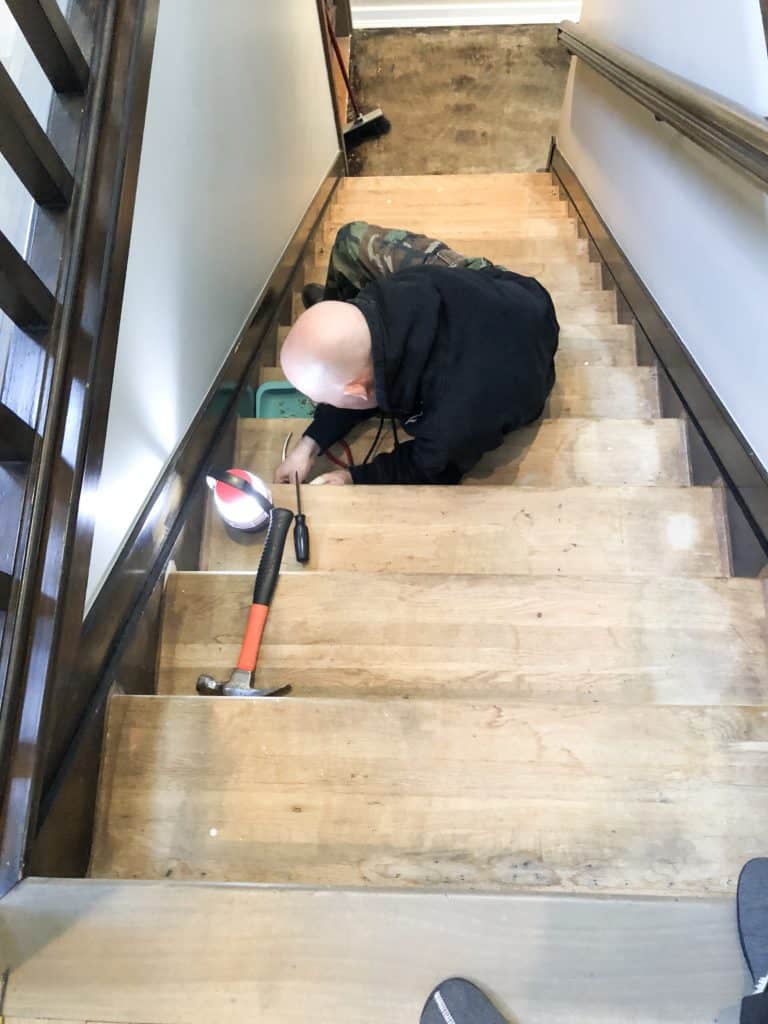
While I was working on my Farmhouse Style Laundry Room for the $100 Room Challenge my husband got bored so he ripped the carpet off the steps. He knew this was the next project so he thought he would get a head start on it.
This was no easy task. He did all 13 steps in one day. I will say I was so impressed.
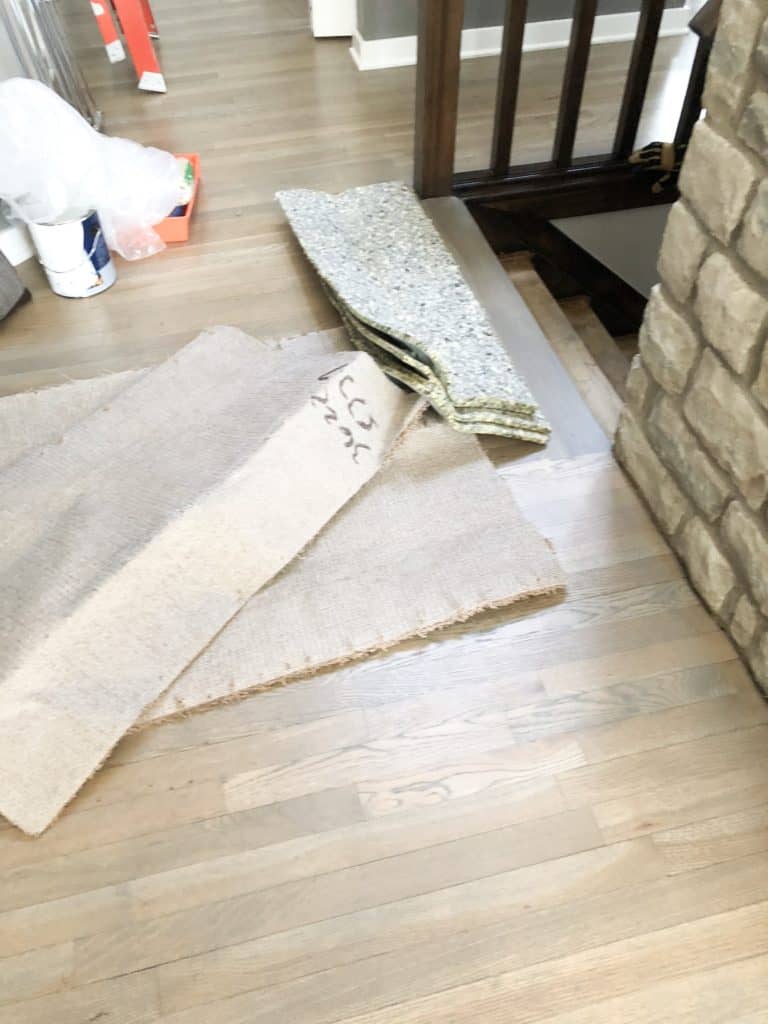
The carpet came off in strips of 2-4 steps at a time.
Then you have to pull all the staples out, and let me tell you there were a bazillion staples in there! Make sure you wear safety goggles! Those staples can go flying.
To pull the staples out he used a flat head screwdriver and needle-nose pliers.
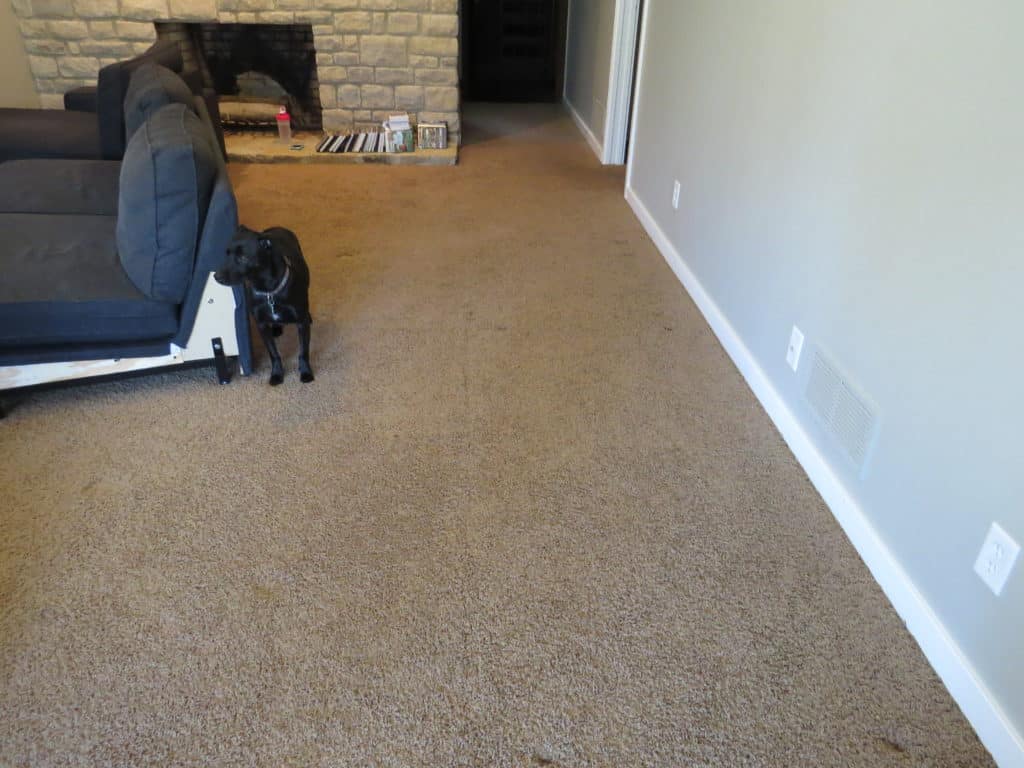
I want to apologize, I took a picture of the steps with carpet and now I can’t find it on my phone. It’s disappeared! So here is a picture of what the carpet looked like in the basement before we ripped it up, you can get the idea of what the steps looked like.
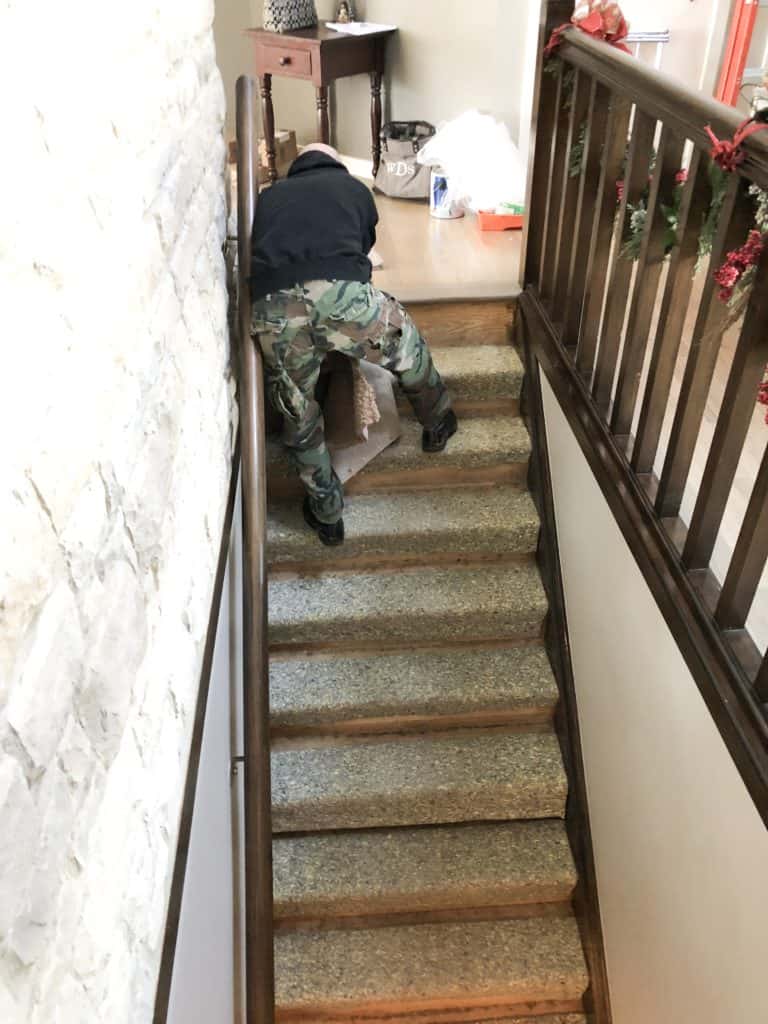
Here is my husband ripping off the last piece of carpet. Then he has to remove the carpet pad and staples.
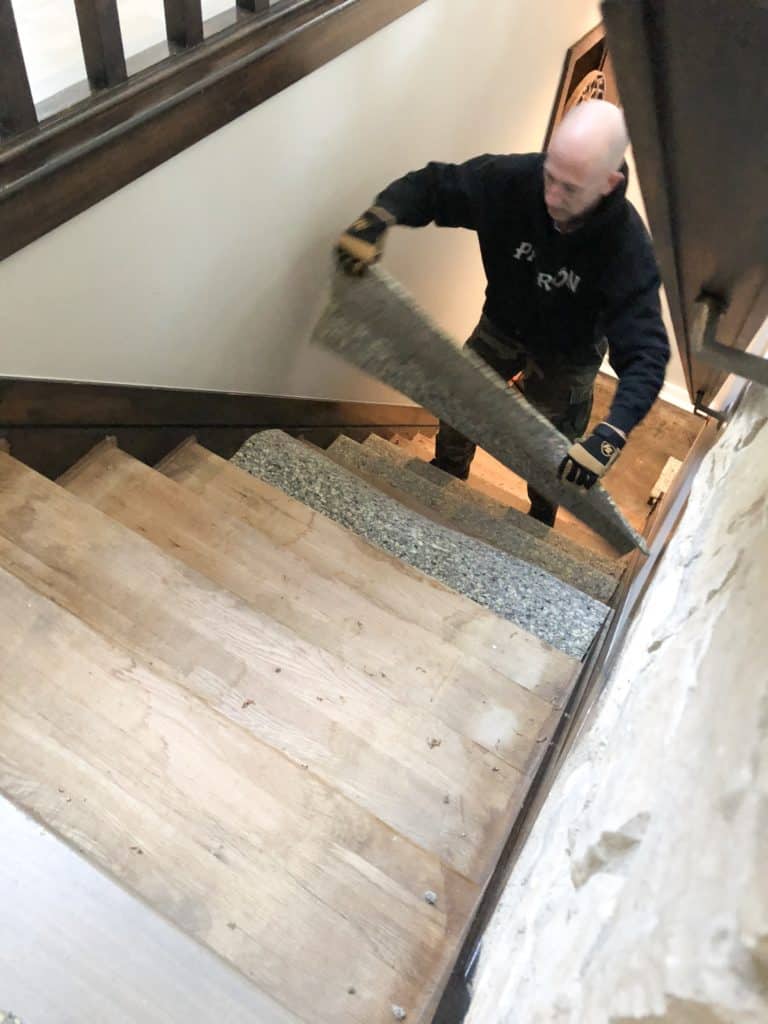
Once the carpet is removed and all the staples are out clean with a vacuum cleaner and sweep up all the dust.
Sanding Stairs Is The Next Step
If you have any steps that need replacing now is the time to do it. You can purchase stair treads and risers at the local hardware store. I am so happy that I don’t need to replace anything!
I used my orbital sander and my good friend Kris (hey Kris😉) let me borrow her mouse sander. With these two I was able to do it all, no hand sanding needed…..thank goodness.
I started with 80 grit sandpaper, then went to 120 grit then finished with 220 grit.
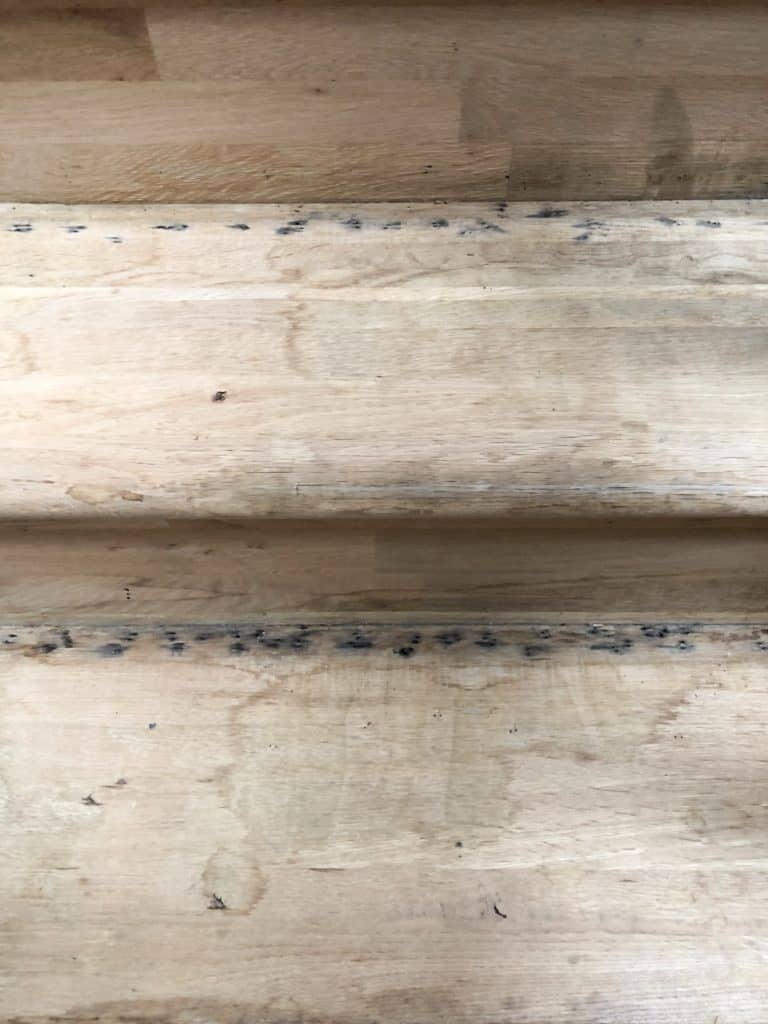
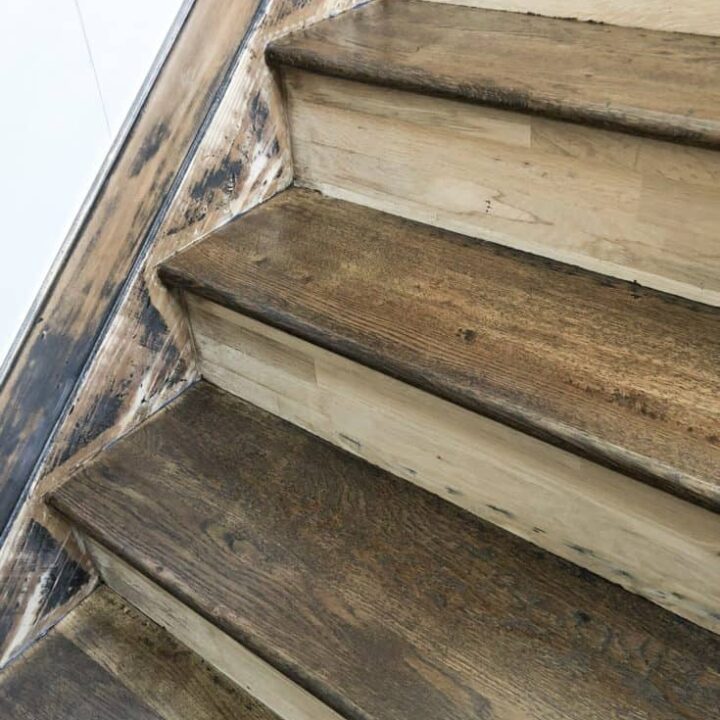
The wood under the steps is in perfect condition. All I have to do is putty a couple of gouges in the wood from removing the staples.
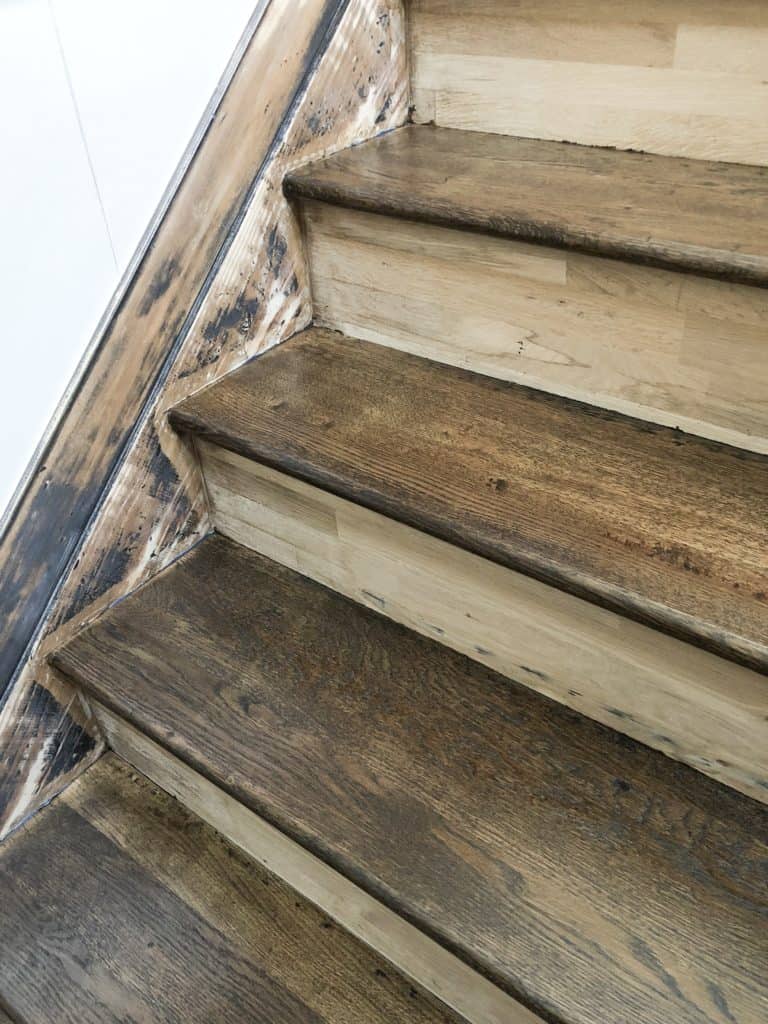
It took me about four hours to sand all the steps. I also sanded the wood on the side of the steps as well as some trim.
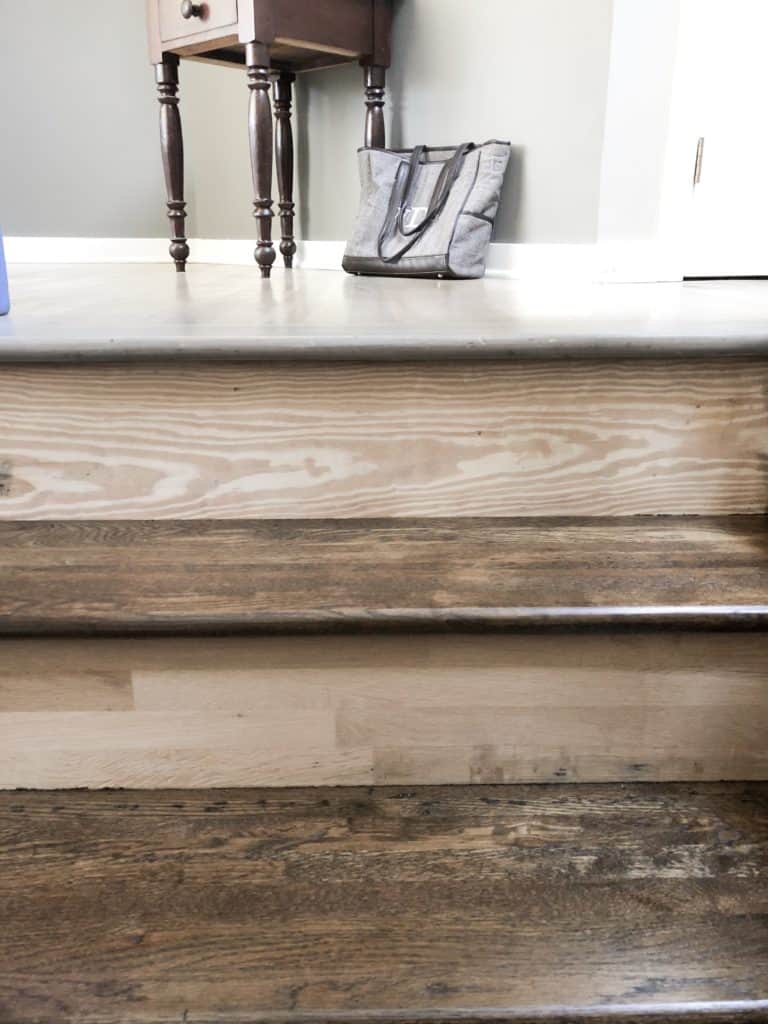
As you can see in this first picture there were quite a few water stains to get out.
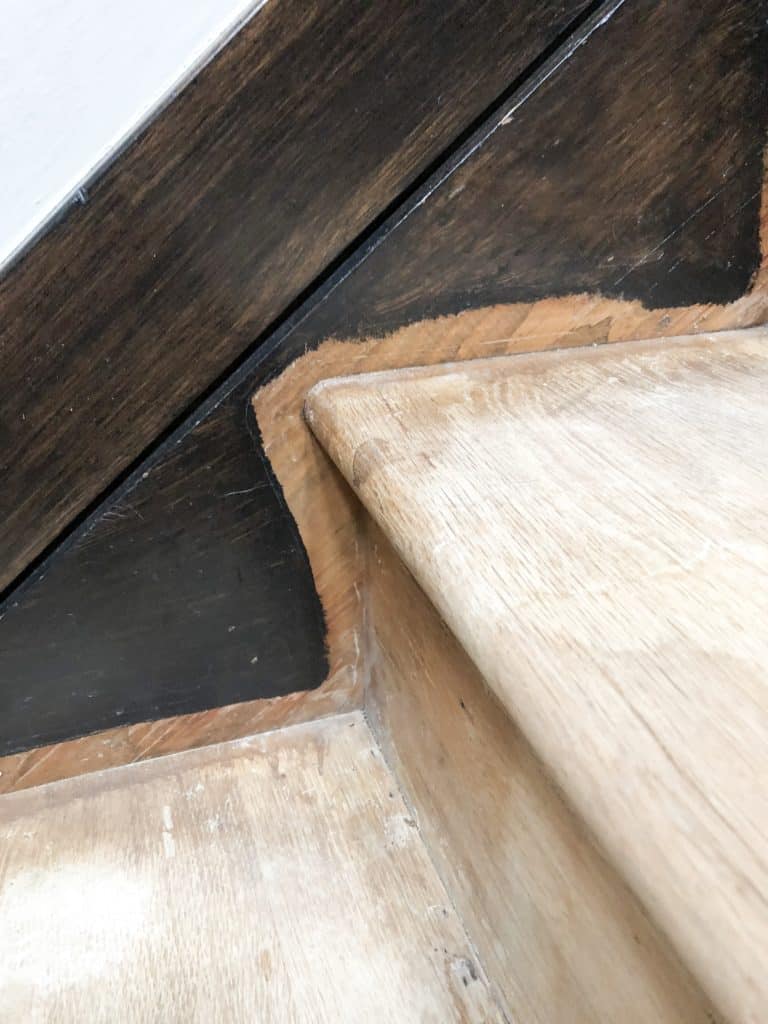
And in this photo below they didn’t stain all the way to the steps, they stopped at the carpet. 😐 So I sanded the trim on the sides as well. More on that project later in this post.
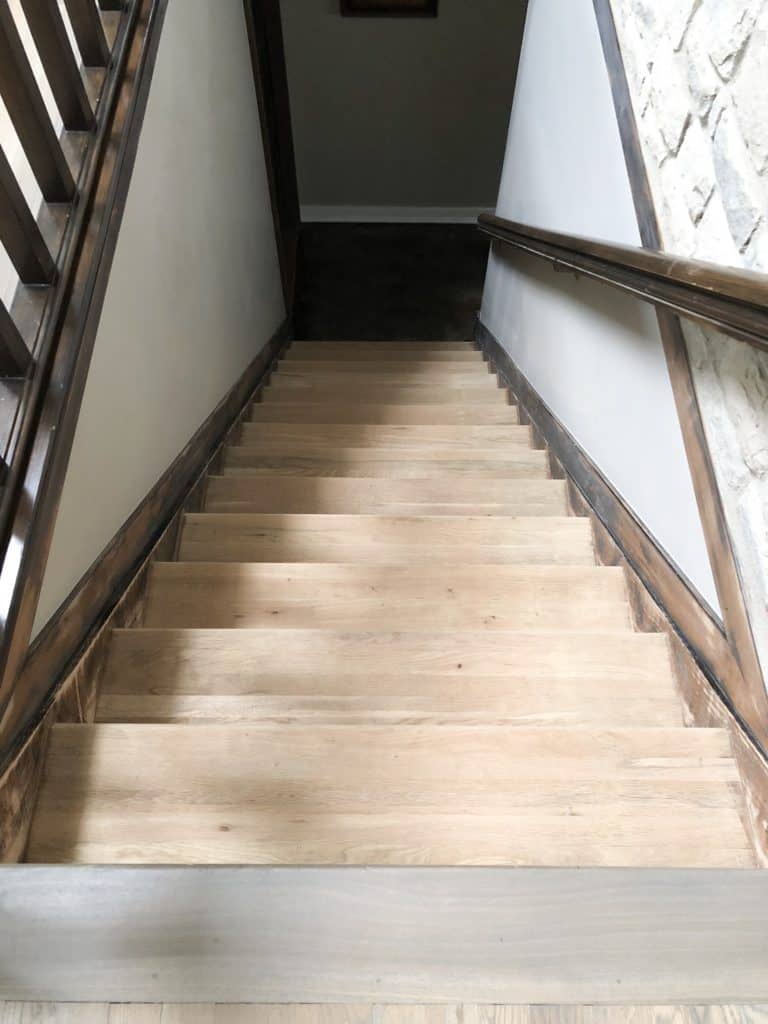
Here we are after sanding.


Refinishing Stairs – Adding Stain
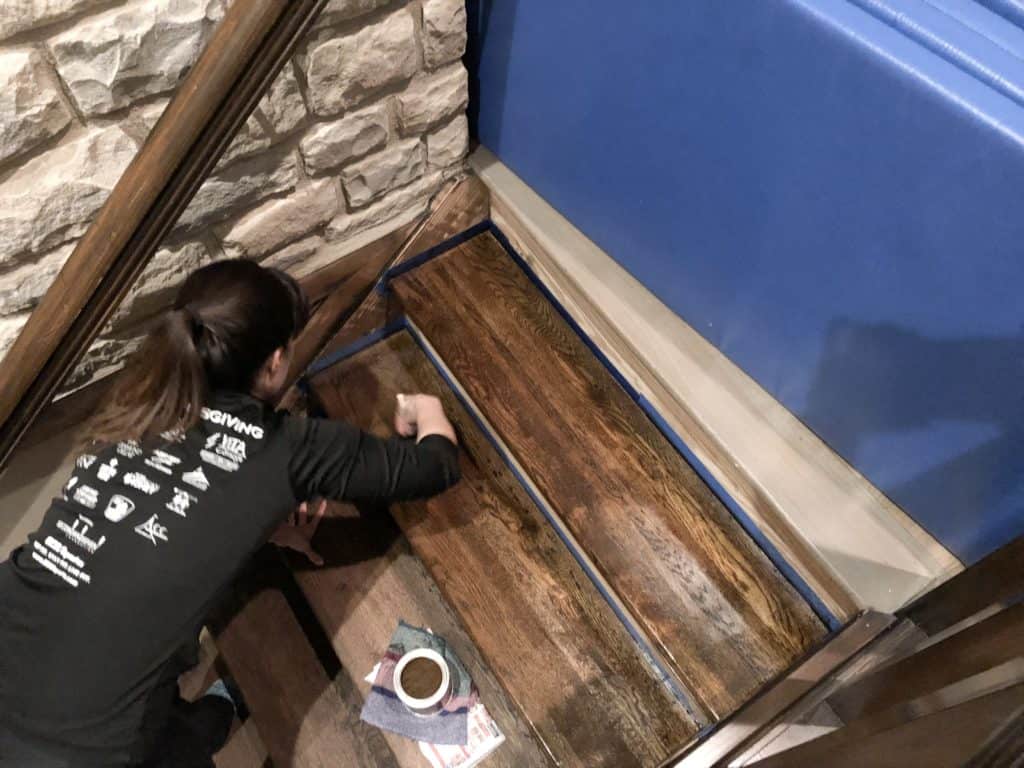
First things first, the prep work. I hate prep work but it is truly the most important part.
Would you like to save this?
You need to tape off the stair treads from everything else. I went through 2 rolls of tape for this whole project so stock up!
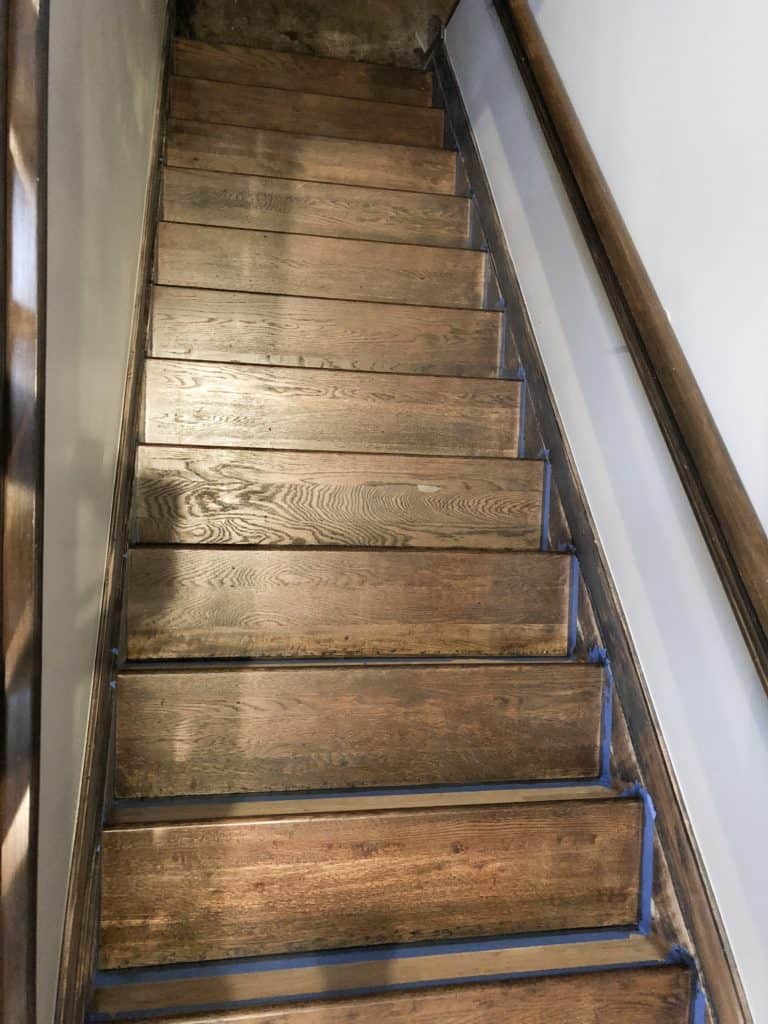
I was trying to decide between a couple of stain colors, Jacobean and Ebony. In the end, I went with Jacobean and it was perfect!
Using a rag or foam brush put the stain on the wood moving with the grain of the wood. Let it sit for a few minutes for a deeper color. Then wipe with a clean rag, again moving with the grain of the wood.
Let the stain dry for 24 hours. You can add another coat at this point if you want a darker color. Just make sure you let it dry for 24 hours before applying poly.
As you can see I did not stain the risers, that’s because I plan to paint them white. If you prefer to have them stained then you would do so in this step.
Refinishing Hardwood Stairs – Adding Polyurethane
Once the stain is dry it’s time to apply Polyurethane. You won’t believe how amazing the wood looks after applying poly, it brings out the color and makes it shine!
I like to use Polyurethane after applying an oil-based stain as long as it’s not a light color. You can choose from several different finishes. Here is the one I used:

I used a foam brush to apply and then waited to dry. OMG, the first coat took forever to dry! I believe it was mostly my own fault because I think I put it on way too thick. There is also absolutely no airflow up and down these steps so that may have been the issue too.
Once it finally dried I sanded it using 220 grit sandpaper moving in the same direction as the grain of the wood. I sand VERY lightly here. Then applied a second coat of poly.
Repeat this for a third coat if you want. I did three coats of poly for extra durability, you decide if you want to do the same, more or less. It’s totally up to you.
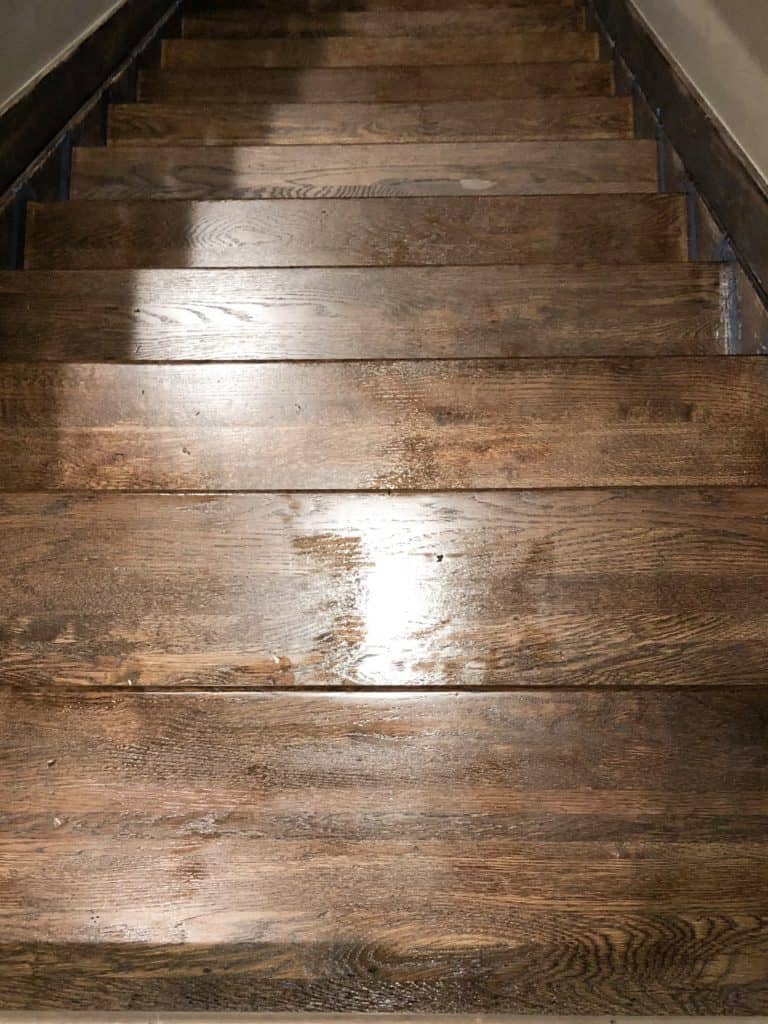
This picture is of the steps with wet poly, when it dries it’s even prettier!
Wait for 24 hours to be completely dry before walking. Yes, this is really difficult if you need to get up and down the steps.
Some people say to do every other step to allow people to go up and down the stairs while waiting for everything to dry. This is a good tactic but my dog wouldn’t be able to do that.
I chose to do it all at once and get it over with. My kiddo had to use the outside steps for a few days because her room is on the lower level, but it was no big deal.
As you can see from the pictures the stair treads are done, and I am in love with the color! The next step is to paint the risers, and I will be adding some more architectural detail.
FAQ’s on How to Refinish Wood Stairs
Is it hard to refinish wood stairs?
This project is definitely not difficult technically, but it is hard work. Tearing the carpet off the stairs was really tough. My husband did that part in one day, if it had been me it probably would have taken me a week, LOL.
Sanding the stairs was tough too because of bending over. Also after 4 hours of sanding my hand felt like it was vibrating even when I put the sander away!
If you have back problems or hand issues then you definitely want help with this project. Or maybe just break it up into smaller chunks.
Staining and Polyurethaning were not hard at all. The waiting for it to dry was excruciating! LOL, I am not a patient person at all!
How much does it cost to refinish wood stairs?
This project did not cost a lot of money, my favorite kind of project!
It cost nothing to rip the carpet off the stairs. It cost me some money in sandpaper. I really like this one from Amazon because it has a ton of it and in varying grits.
I used a quart of stain and a quart of poly, with some leftover of each. So all in I was at about $50-60 depending on how much sandpaper you buy.
A lot of times I have leftover stuff from other projects and that really helps me keep the cost down on other projects.
The biggest expense on this project was my time and labor.
The plan for the walls….
Box molding, that’s is the big plan!!!!! I sanded the sides of the steps as well as the trim because I plan on painting it white. As well as the stair risers.
Then I am adding box molding on the wall very similar to this wall. I just love this look!

Go check out my post on how to add box molding to a staircase and see the finished product. Like I said, one of my favorite projects EVER! I really feel like it adds a ton of value, and class to my home.

How to Refinish Wood Stairs That Were Carpeted
Learn how to Refinish Wood Stairs that Were Carpeted
Materials
Instructions
- Remove carpet
- Remove carpet pad
- Remove staples using the flat head screwdriver and needle nose pliers
- Repair or Replace any damaged wood
- Sand wood using both sanders starting with 80 grit sandpaper, moving on to 120, and finishing with 220
- Clean the stairs with a vacuum and wet rag
- Tape off the area you will be staining using painters tape
- Apply stain using a foam brush or rag
- Let it sit for a couple of minutes and remove excess with clean rags
- Let it dry 24 hours
- Repeat steps 9 and 10 if you want a darker color
- Apply polyurethane with a foam brush
- Let it dry 24 hours
- Using a 220 grit piece of sandpaper lightly sand the stairs then clean
- Apply another coat of polyurethane
- Repeat steps 14 and 15
Notes
You might want to break this project up to keep it from being too hard, especially the removal of the carpet. The whole project took me about a week to complete from start to finish allowing for dry times on the stain and poly

As a licensed Real Estate Agent and an avid home decorator, I strive to give my clients the very best I can when it comes to staging, selling, and decorating their homes. I have lots of experience with paint color choices and love to DIY my home so I can have everything just the way I want it. I share my ideas and projects with the world in the hopes that I can help others have their homes just the way they want as well.


Great work Wendy, the before and after pic is outstanding – great results!
Removing the carpet and pad can be done in 10 minutes , and maybe 30 to remove all the staples. But we do it everyday so lots of practice I guess. Thanks for the tips, doing my stairs now.Was looking online to see if it’s best to use wood filler before sanding anything , or sand once then do wood filler then do full sand. Havnt really found solid answer yet so I’ll probably do a quick sand before filler. Then full sand.