
How to Stain Concrete Floors
Today I am sharing how to stain concrete floors, the good the bad, and the ugly!
Finally, it’s done! From the moment we walked through this house when shopping for a new home I knew that this ugly brown carpet had to go. I didn’t want to just replace it with carpet, I have 2 teenagers and they are as messy as toddlers!
We were looking for something durable and beautiful, but also something that would not break the bank. In the local Parade of Homes, many of the houses had stained concrete basement floors and I fell in love with the idea.
*This post contains affiliate links. For more details see my full disclosure.
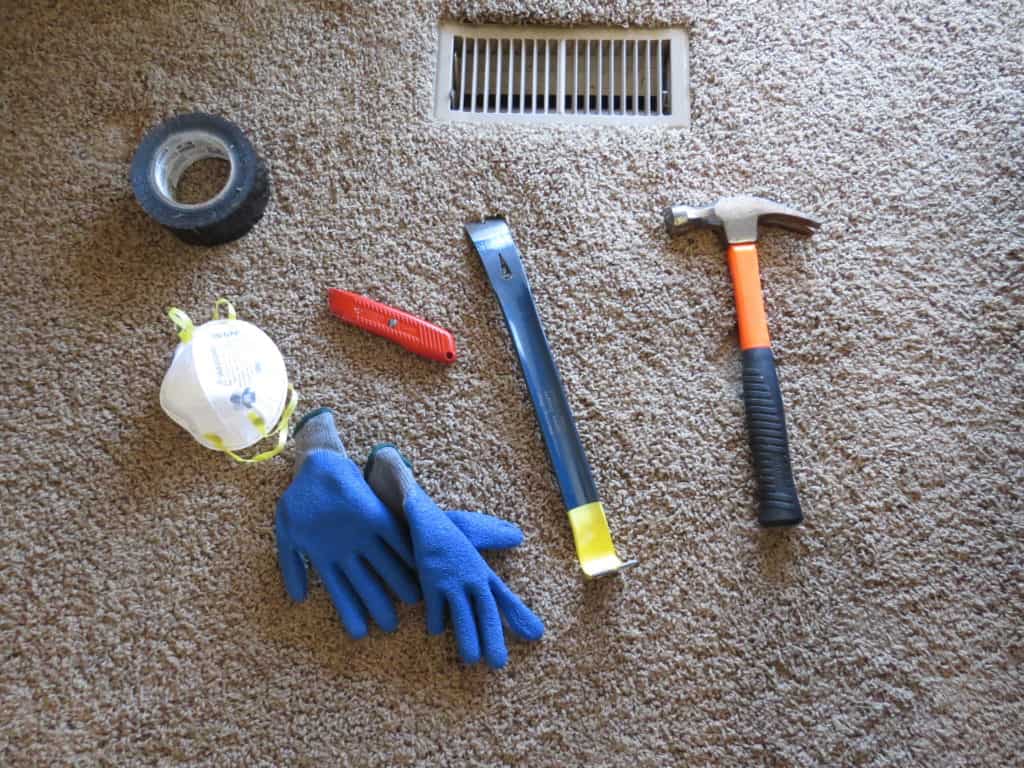
Materials
I researched different products and decided to go with Rust-oleum’s Epoxy Shield product line. Let’s go into the details on how to stain concrete floors.
- Safety Goggles – these are not the kind you used in chemistry class. These are much better looking, lol.
- Gloves
- Dust Mask
- Duct Tape
- Adhesive Remover
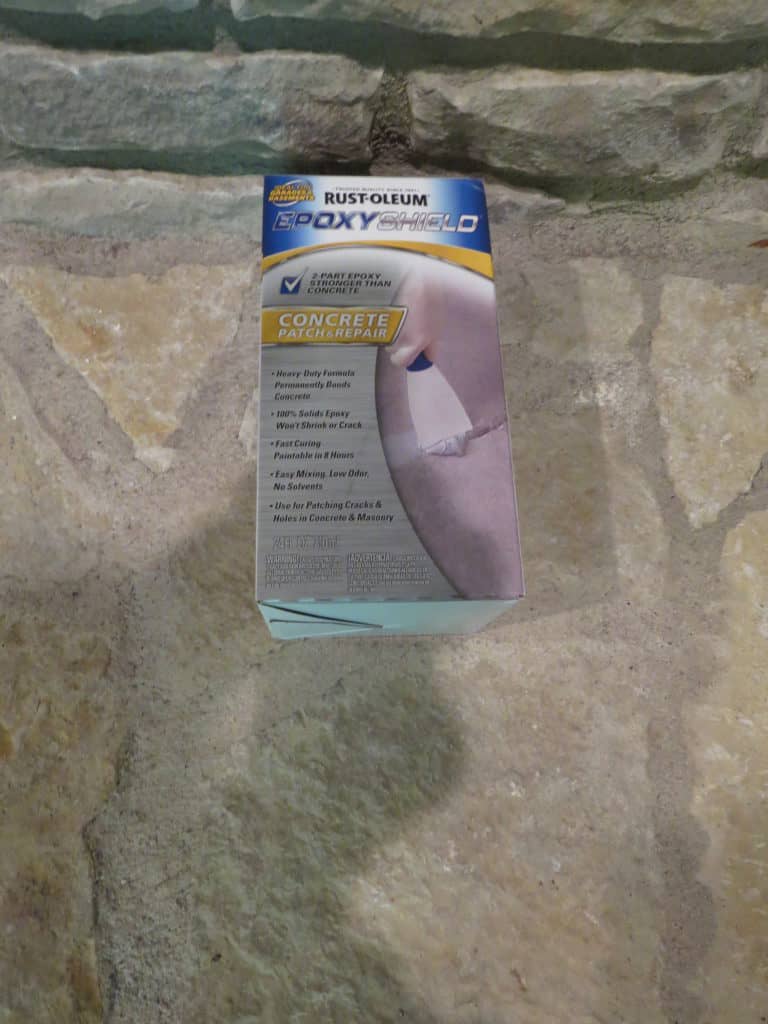
- Rustoleum Concrete Patch
- Etching Powder
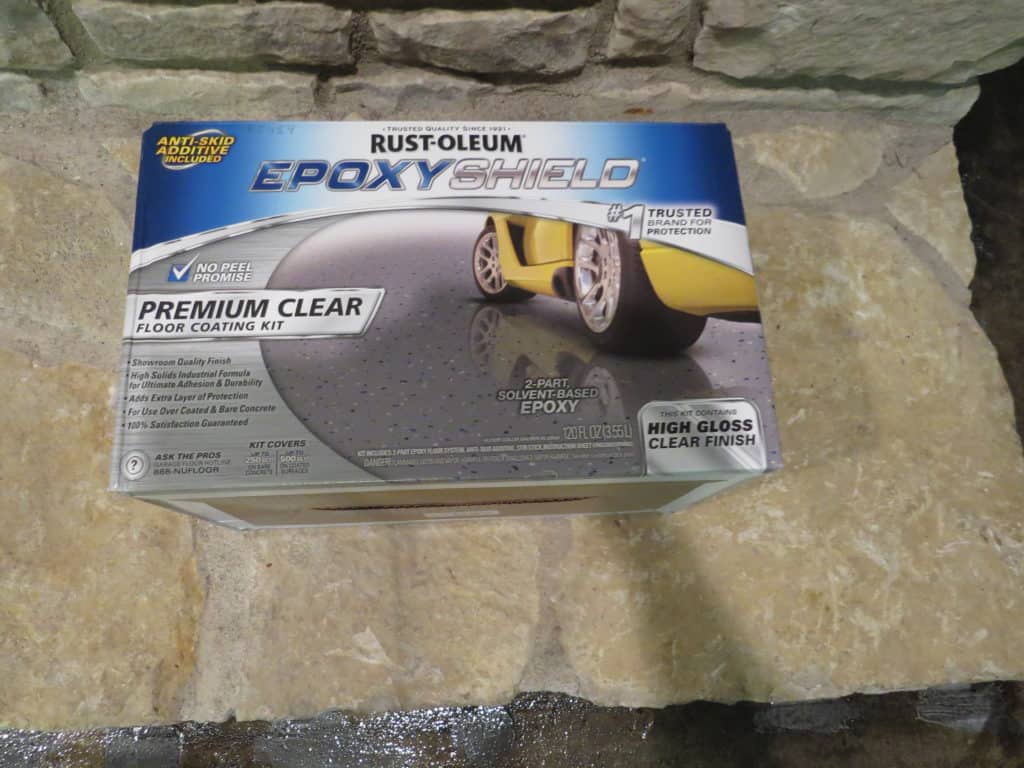
- Epoxy Kit
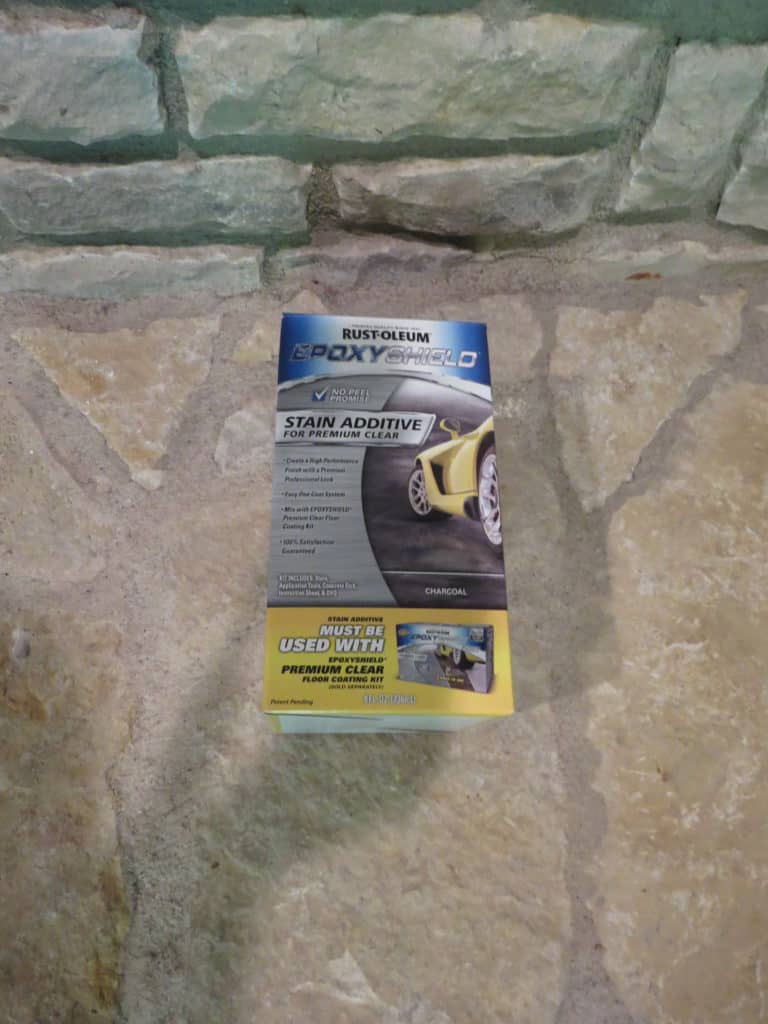
- Stain Additive
Tools
How to Stain Concrete Floors
This project was on the to-do list but it got moved up to the top when my dog developed a ph imbalance in her bladder. She started using this room as her own personal bathroom. Yeah, not cool.
The basement smelled so bad that we had to do something, FAST! So we did a bunch of research and found the right products and got to work.
Remove carpet
The first thing you want to do is pull up the carpet you are replacing.
Before you start check with your local trash company and find out what dimensions the carpet rolls need to be. For example, my trash company said no more than 4 feet long and 2 feet thick.
Make sure you have a new, sharp utility blade and start cutting in long strips, roll them up and tape the rolls closed with duct tape. Continue until you have all the carpet up then do the same thing with the padding.
To remove tack strips take a pry bar and hammer the straight end under the nails, you don’t need to pry. The nails should come out of the concrete with the vibrations of the pounding.
Definitely wear safety goggles! Sometimes those nails go flying in the air so make sure you protect your eyes.
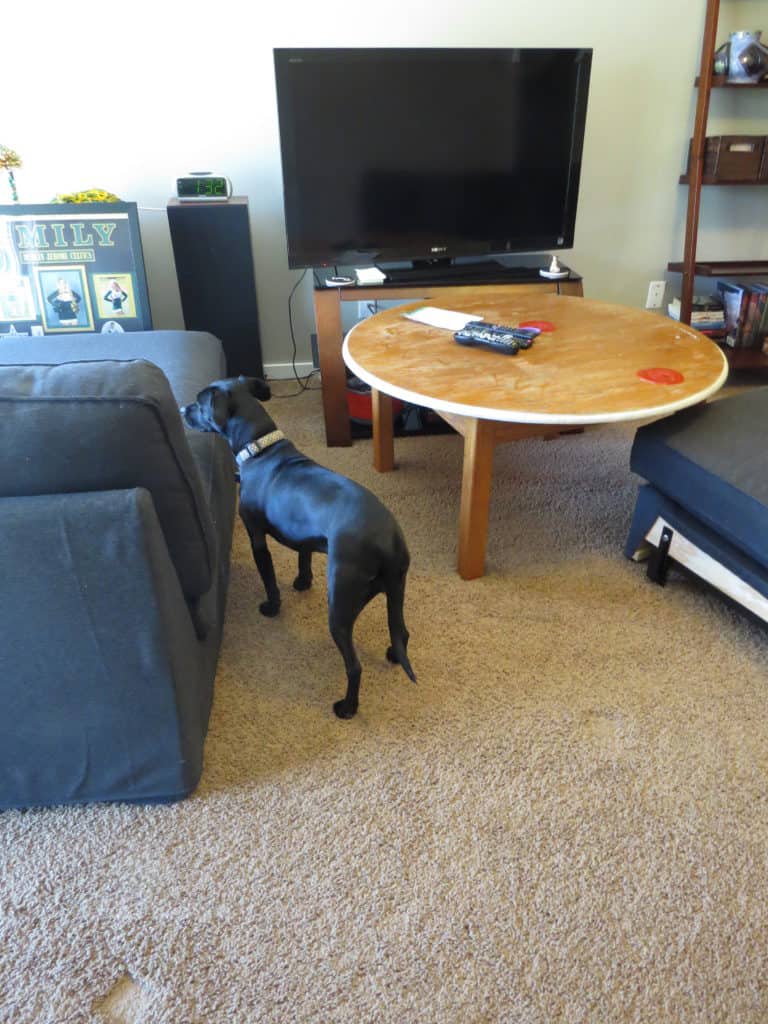
The picture above shows the old brown carpet and the culprit who decided to ruin it! HAHA! I can’t be mad at her though, she’s too cute and such a good cuddler!
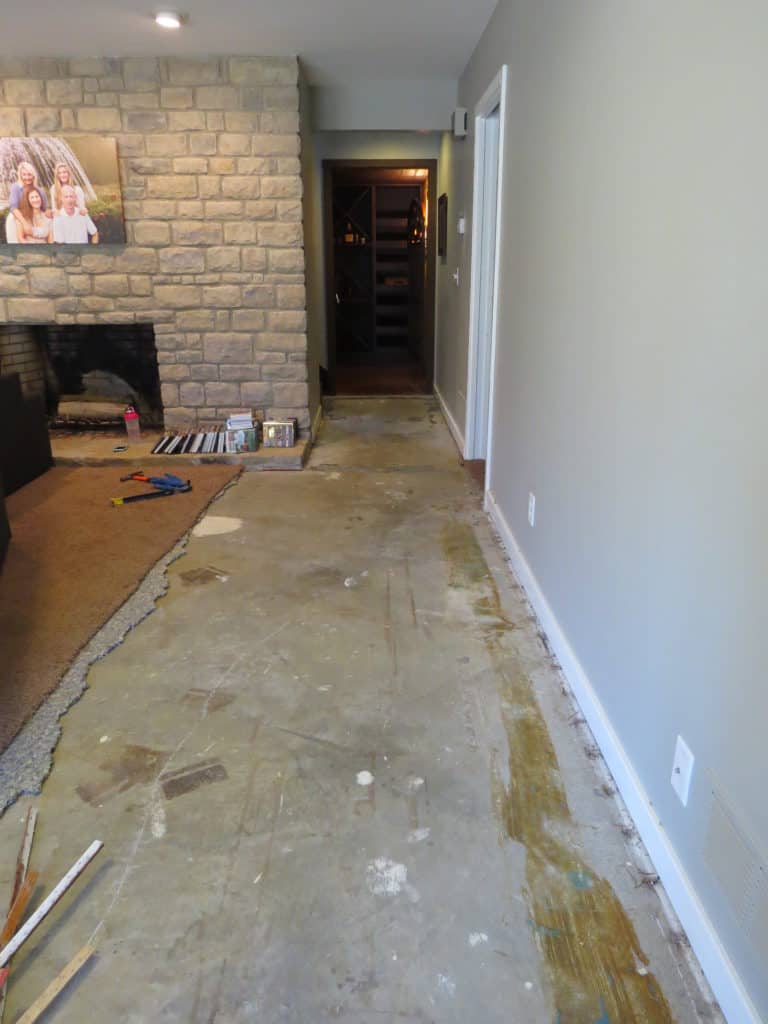
The work in progress above….one down many to go!
Remove Carpet Pad Glue and Patch Holes
Make sure you have heavy-duty gloves for this step.
I used this adhesive remover which was no joke! Follow the directions on the product you use but make sure you have your skin protected and good ventilation.
The smell was pretty bad I won’t lie, and a couple of times I got a drop on my skin…..not fun. But I will say this stuff worked like magic!
I was able to pour it down, spread it with a cheap paintbrush and after 30 minutes it scrapped right up. I used a scraper that I had from an old wallpapering kit (from the 80’s 😳, please no judging 😂)
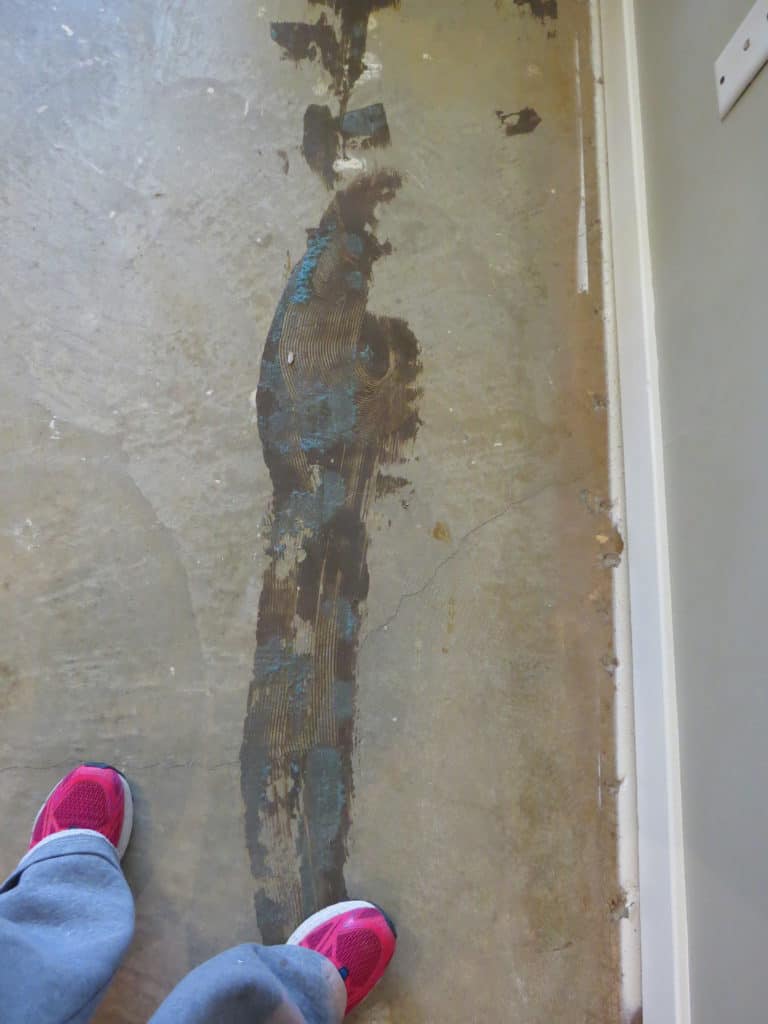
Above you can see the glue that I had to get up and the holes along the baseboard that I needed to fill.
I used Rust-oleum’s concrete patch to fill in all those holes left by the tack strips and a couple of large holes that were in the middle of the room.
Would you like to save this?
Etch the concrete
This step is necessary only if you have concrete floors that have never been painted or stained before. If they have then you don’t need to do this step.
First, clean the floor! Make sure there is no debris, no leftover residue from the adhesive remover. This step takes time.
What you do is mix the etch in a watering can with water and work in small sections. Wet the floor with a mop, spread the etching solution, then using a stiff-bristled broom scrub.
You will see bubbling, that’s good! It’s working!!!! Once it’s done bubbling mop it up and move to the next section. When you are done mop the floor three more times…..yep that’s what I said….three more times!

Rustoleum Epoxy Shield Etching Powder
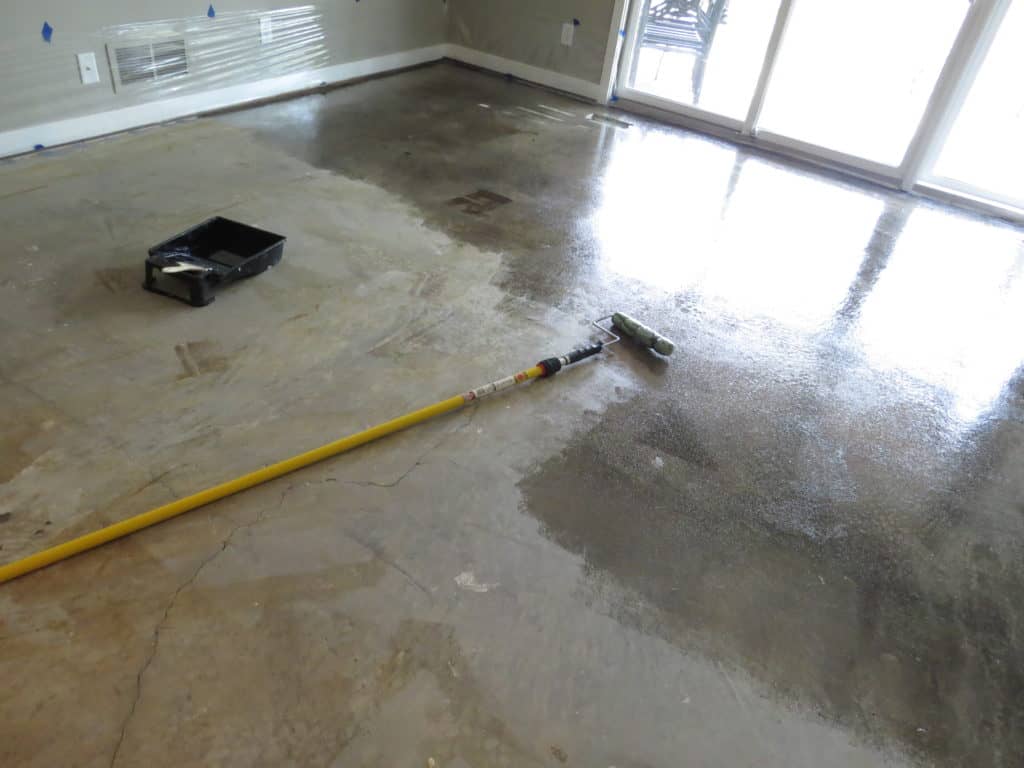
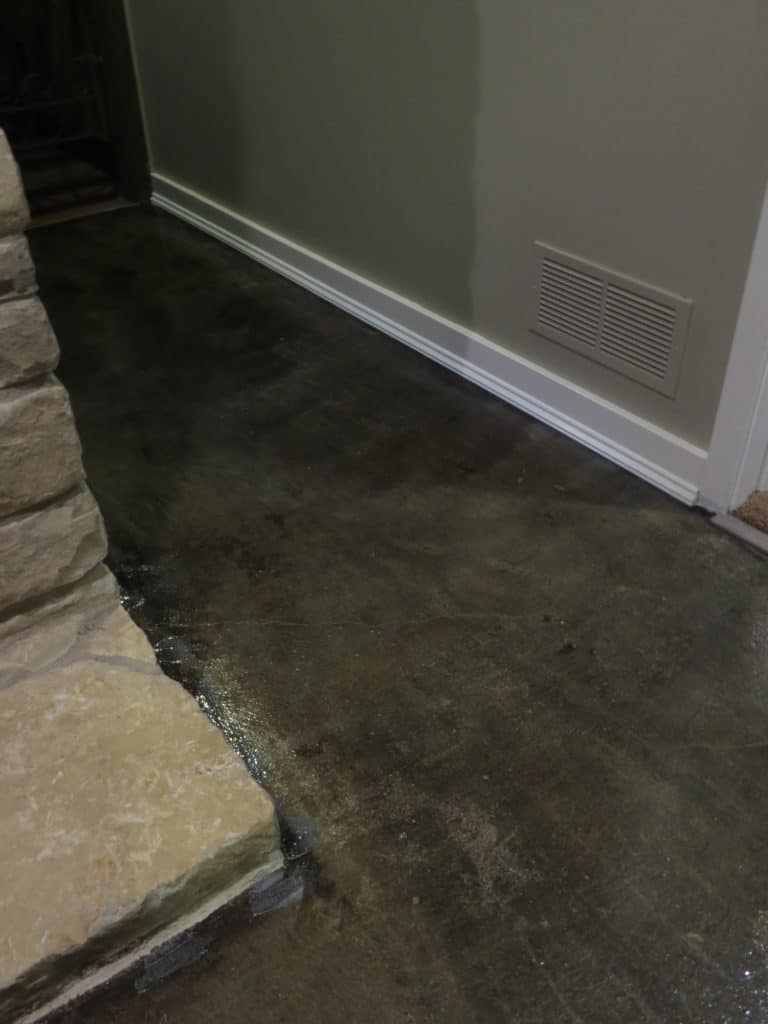
Stain the concrete
This is the fun step because you see results!
Mix the activator with the color you chose and the nonslip material. Stir for a couple of minutes, or whatever the package says to activate everything. As always follow the directions on the product.
Work in small sections with a roller on an extension pole. Put a bag on the roller and rubber band it, this creates texture and it should have been included in the kit.
Make sure you work quickly! This product only lasts about 90 minutes after activating and then it gets really thick, take my word for it. I was pushing that 90-minute mark hard. Make sure you wear gloves on this step as well, protect that skin!
Rust-Oleums concrete stain additive in Charcoal
How to Stain Concrete Floors Tips and Tricks
I used plastic sheeting on the bottom foot of the walls to protect them during the etching and staining process. Boy was I very happy I did this because I splashed a lot of water upon the walls.
Will most likely want to install some shoe molding or quarter round because there will be a gap between the concrete and the baseboards where the carpet used to be.
I could have removed the baseboards and installed them lower but then I would have to paint the wall where the baseboards used to be. It seemed easier to just add some quarter round or shoe molding.
I get asked a lot if you can stain their concrete floors in their garage and the answer is yes! To be honest, I am thinking of doing the same thing.
UPDATE: Since staining my concrete floors I have also installed Built-ins for storage and created a reclaimed look wood wall. This room went from my teenagers hang out space to my office/den space since I work from home, and the kids are in college now. Here is a look of the room with the changes I have made and how they look with the stained floor.
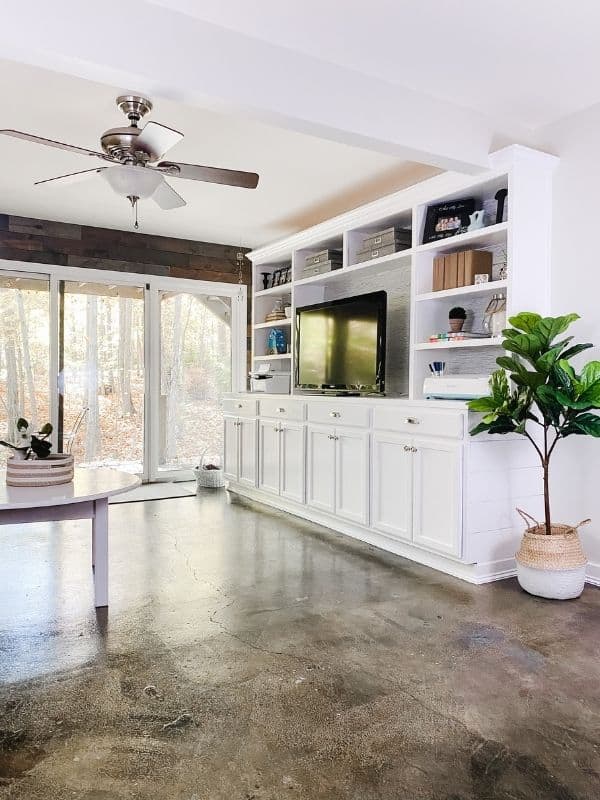

I am proud to say is this basement floor project cost me less than $250 with the additional molding and thresholds included. That’s a lot better than hiring a professional who would charge me thousands! And I think it looks pretty good and I am pretty darn proud of what I have done!
Related Floor Posts You Might Like:
- How to Install Slate Tile Floor
- Everything You Need to Know About Herringbone Floors
- 8 Bathroom Flooring Trends
- The Best Area Rug Pads for Hardwood Floors
- Cheap Flooring Ideas for an Instant Update


As a licensed Real Estate Agent and an avid home decorator, I strive to give my clients the very best I can when it comes to staging, selling, and decorating their homes. I have lots of experience with paint color choices and love to DIY my home so I can have everything just the way I want it. I share my ideas and projects with the world in the hopes that I can help others have their homes just the way they want as well.


Heya i’m for the primary time here. I came across this board and I in finding It really helpful & it helped me out a lot. I’m hoping to offer one thing again and aid others like you aided me.
That’s so great! I am glad I helped you, that was the primary goal in starting this blog:)
Holy cow! I had no idea you could DIY conrete floors. You definitely saved a ton rather than hiring a contractor. The floors look fantastic.. and the best part is they will be much easier to clean!
Thank you so much! You are right Kate, they are soooo much easier to clean. And with teenagers, well there is always food spilling somewhere!
These look great! I stained my floors in my sunroom recently and I loved the process so much that I plan on doing my basement soon. Stained concrete is the prettiest!
Oh Emy I agree. It’s a little hard to tell from the pictures, because of it being the basement it was hard to get really good lighting, but I just love the way they shine. I also love the perfect imperfections in the concrete that show through. I am thinking of doing my garage soon! Happy staining;)
Wow! What a great idea. I wouldn’t have even thought to stain concrete floors. They turned out amazing. You have given me some inspiration. Great work!
-Marly
Marly you are so sweet! Thank you so much!
I would love to stain my new garage floors!!! 1- do you think one kit would work on a 2 car garage??? 2- with it being January in South Carolina- do you think the weather will be ok??? And- how long will it take to dry do you think???
Thank you!!
Rendi I definitely think you can do this in your garage, I am planning on doing it in mine. Now as far as the time of the year, it depends on what kind of temps you are getting. Right now I know that a lot of the country is getting these crazy Artic Blasts so you may want to wait a month or two. I would look at the manufacturers directions and see what the minimum temp is, then I would add a few degrees just to be safe. Floors always seem colder than the air temp. I do think one kit would work on a two car garage, my basement family room is pretty big and I had plenty left over. They say 24 hours to dry….when I do mine I think I am going to do half (moving all my stuff to one side of the garage) then do the other half just because I don’t want everything sitting outside all night and I don’t think it will be dry enough for shelving, etc. I know that means buying 2 kits but I don’t think I can get around that. If you have a place to put all your stuff I think you could do 1 kit and be good to go in 24 hours. Good luck and please send me pictures if you do it!
Hi, I just read how you stained your concrete floors. Looks like you did this a few years back. Are you still happy with it? I am thinking of doing my living room and hall. We rent the house so I don’t want to invest a lot in flooring but my landlord doesn’t mind if we change things. What are your thoughts of doing this in the main rooms of a house? I have dogs and grandchildren that have worn out the carpet in just 3 years and I hate the carpet now. Thank you for your input.
Hi Dayna. I feel the same way, I hate carpet! Especially in those rooms that have high traffic. Yes, it’s been almost 5 years since we have stained the concrete and I just adore it still. I plan to put an area rug down in front of the couch to make it a little softer underfoot but allow for the traffic area to remain concrete. I think it will hold up really well with your dogs and grandchildren. Good luck!
This has been so incredibly helpful! I have wall to wall carpets and tile in my home and they need to GO. I’ve been contemplating pulling it all up and staining the concrete and after your beautifully detailed rundown, I’m officially starting this weekend. Thank you!!
Oh my gosh, I am so excited for you Victoria! Just remember to work in small areas because the stuff dries fast. Good luck!
@atlaneandhigh, Does it blend well if you do a room at a time? I’m contemplating doing this, but I don’t know where I’ll put all my stuff if I have to do the whole house at once. This is inspirational!
Hi Nicole! I only did one room so I can’t say for sure. I would probably try to make the area where you stop not a solid line, make it more of a swirl that way when you go to do the other space it won’t seem like you had a start and stop line. Also, try to not go over what you already did because that will make it darker than the rest of the space. I totally understand your dilemma and sometimes we have to do things because we just have to. I wouldn’t let this stop me from trying it. Once it’s done no one will notice!
Can you tell me if you can see where you had to patch the spots it in. O Crete after you stained it?
Hi Tiffany! Yes, you can still see them but the floors have different colors so it doesn’t really stand out.
Hi! How much square foot did you stain? I have a 1500 sq ft basement, so trying to figure out how much material I will need.
Hi Keely! That’s a large area. I would check the manufacturer’s directions on the box for that info. My room was about 250 sq ft.
Wow you’ve inspired me. Do you have to etch?
And also how long did it take 🙂
Hi Jazz. Yes you do have to etch otherwise the stain won’t adhere to the concrete. It doesn’t take long, the whole thing was about an hour. The product gets hard to use after too much time.
We were planning on just polishing our concrete floors in our new modern home. But now I really want to stain them. My question is do you stain, then polish, then seal them or just stain and seal?
Hi Vanessa! I think it depends on what product you choose. With the one I purchased it was stain and seal. Just check out the manufacturers directions.
I have been looking to do something different for our floor for awhile. Everything is super expensive. This is a great option. Our floor has never been sealed or polished. It has a rough finish. (1950’s home) Do I need etch? What is the purpose of the etching process? Thanks! Carolyn
Hi Carolyn. You will still need to etch even if your floor hasn’t been sealed or polished. Think of it as primer before paint. It will help the finish adhere better. Good luck!
Now that it has been several years, how are they holding up?
hi Robbie. This is a low traffic space and after several years it’s still looks great! I get a lot of compliments on it too. I am very happy I did this project. Thanks for stopping by!
If your concrete floors were painted previously does that have to be removed prior to staining?
Hi Tara. I would check the manufacturers recommendations on that. It might say in the directions for the stain.
Hi, I followed your tips and my floors turned out beautifully. My only problem is that we have pets that leave “smudges” on the floor from paw prints. I have tried mopping with everything from vinegar, borax, baking soda, fabuloso, swiffer, Dawn, etc. Do you have any tips for mopping the smudges out? Thanks!
P.S. I absolutely love my floors and have gotten tons of compliments!
Hi Jo. I am so sorry you are having this issue. I have a dog and I have no paw prints. I typically use pine sol to mop so you might want to give that a try. Otherwise maybe reach out to a cleaning company. I hope that helps a little.
Hi!! I’ve started this process following your advice which has been amazing! I have a question though, I used the concrete patching you suggested and it stands out compared to the rest of the concrete. When I eventually get to the staining part is that going to show and loom weird? Does that make sense? Like I have dark gray circles everywhere I patched and I’m afraid it will end up showing and looking silly.
Hi Megan. It does show through but with all the color variances you don’t notice it. At least I don’t see it and I am pretty picky. I hope that helps.
What color(s) did you use?