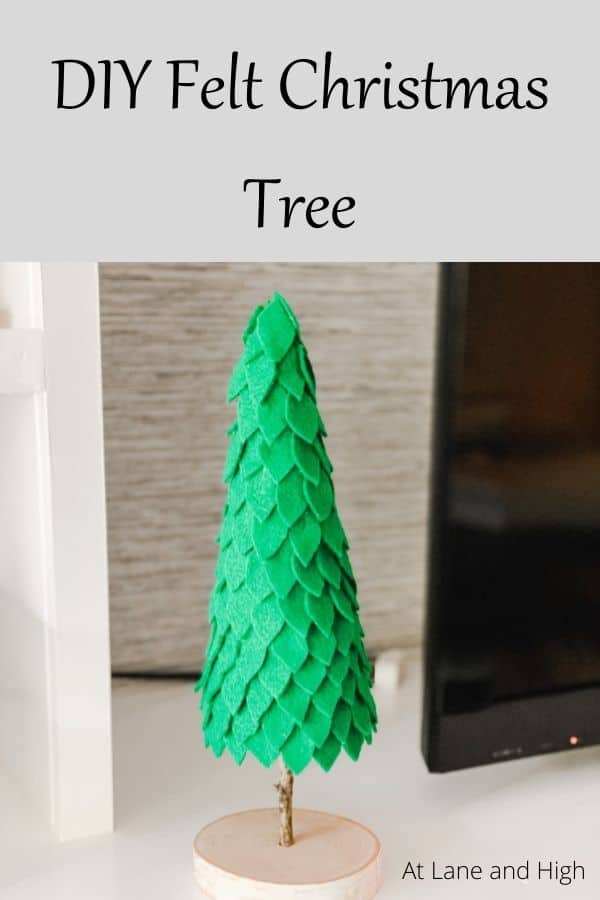
DIY Felt Christmas Tree
I have been working on some great Christmas crafts this year and I just love how my DIY Felt Christmas Tree turned out. Keep reading to learn how you too can create a felt Christmas tree.
Things always get very hectic in December with family gatherings and shopping etc. So I decided to get my act together and try to prep all my holiday decor in November!
This is a great project because it’s super cheap! The materials are few and very inexpensive. But the finished product is very cute and will really add a lot to your holiday decor.
*This post contains affiliate links. For more details see my full disclosure.
DIY Felt Christmas Tree
Now I want to start off by telling you that you can totally make this project your own but choosing different sized foam cones and different color felts. How cool would it be to have an entire forest of felt trees! I think that would be awesome and I might do something like that for my entryway.
What you need:
- Foam Cone – mine was about 3 inches wide at the base and almost 7 inches tall
- Felt – the amount you need is determined by the size of your cone
- Scissors – good crafting scissors should never be used for anything else, they will get dull
- Glue gun – this one comes iwth 50 glue sticks!
- glue sticks
- A stick from nature
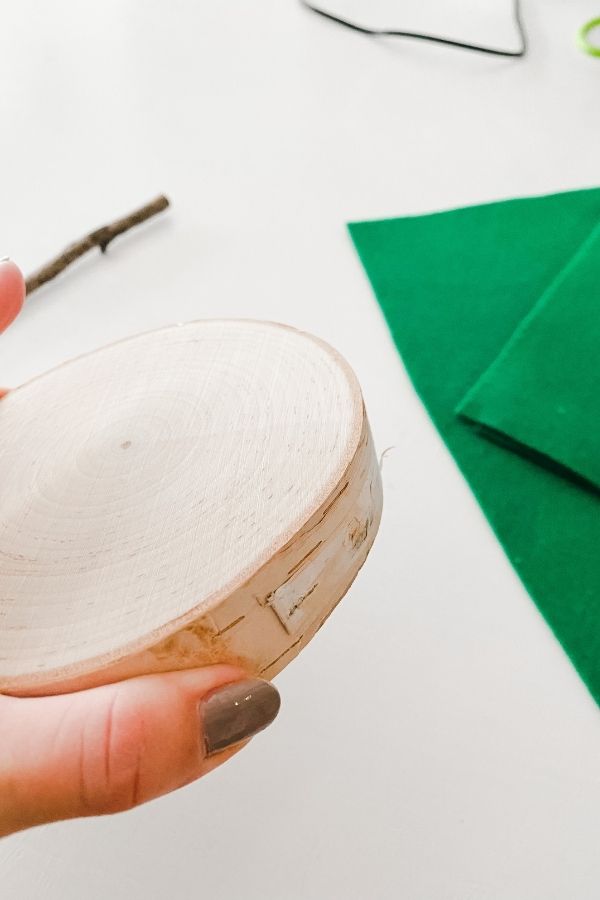
- Wood base – I got this one but you could also get this from your backyard and cut it into a base.
- Drill
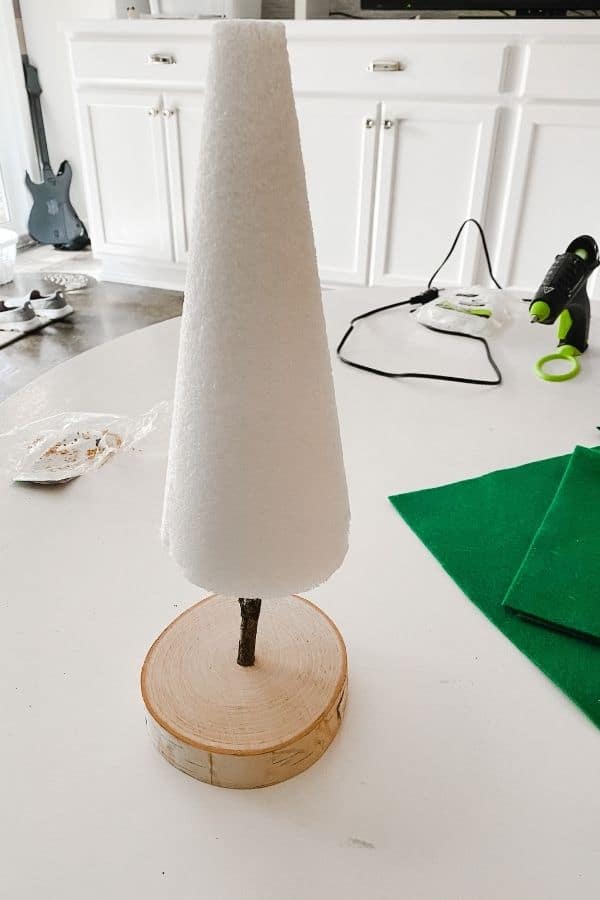
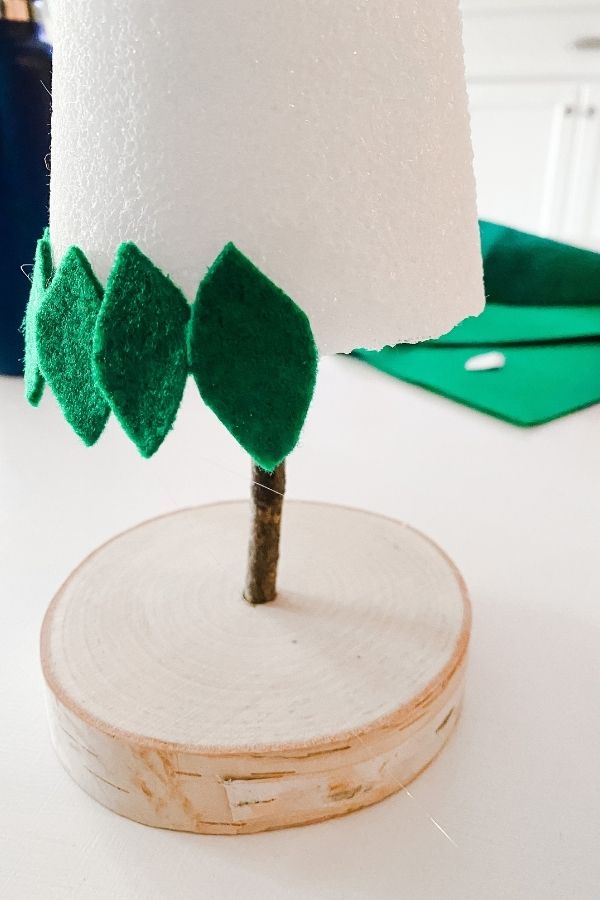
Step 1 – The base
Go outside and find yourself a stick that is about a half-inch in diameter and as straight as possible. I cut one down to about 6 inches in length.
Take the base and drill a hole in the center the same diameter as your stick. It should be deep enough so that the stick will sit firmly inside but not so deep that it goes through the base.
Put a dab of hot glue on the stick and put it in the hole. Once that is dry stick the bottom of the foam into the top end of the stick and push it down until you get to the place you like where the foam is in dimension with the base.

Step 2 – Cut your felt
Like I said earlier, my cone was about 3 by 7inches and I ended up needing roughly 130 felt leaves for the whole thing.
I cut out a leaf shape from a piece of paper. I completely free-handed it, but in the end, it came out to be about an inch long.
Would you like to save this?
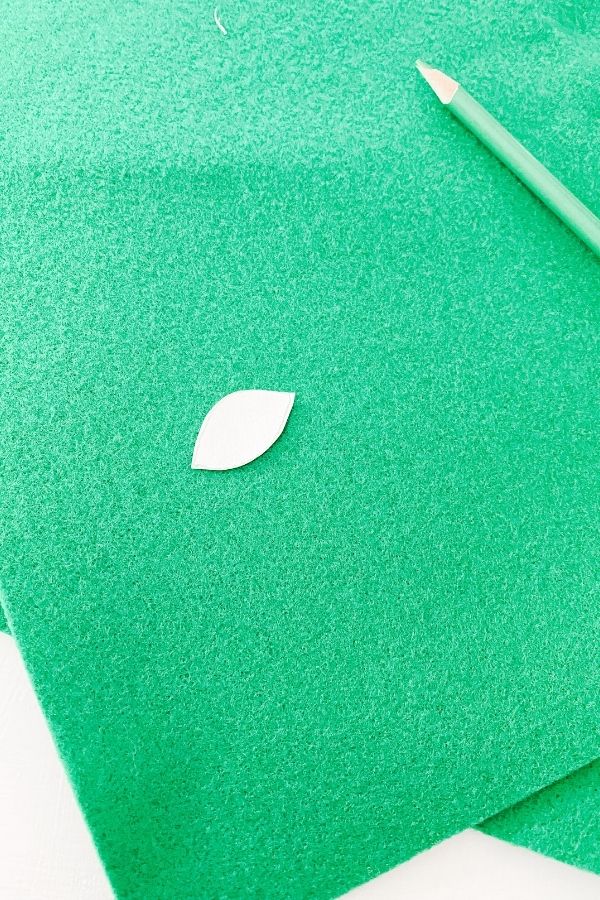
If you have a bigger tree you might want to use leaves a little bigger, and if your tree is smaller then use smaller leaves.
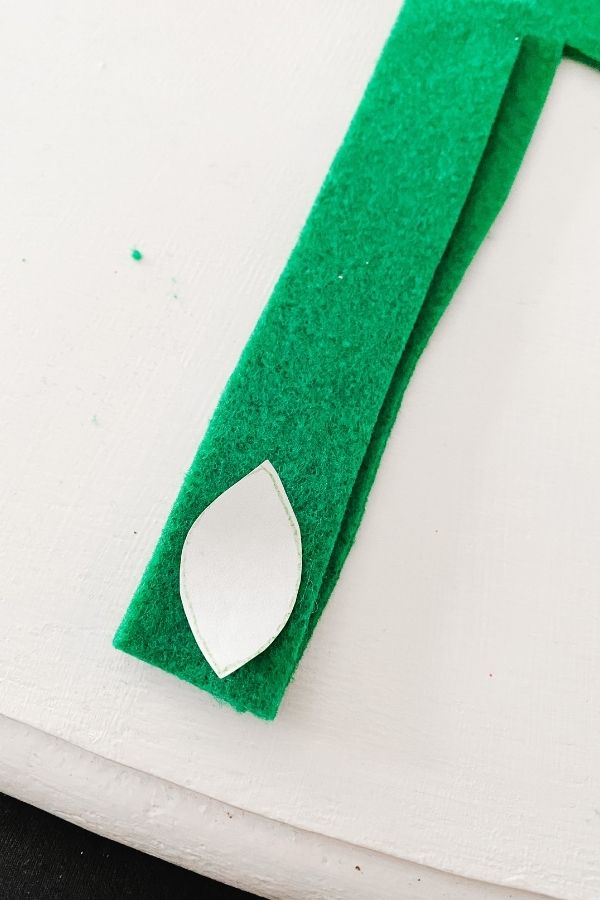
Once you have your leaf template ready cut a strip of felt a little wider than the leaf and fold it in half. Start cutting out the felt using the leaf template, two pieces of felt at a time. By doing this you get done cutting much faster.
Keep going until you think you have enough leaves.
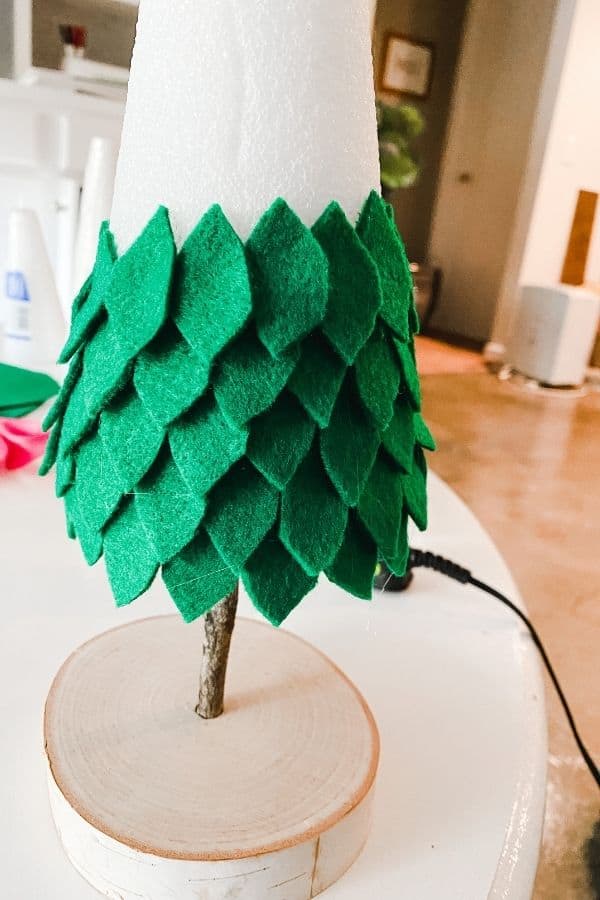
Step 3 – Attach the leaves
We are going to work from the bottom to the top. Put a dab of glue on the leaf and attach to the bottom of the foam cone. Make sure you have the center of the leaf at the bottom edge of the cone.
The leaf will hang lower than the cone and that’s okay. It will hide the cone so you don’t see the white.
Once you get the first row done attach the next row in a brick pattern, putting them in the center of two leaves below. Continue doing this all the way up the tree.
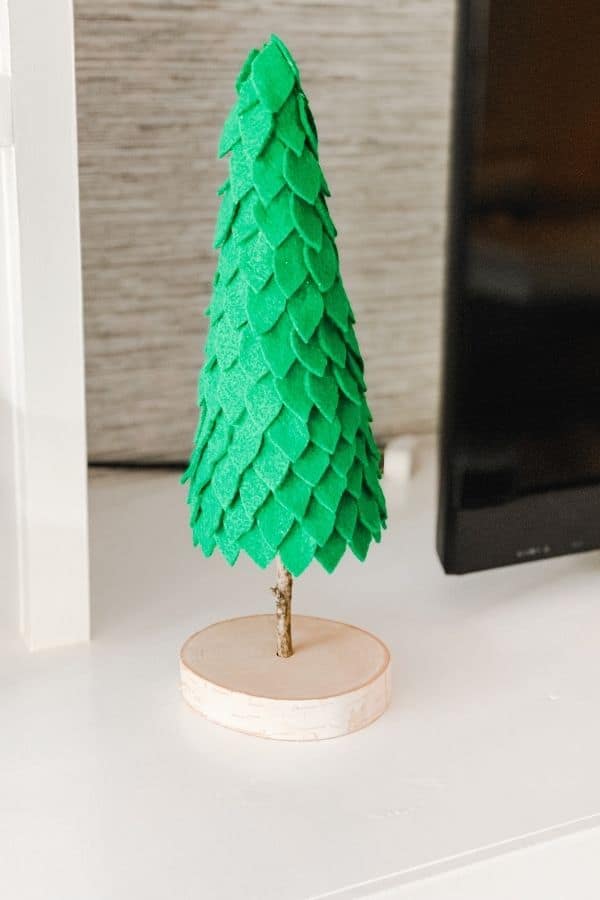
The Finished Felt Christmas Tree
And here is the finished product! I just love how it turned out and I thoroughly plan to do a few more for my entryway table. I think a forest of felt trees would be really cool!
Related Christmas Crafts:
- DIY Christmas Wreath Ideas
- A DIY Coffee Filter Christmas Tree to Brighten Your Holiday Decor
- How to Make Salt Dough Ornaments for Christmas
- DIY Wood Bead Ornaments
- How to Make Pinecone Gnome Ornaments
- Homemade Felt Christmas Tree Ornaments


DIY Felt Christmas Tree
Learn how to make a felt Christmas tree for your home! After doing one you will want to make a whole forest of DIY Felt Christmas trees!
Materials
- foam cone
- wood slice for base
- stick from nature
- felt
Tools
- drill
- glue gun
- glue sticks
- Fabric Scissors
Instructions
- Gather a stick from outside about 6 inches long and around a half-inch in diameter. Also, make sure it is as straight as can be.
- Drill a small hole in the center of the base the same diameter of the stick.
- Add a touch of glue to the stick and put it inside the hole.
- Once the glue is dry stick the styrofoam cone on top of the stick.
- Cut a piece of paper in the shape of a leaf, about one inch in length.
- Use this as a template and cut out leaves from felt. Any color of your choosing.
- Starting at the bottom put a dab of hot glue on the top of the leaf and secure the bottom of the foam cone. Make sure to leave half the leaf hanging below the cone.
- For the next row glue the leaves in the center between the two in the bottom row to form sort of a brick pattern.
- Continue like this all the way to the top.
- When you get to the top put the glue on the bottom of the leaf and bring the tops together to form a peak at the top.

As a licensed Real Estate Agent and an avid home decorator, I strive to give my clients the very best I can when it comes to staging, selling, and decorating their homes. I have lots of experience with paint color choices and love to DIY my home so I can have everything just the way I want it. I share my ideas and projects with the world in the hopes that I can help others have their homes just the way they want as well.