
Basement Wine Cellar: How to Demo Shelves Delicately
It’s week 2 of the $100 Room Challenge and we are discussing our Basement Wine Cellar. This week we delicately removed several shelves or at least attempted to.
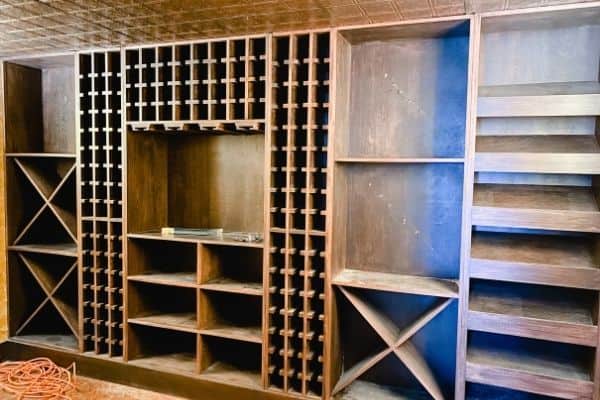
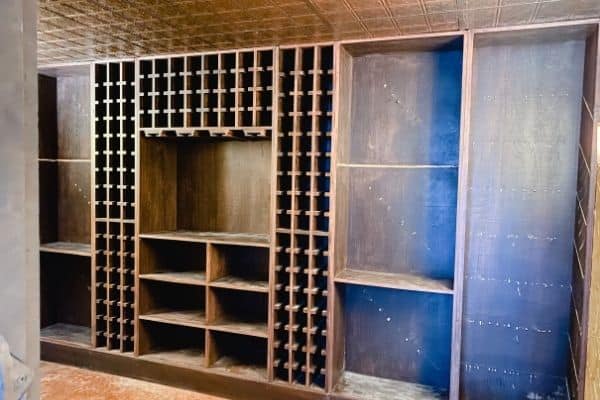
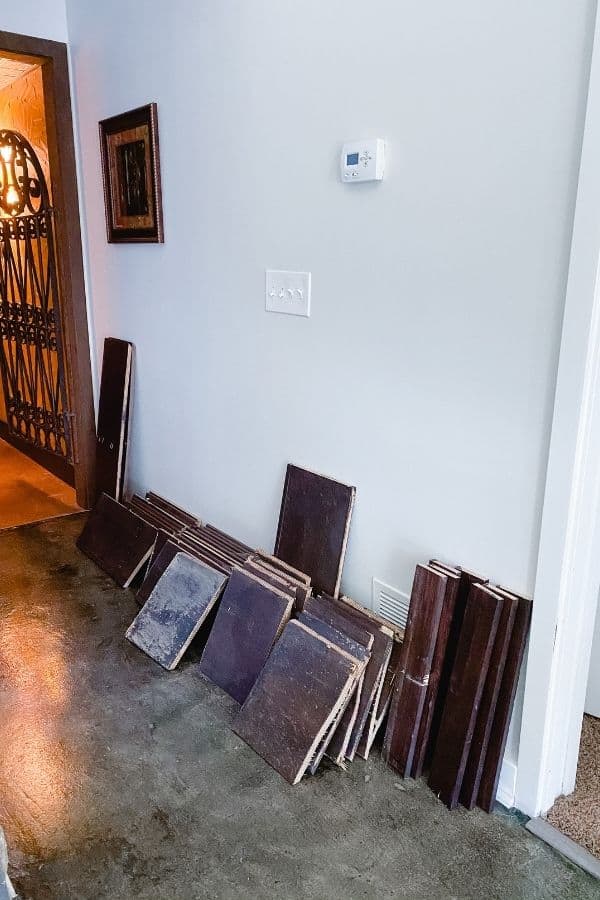
If you recall, we have this 50 square foot room in our basement that is a wine cellar. It’s super cool but we needed more conventional shelving rather than wine bottle shelving.
Week 1 | Week 2 (this week) | Week 3 | Week 4
Our plan was to remove the X’s and the angled shelves.
*This post contains affiliate links. For more details see my full disclosure.
Basement Wine Cellar Shelf Removal for the X’s
Delicate demo, this is what the goal was. For the most part, we achieved this.

The X’s are built with one solid piece and two smaller pieces. He took a hammer to the smaller pieces and they came out pretty quickly.
The larger board was not so easy.
He ended up using the sawzall but that was really scary because we didn’t want the backboard cut.
Once he got it off we could tell exactly how the shelves were built. They were nailed in from the sides and stapled in from the back.
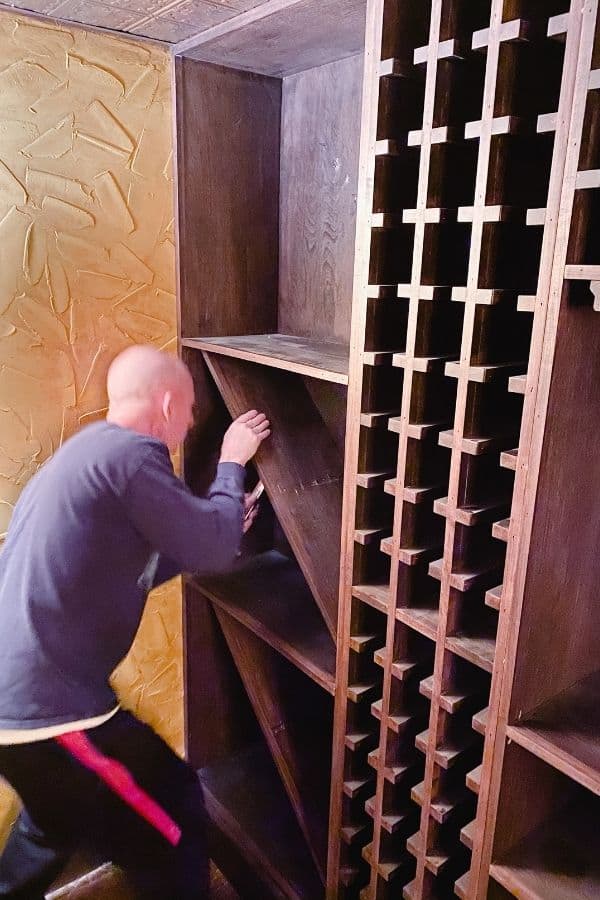
On the second X after removing the smaller boards I talked him into using the pry bar to gently remove the larger board. It worked! He continued on around the shelves using this method.
Basement Wine Cellar Angled Shelf Removal
The angled shelves were not so easy to remove. In fact, they were downright stubborn!
Hammering was the solution. The only solution. There were a couple that he did have to use the sawzall on. It took longer to remove these shelves than it did all the X’s.
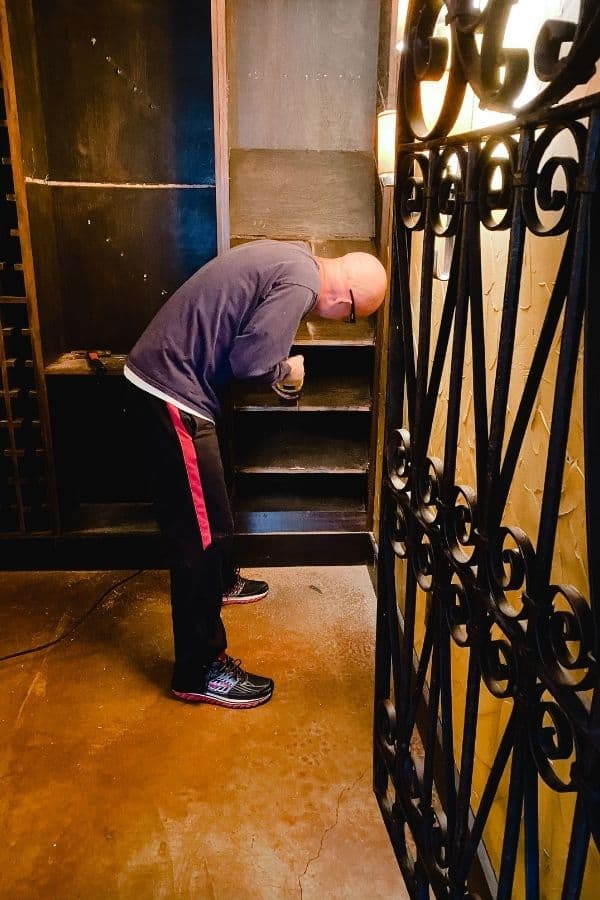
Once the shelves were removed, and we had a good sneeze fest because of all the dust, we cleaned up. The final step was to remove the remaining nails and staples that were sticking out of the sides and back.
Would you like to save this?
How to Remove Nails from Wood
You should always try to pound out our pull through the wood. That is always the best option. I couldn’t do that in this case.
Another option is to use a Dremel to saw through the nail.
Dremel is one of my favorite tools! It can be used in a multitude of ways to get you out of just about any jam!
I used my Dremel (I have this one) and a cutting tool. This is a great group of cutting tools to buy.
Use the Dremel at high speed, get as close to the base of the nail against the wood and cut. There will be some sparks but don’t worry, you won’t catch on fire.


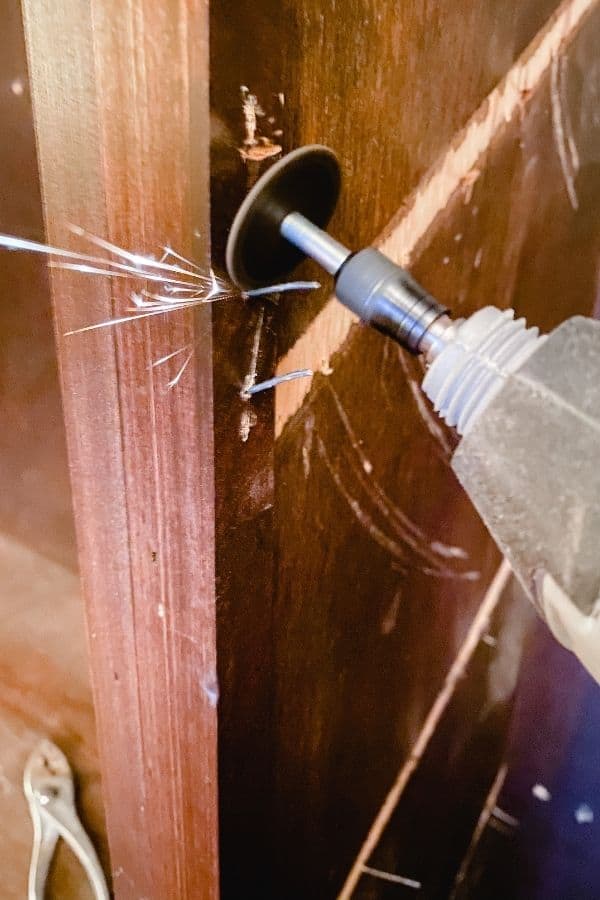
Make sure you have safety goggles on because the nails can go flying once they are cut through.
The next step will be sanding the holes where the nails and staples were, and fill with stainable wood putty.
We did go to the store and purchase wood to replace the shelves, those we won’t be able to reuse from the wood we removed. I will talk about that more in detail later this month once I know how much I used and how much I can return.
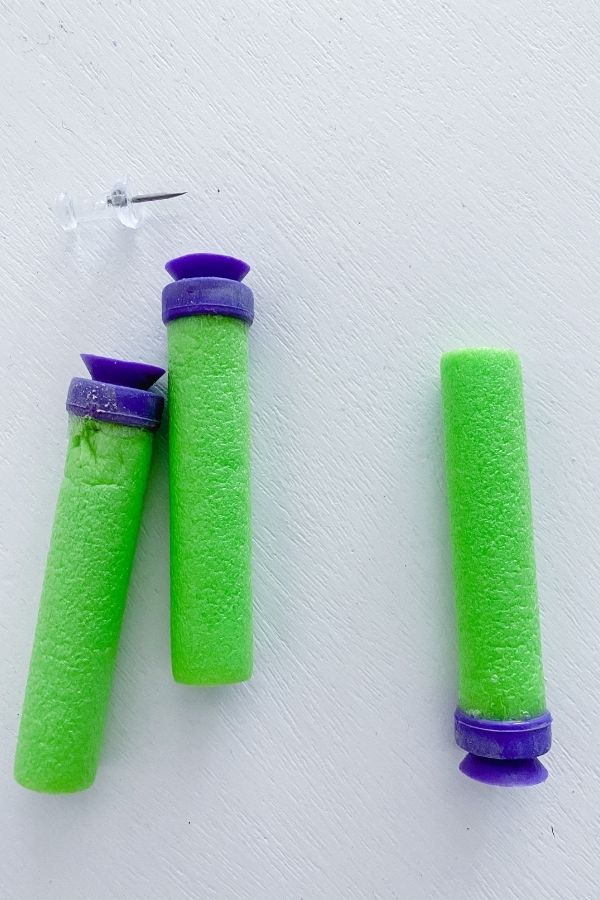
On a funny note:
We found some things on the angled shelves, toys, and a push pin. There were young boys in the house before us, my guess it’s from them. LOL
Check out my other $100 Rood Challenge posts:
DIY Patio Ideas on a Budget: How to Transform Your Patio for Less
Teen Hangout Room is Finished!


As you can see, we got a lot done on our Basement Wine Cellar but we have a lot left to do! I need to attach new shelves, stain them, and poly the whole thing. It’s the drying time that kills me on things like this. And I need to paint the walls and age them! Stay tuned, good things to come!

As a licensed Real Estate Agent and an avid home decorator, I strive to give my clients the very best I can when it comes to staging, selling, and decorating their homes. I have lots of experience with paint color choices and love to DIY my home so I can have everything just the way I want it. I share my ideas and projects with the world in the hopes that I can help others have their homes just the way they want as well.


Wow, that was a well-built wine cellar! Taking the time to demo it correctly is going to really help you make it nice in the end. It’s looking better already!
I was shocked at the number of staples in the back! It is starting to come together though.
Already looking so good! Still so jealous of this cool space!
Thanks so much Rebecca!
I have to say, this looks so much better than I was imaging it would. I wasn’t sure I was going to like it without the Xs and angled shelves, but now I want it for my own basement bar. 😀 Great work. (And whenever there is a “Nerf war” in our house, we will find those little things for MONTHS–that made me smile.)
It gave us a good giggle to find them! LOL. I am glad you like the changes!
I am a fan of the dremel tool as well, it may be my go to tool for jobs like this! Great work so far it will look so pretty once you refinish them cabinets.
I can’t wait to have them done!
I love that you are modifying this to make it work for you! It’s going to be great.
Thanks!
So smart removing the shelves that don’t work well. I’m excited to see how you put it all together, and gotta get me a dremel. Would be so handy for lots of projects!
Oh yes, you need a Dremel! It helps me out of so many jams! I couldn’t DIY without it.
Wow- removing all that extra X and angled shelving already made such a difference!
Right?! I am excited to begin restoring some much-needed storage space.
Wow, Wendy! What a difference it makes with just the x pieces gone. It makes the space look so much bigger already and I can only imagine how much more functional it will be now. It was so worth the work.
I couldn’t agree more Lisa!
I find those nerf guns darts all over our house! (Two boys) You are making such great progress in here. I cannot BELIEVE how many shelves you removed! Hopefully you’ll be able to put some to good use (even if not in this space).
What’s funny is that we removed a ton but most of it we couldn’t even use! I am so excited about having shelving that will actually create more storage for our stuff!
I love the dremel too. I have found so many uses for it. Your room is going to be amazing!
Thank you so much Sherry!
I’m so glad he was able to do it successfully! I would have been so nervous!
Yep, that’s why I made him do it! I was way too nervous!