
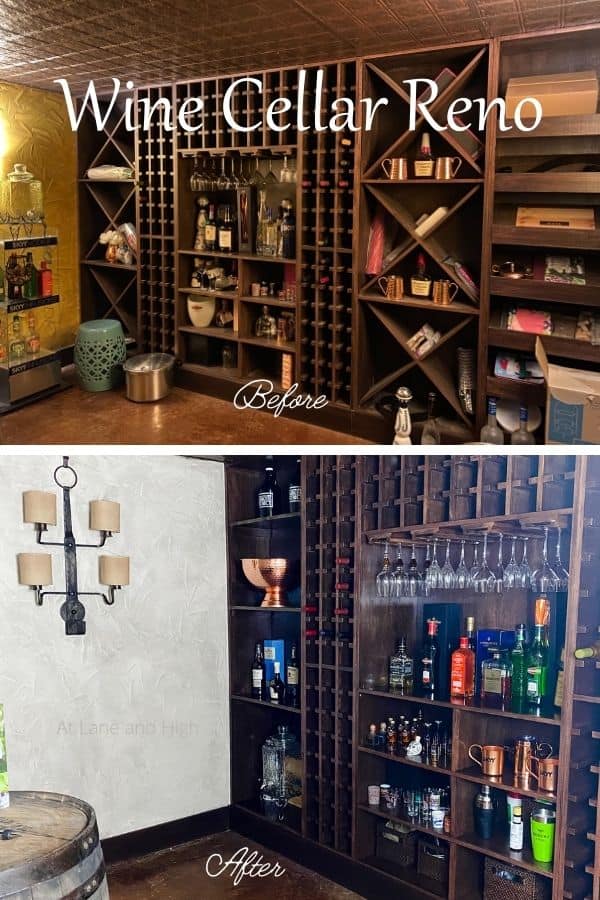
Wine Cellar Ideas: Building a Wine Cellar in Your Basement
It’s reveal day and I am so excited to share my Wine Cellar Ideas with you!
As you know I have been working on my Basement Wine Cellar for the $100 Room Challenge. It’s a small 50 square foot space that a previous owner built. It was a cool room but now it’s a fabulous room that works for our family.
Check out the other weeks of the challenge:
Week 1 | Week 2 | Week 3 | Week 4 (this week)
*This post contains affiliate links. For more details see my full disclosure.
Wine Cellar Ideas
As I said, this room wasn’t in terrible shape, it just didn’t work for us.
Before
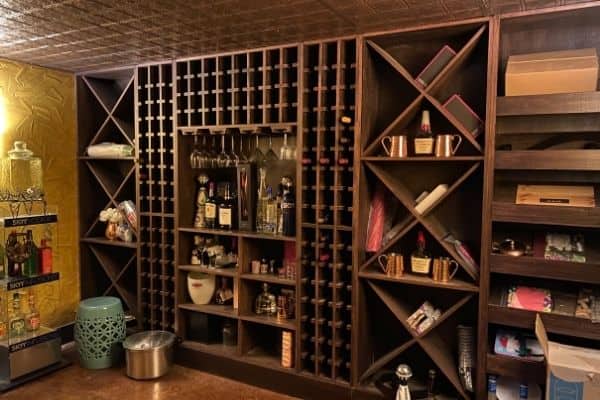
- There was way too much wine storage and we don’t collect wine.
- We need more shelving for liquor and entertaining dishes.
- The room is way too dark, there needs to be something done to lighten the wall color but still have the old world look.
- The finish on the shelves is very rough, it’s impossible to keep this room clean.
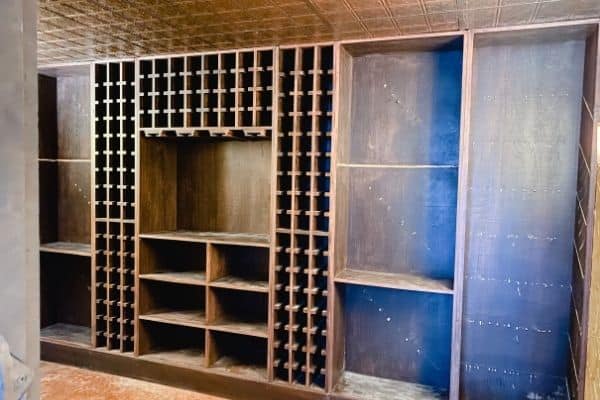
The first thing we did was to delicately demo the room. My husband was in charge of this and he did a really good job.
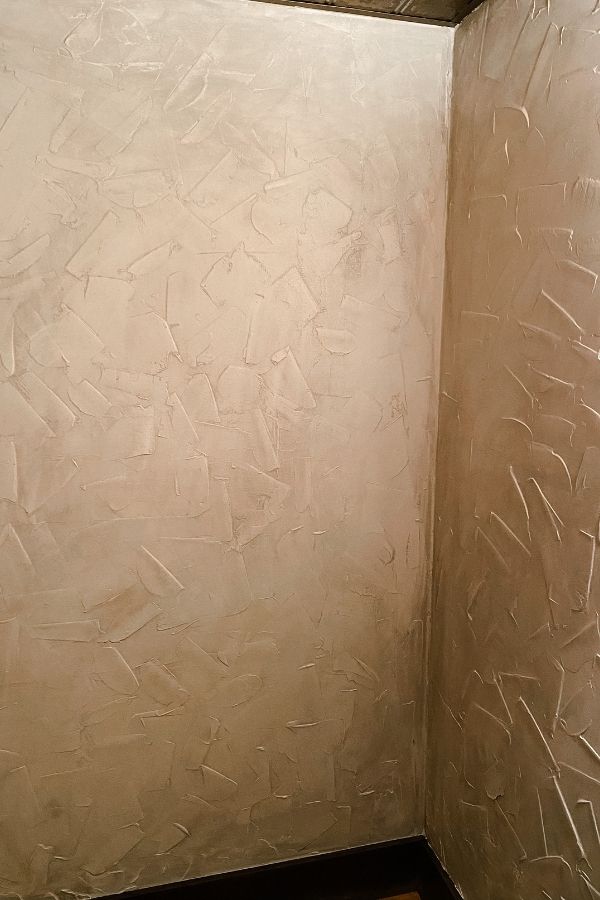
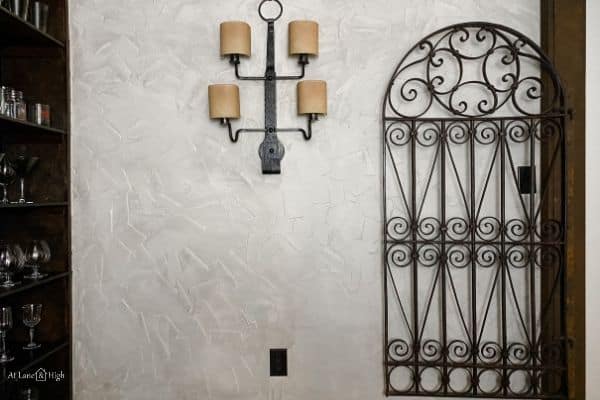
Step 2 was to take care of the walls. I was really nervous about making sure the walls still look aged and old world-ish but I think they turned out really well.
Now it’s time to rebuild the shelves, finish everything with stain and multiple coats of poly, and put everything back in.
After
Unfortunately, we were unable to use most of the wood we removed. It was either destroyed in the removal process (not so delicate demo) or it was the wrong size to use again.
One thing we were able to repurpose were the 1×4 pieces that were in front of the slanted shelves. They were the pieces of wood hiding those cute nerf darts! LOL
We took each one of those pieces and cut them into quarters. These became our brackets to each shelf we installed.
We nailed each bracket to the sides of the walls and installed new shelves made of 3/4 inch plywood and trim to hide the ugly plywood edge.
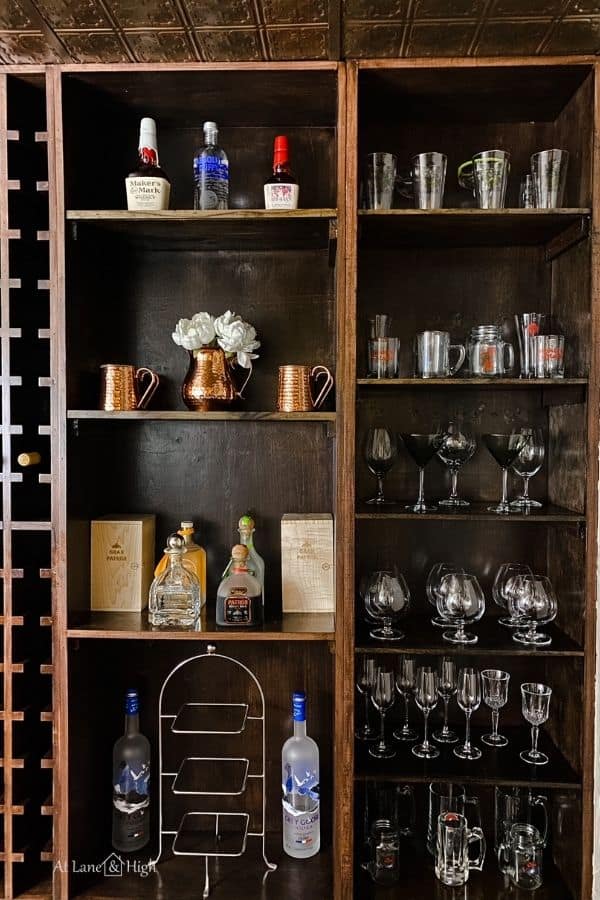
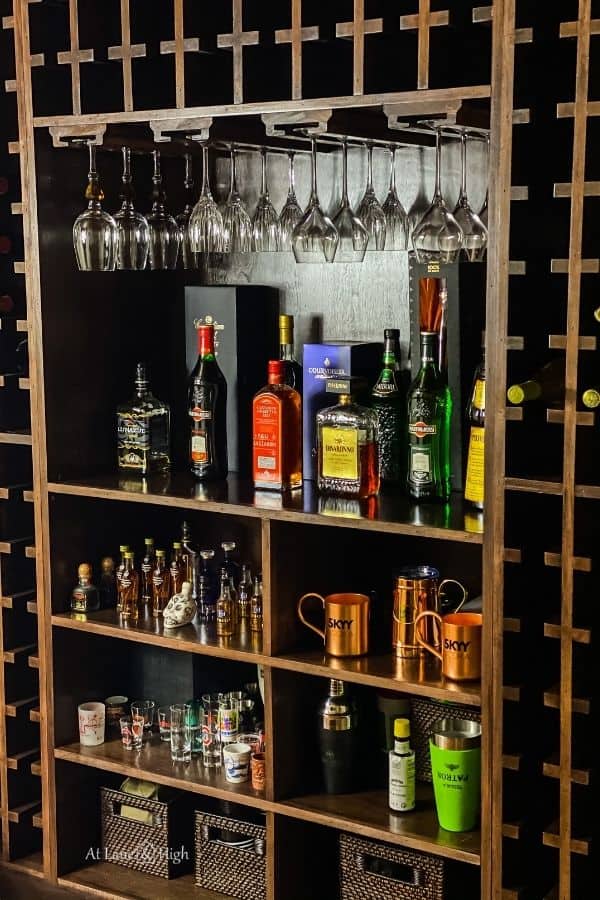
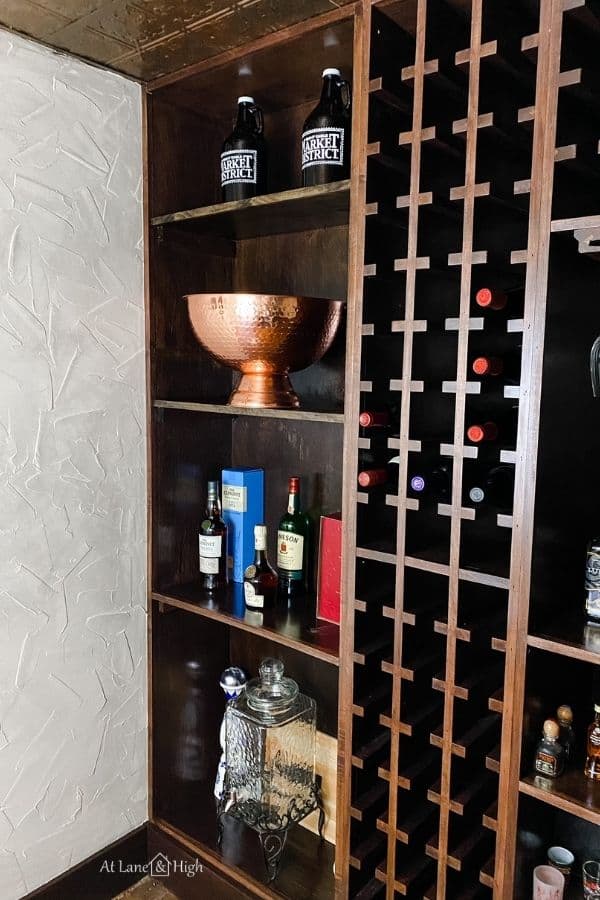
We now have 12 shelves where before we barely had 4! Super excited about storage!
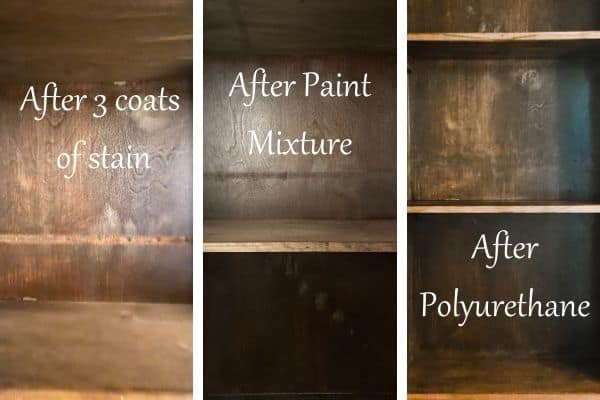
I puttied the nail and staple holes and sanded them down. I was really nervous about the wood putty accepting stain. The packaging says it’s stainable but is it really?
The putty did well, but the bare wood left by the old shelves and the part that I sanded down near the putty did not! This was something I did not expect!!!
After 3 coats of stain, I realized it was not going to get the same color as the rest of the wood so I went to paint. If you water down acrylic paint it acts like a stain.
I used brown and black acrylic paint as well as a little water and painted it on with a small craft brush. This finally started to look similar to the stain color. FINALLY! I was freaking out here!
There was a bit of a texture difference between the painted part and the stained but I was hopeful that once I added polyurethane that would make it all blend together and it did! Whoohooo! Crisis averted.
Would you like to save this?
Here is the finished shelving after stain and poly.
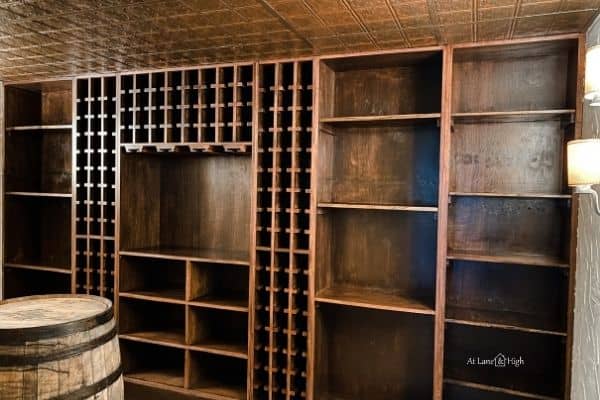
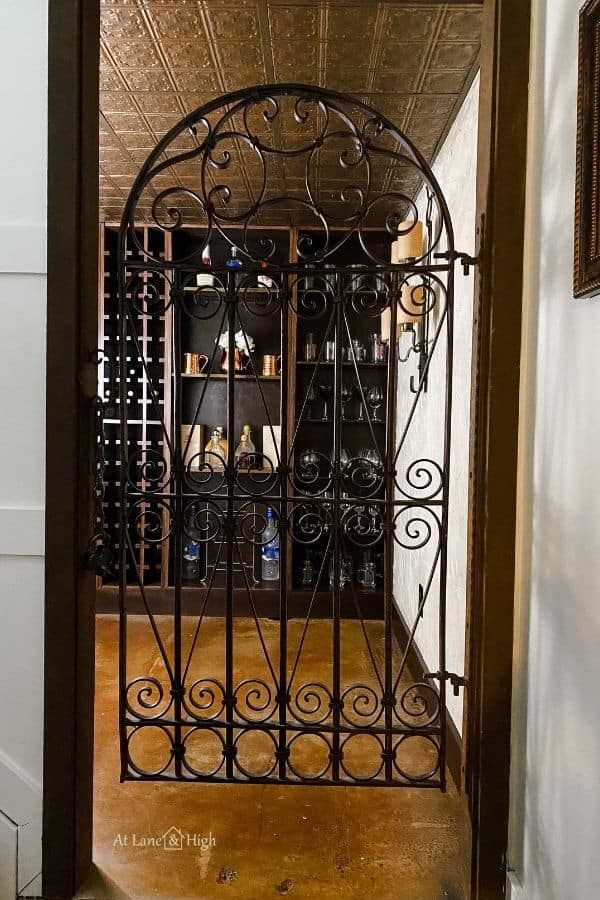
Basement Wine Cellar Finished!
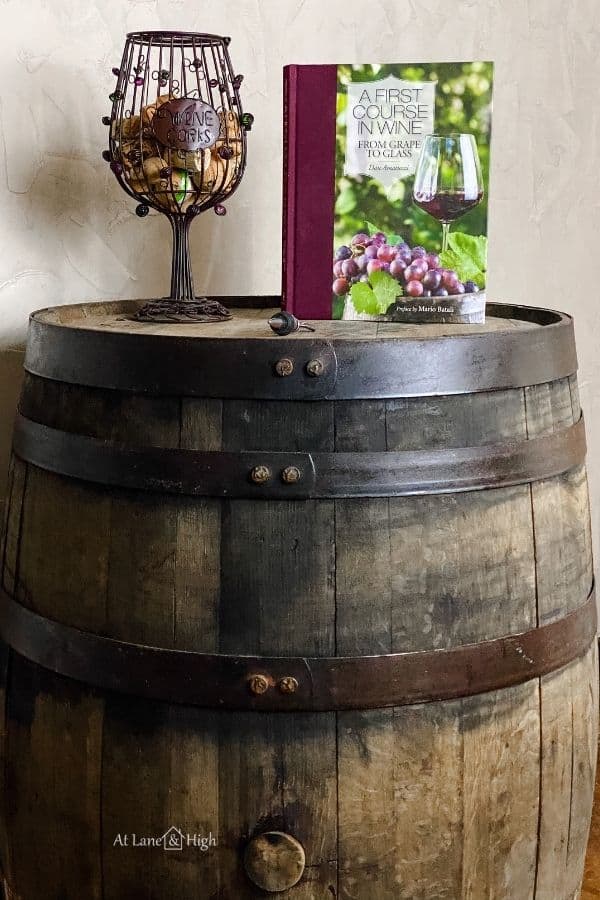
And here is the finished room! I added tons of stuff, things I had in the kitchen as well as in boxes sitting on the floor of this room.
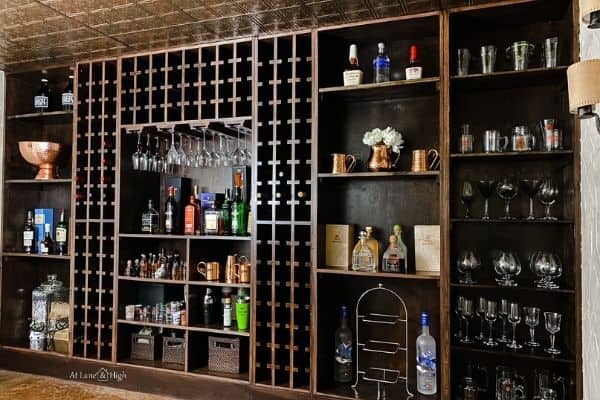
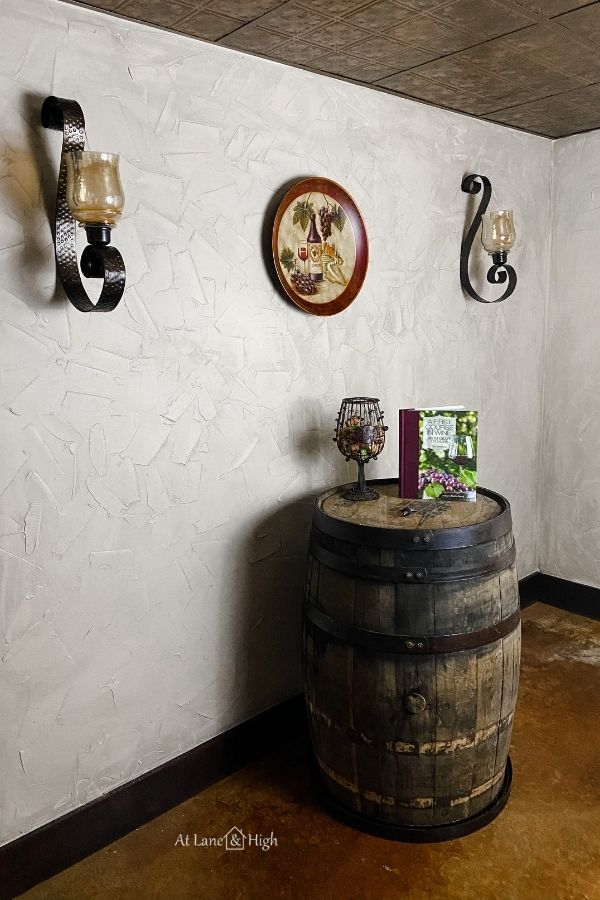
I love the way it turned out and once all the stuff is in you can’t even see the minor imperfections on the back wall from the parts I had to paint.
Let’s talk budget. Previously I had spent $42.98 on paint for the walls.
The cost this week for all the wood was $60.98.
I had stain and poly on had from previous projects so all it really cost was for the wood.
That makes my total for the entire project $103.96.
I went over a few dollars but I think the transformation makes it totally worth missing a Starbucks this week in order to cover the overage don’t you?
Other $100 Room Challenge Reveals:
DIY Patio Ideas on a Budget: How to Transform Your Patio for Less
The Teen Room is Finished, Despite All That Happened

I hope you see how we took a room that wasn’t working and made some changes to make this room that not only looks beautiful but functions amazingly for our family! Now go add a basement wine cellar to your home;)

As a licensed Real Estate Agent and an avid home decorator, I strive to give my clients the very best I can when it comes to staging, selling, and decorating their homes. I have lots of experience with paint color choices and love to DIY my home so I can have everything just the way I want it. I share my ideas and projects with the world in the hopes that I can help others have their homes just the way they want as well.


Wow, you gave this room such a cool vibe, while still keeping the historic flavor with that barrel and the light fixtures and the dark wood. (I’m so impressed you were able to match the new wood to the old!) What a gorgeous way to store and display a great collection!
Thank you so much Meredith! We are really loving the room now.
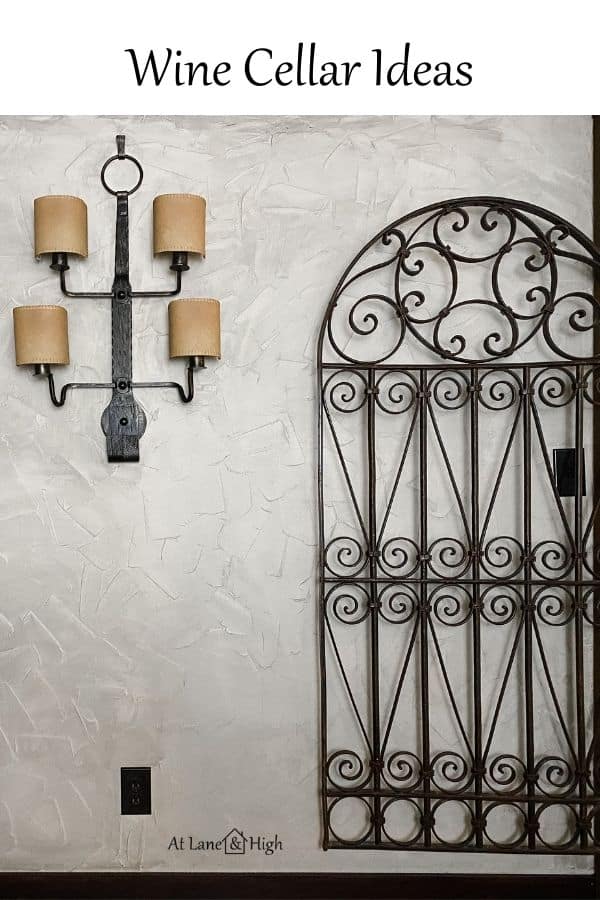
Wendy the stucco really adds a lot of light to your space that is so needed, plus it makes me feel like I am back in Italy in the vineyards. Such a beautiful classic look for this wine cellar you did an amazing job!
Thank you Jen! The texture on the walls was there but you couldn’t see it very well with the gold color. The lighter color really brings it out.
It looks absolutely amazing Wendy! What a difference the horizontal shelves make. I love them! What a beautiful room.
Thank you so much Lisa!
This looks great! What a build- now you have so much usable storage. The styling is outstanding- well done. I think $4 over is well worth it. Great job!
Thank you Jackie! We are loving the storage for sure.
What a wonderful room to makeover and you did an amazing job! It is absolutely beautiful!
Thank you so much Sherry.
This look so good! The lighter paint on the wall makes the room brighter without taking away from the look and feel of the space. I am also super impressed with your paint matching skills on the shelving. So hard when stain doesn’t adhere or you can’t get the right color, but you found a perfect solution. I absolutely LOVE this room, so unique! Thank you so much for joining another round of this challenge!
Thank you so much Erin! And thank you for keeping this challenge going every year!
The new color definitely makes it brighter in there. It’s so much more functional for you now! I agree going over budget was so worth it. Great job!
Thank you Tracy! We are super happy with all the storage now!
It turned out so great! So worth the tiny overage!
I agree!
It looks so much fresher Wendy! You chose a great color to brighten it up. And it looks like it’s way more functional for you and your family. Great work!
Thank you so much Christina!